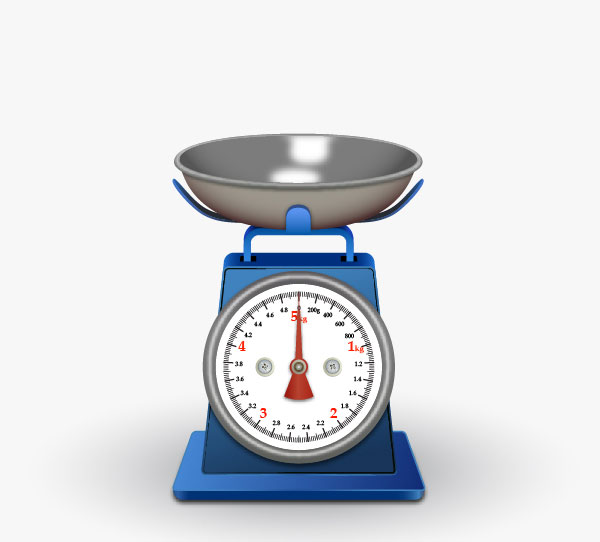
In this Adobe Illustrator tutorial you’ll learn how to create a realistic kitchen scale with the use of some basic tools and techniques. You will learn lots of useful illustrator tricks to speed up drawing a dial face along with some other parts of the kitchen scale. Hope you will enjoy this tutorial and maybe even discover some new methods along the way. Let’s begin!
Create a New Document
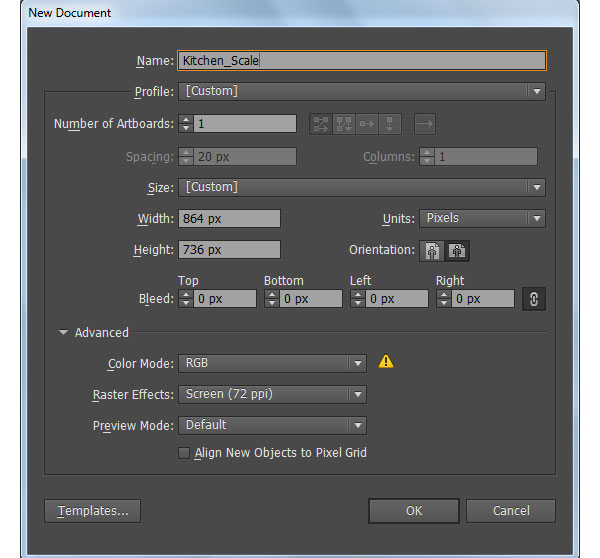
1. Launch Illustrator and then press (Ctrl + N) to create a New document. Select Pixels from the Units drop-down menu, enter 864 in the width box and 736 in the height box then click on the Advanced button. Select RGB, Screen (72ppi) and make sure that the Align New Objects to Pixel Grid box is unchecked before you click OK.
Create the Main Shape of the Kitchen Scale
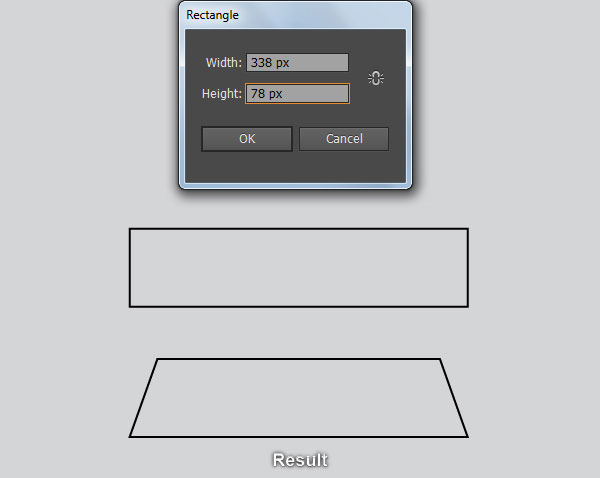
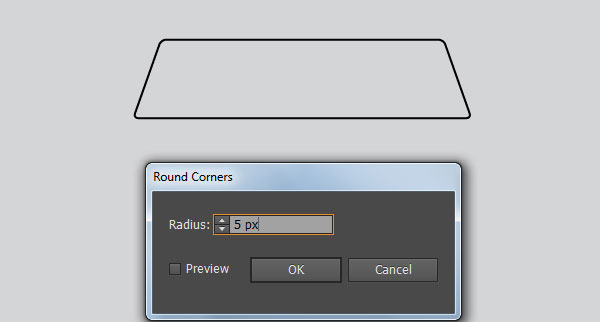
2. Pick the Rectangle Tool (M) and create a 338 by 78px black rectangle. With the Direct Selection Tool (A), select the top-left anchor point of the newly created rectangle and move it 28px to the right. Next select the top-right anchor point and move it 28px to the left. After you are done adjusting the shape of the black object, reselect it and go to the Effect > Stylize > Round Corners… Enter a 5px Radius and click OK.
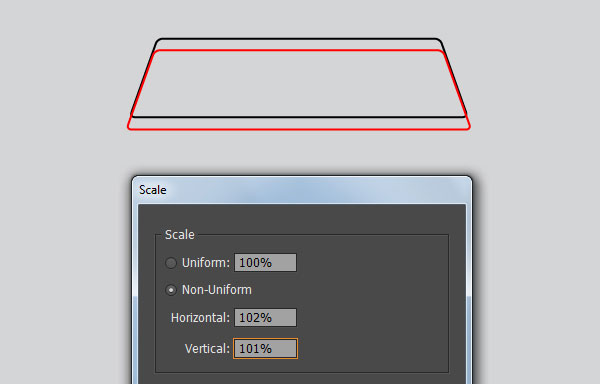
3. Select the black object created in the step 2 and go to the Object > Transform > Scale… Check the Non-Uniform, enter a 102% in the Horizontal box and 101% in the Vertical box, then click Copy. Replace the existing stroke color of the copy with red and then move it 12px down. Keep the red object selected, open the Appearance panel (Window > Appearance) and click on the Round Corners section. In the Round Corners dialog box, enter a 19px Radius and click OK.
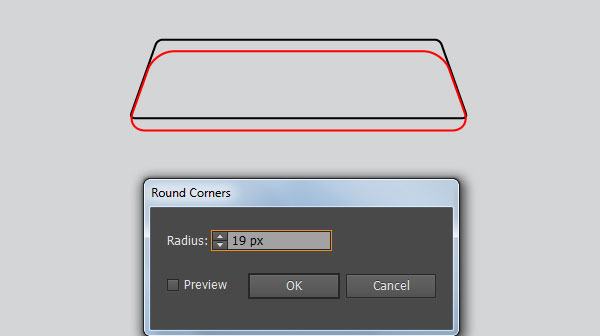
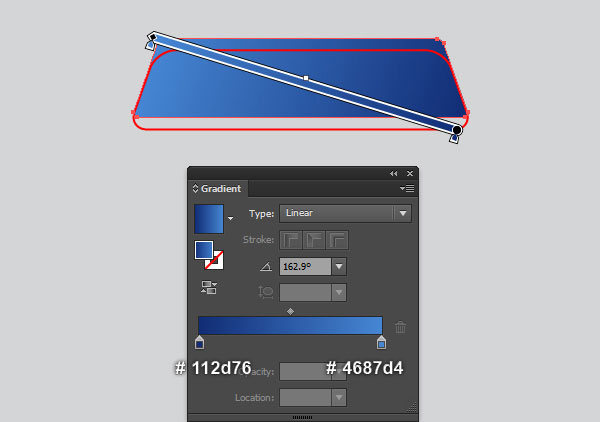
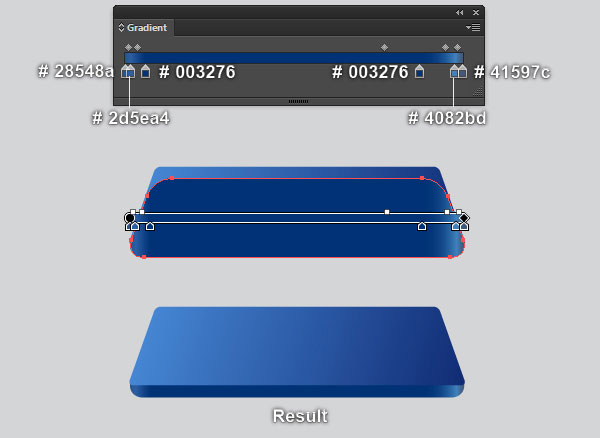
4. Before you continue, select the two objects created in the previous steps and go to the Object > Expand Appearance. Now select the black object, remove its stroke and fill this object with the linear gradient as shown in the first image. Continue select the red object, remove its stroke and then fill this object with the linear gradient as shown in the second image. Still having the resulting shape selected, press (Ctrl +Left Square Bracket) to hide it behind the first shape created in this step.
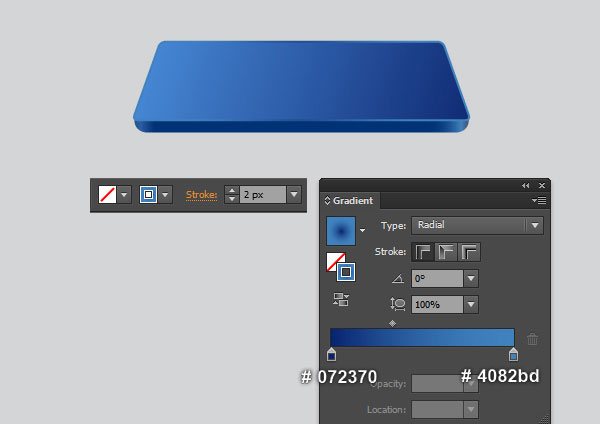
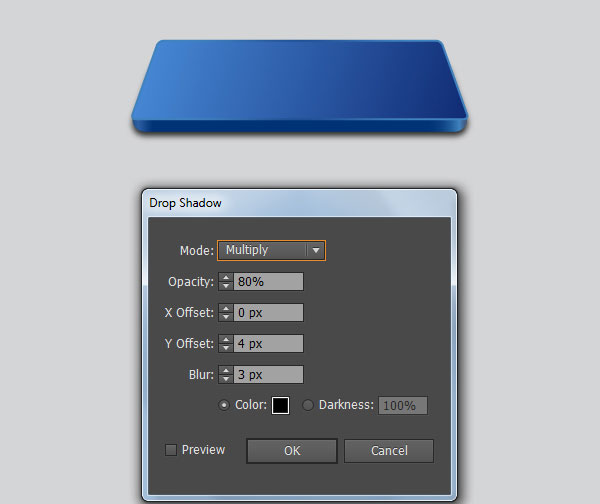
5. Select the first shape created in the step 4 and make a copy (Ctrl +C, Ctrl +F) of it. Keep the copy selected, swap the fill and stroke colors by clicking the bent double-headed arrow next to the Fill and Stroke color swatches in the Toolbox. Change the stroke weight of the resulting object to 2px and then replace the existing stroke color with the radial gradient as shown in the first image. Next select the second shape created in the step 4 and go to the Effect > Stylize > Drop Shadow… Follow the data like you see in the last image and click OK.
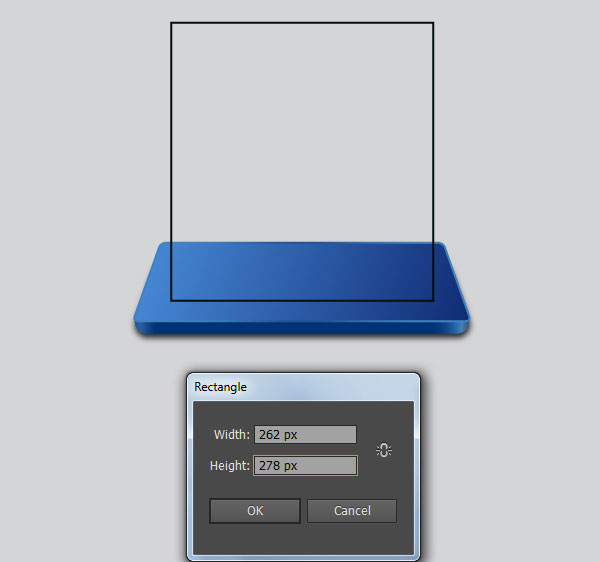
6. Pick the Rectangle Tool (M) and create a 262 by 278px black rectangle, then place it to the position as shown in the first image. With the help of the Direct Selection Tool (A), select the top-left anchor point of the newly created rectangle and move it 30px to the right. Continue select the top-right anchor point and move it 30px to the left. After you are done adjusting the shape of the black object, reselect it and go to the Effect > Stylize > Round Corners… Enter a 7px Radius and click OK.
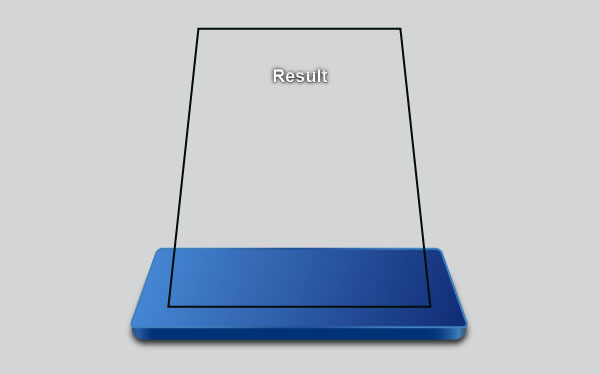
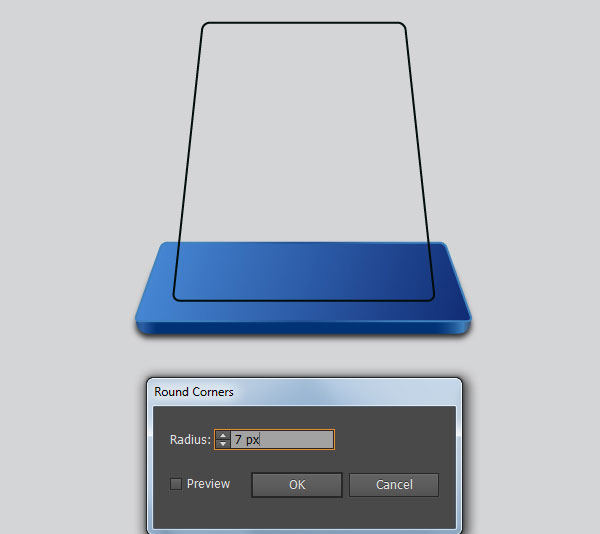
7. Select the black object created in the step 6 and go to the Object > Transform > Scale… Check the Non-Uniform, enter a 98% in the Horizontal box and 103% in the Vertical box, then click Copy. Replace the existing stroke color of the copy with red and then move it 14px up. Keep the red object selected, open the Appearance panel (Window > Appearance) and click on the Round Corners section. In the Round Corners dialog box, enter a 12px Radius and click OK.
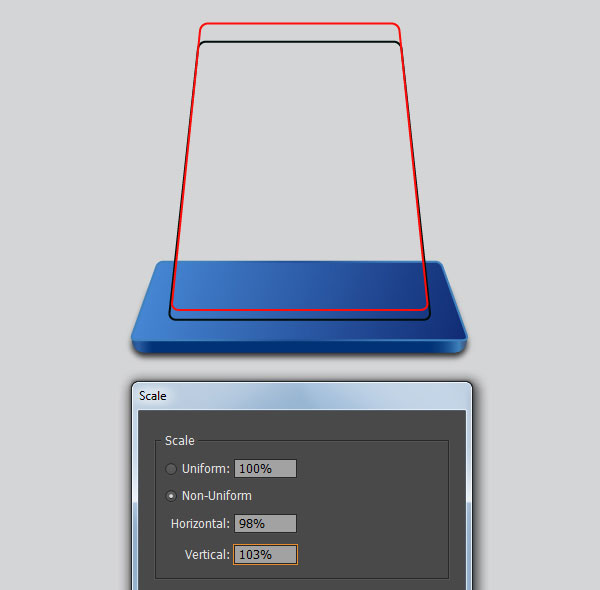
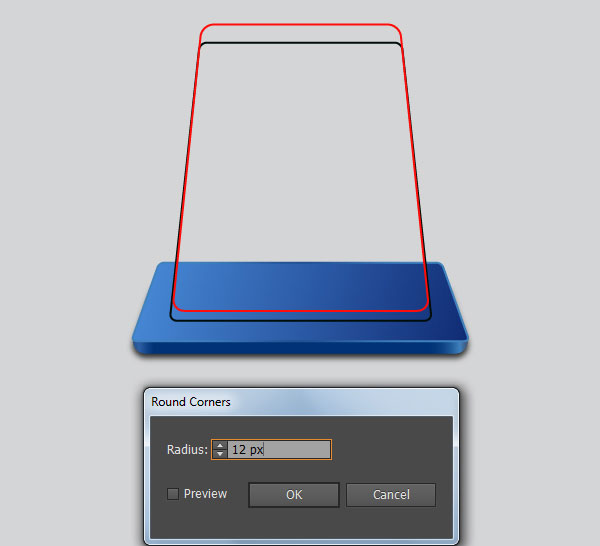
8. Before you continue, select the two rounded objects created in the previous steps and go to the Object > Expand Appearance. Now select the black object, remove its stroke and fill this object with the linear gradient as shown in the first image. Continue select the red object, remove its stroke and then fill this object with the radial gradient as shown in the second image. Still having the resulting shape selected, press (Ctrl +Left Square Bracket) to hide it behind the first shape created in this step.
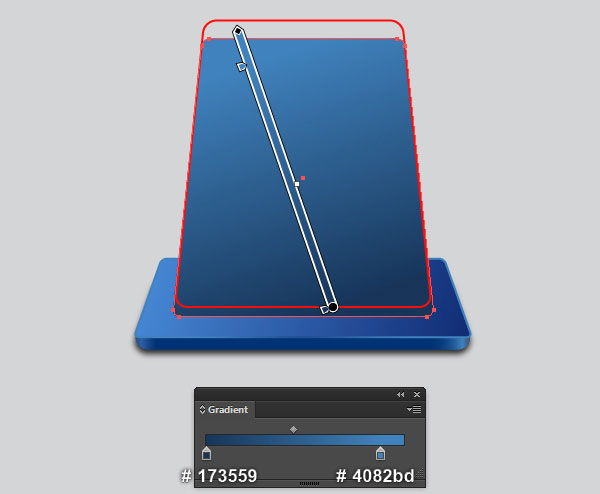
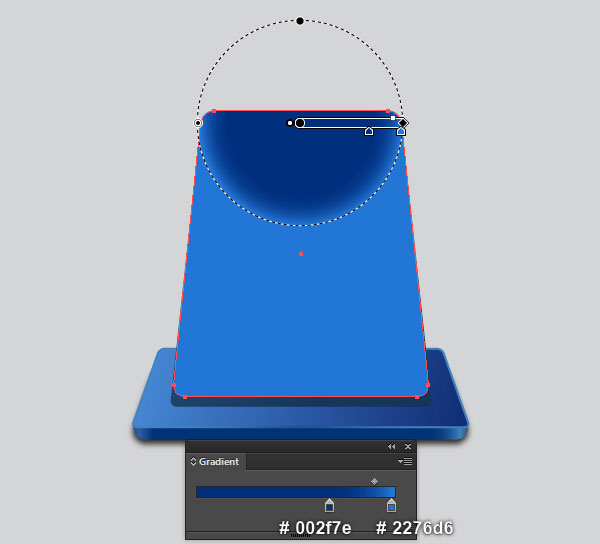
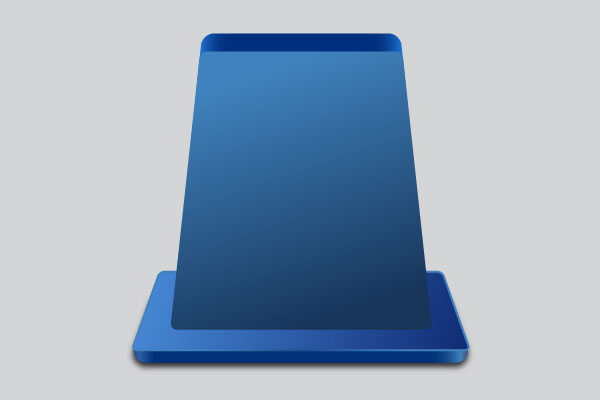
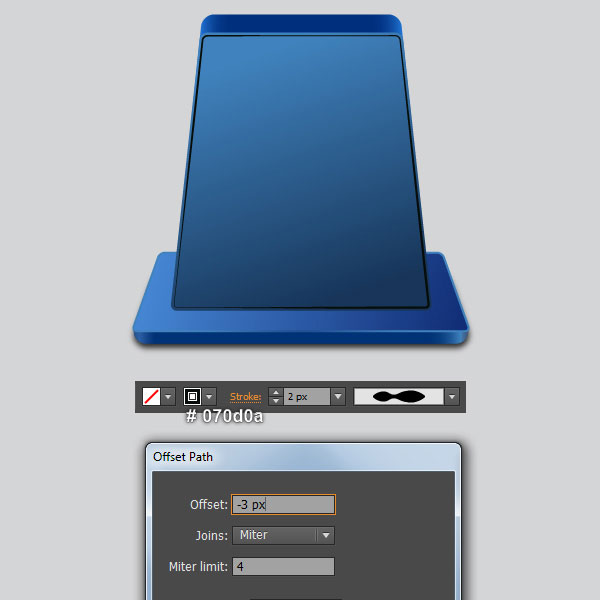
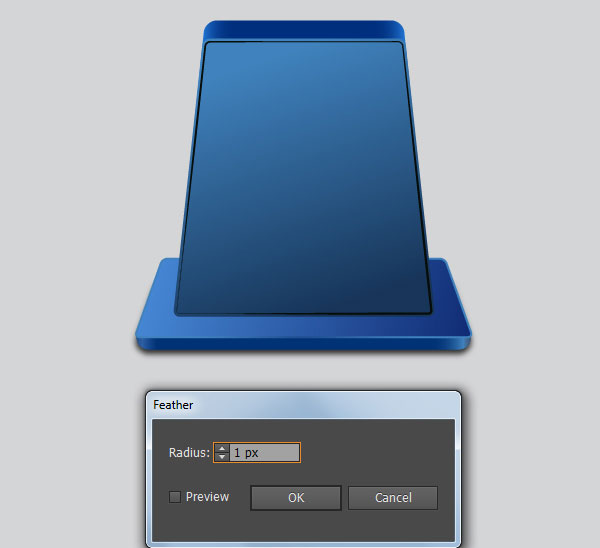
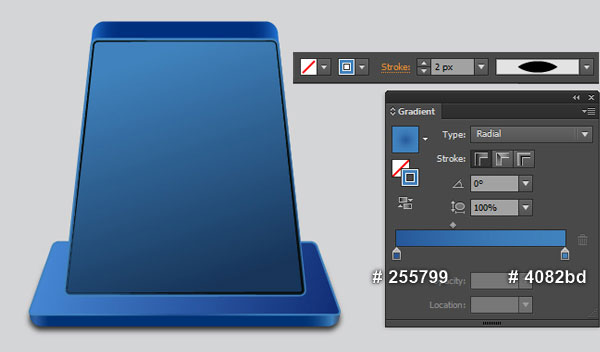
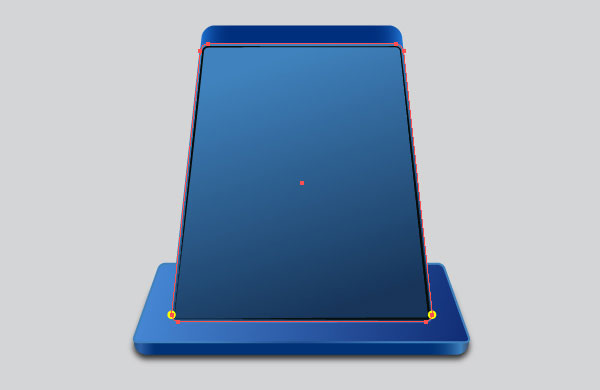
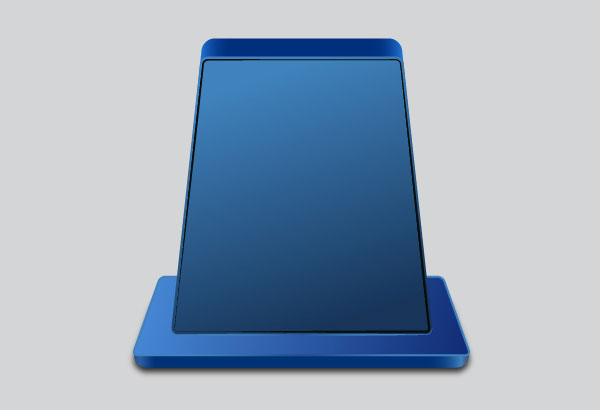
9. Select the first shape created in the step 8 and go to the Object > Path > Offset Path… Enter a -3px Radius and click OK. Keep the newly created shape selected, swap the fill and stroke colors by clicking the bent double-headed arrow next to the Fill and Stroke color swatches in the Toolbox. Change the stroke weight of the resulting object to 2px and then replace the existing stroke color with black (# 070d0a). Still having the resulting object selected, apply the Width Profile 2 and a 1px Feather effect for this object. Next select the first shape created in the step 8 again and make a copy (Ctrl +C, Ctrl +F) of it. Keep the copy selected, swap the fill and stroke colors by clicking the bent double-headed arrow next to the Fill and Stroke color swatches in the Toolbox. Change the stroke weight of the resulting object to 2px and replace the existing stroke color with the radial gradient as shown in the third image. Then apply the Width Profile 1 for the resulting object. Now focus on the next to last image, select the two anchor points highlighted with yellow and click on the “Cut path at selected anchor points” icon from the Properties bar. This make the newly created object becomes two paths. Select and remove the upper path.
Create the Bowl of the Kitchen Scale.
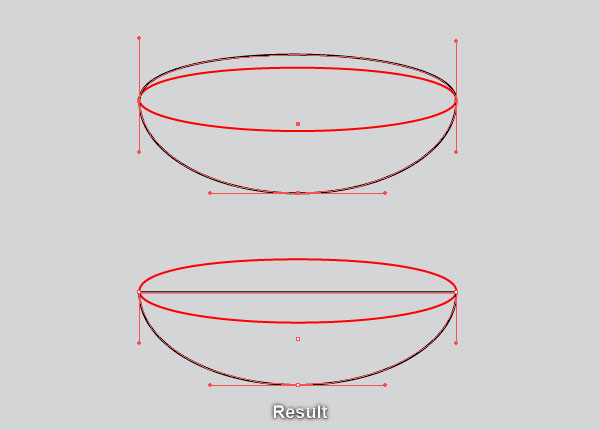
10. Pick the Ellipse Tool (L) and create two ellipses with dimensions: 317 by 63px and 317 by 188px. Reselect the two newly created ellipses, open the Align panel (Window > Align) and click on the Horizontal Align Center button, then click on the Vertical Align Center button. With the help of the Direct Selection Tool (A), select the top anchor point of the black ellipse and remove it. Next pick the Convert Anchor Point Tool (Shift +C), click on the two upper handles of the left and the right anchor point of the black object. This will remove these upper handles. You should end up with something like in the last image.
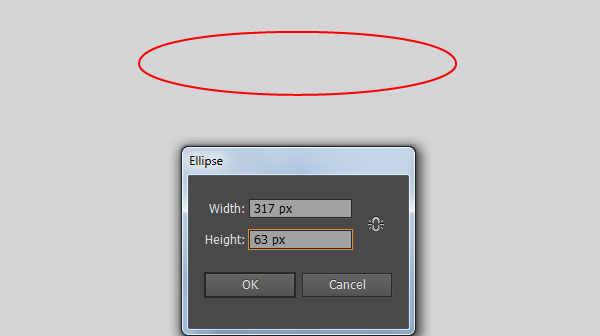
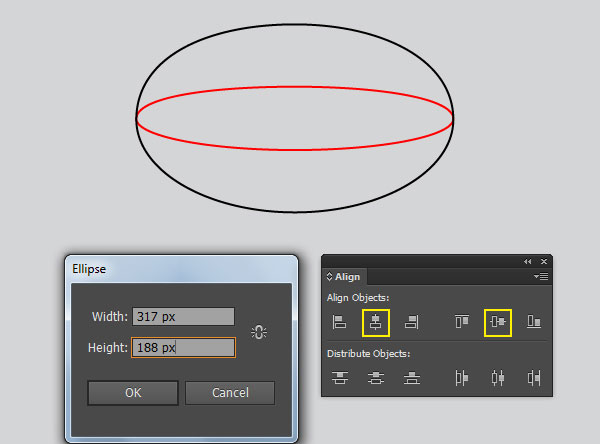
11. Before you continue, select the red ellipse created in the step 10 and make a copy (Ctrl +C, Ctrl +F) of it. Keep the copy selected, remove its stroke and then fill this ellipse with the radial gradient as shown in the first image. Continue select the black object created in the step 10, remove its stroke and fill this object with the radial gradient like you see in the second image. Finally hide the resulting shape behind the ellipse you just filled with dark gray gradient colors.
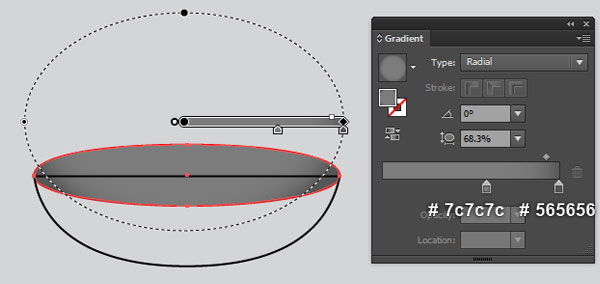
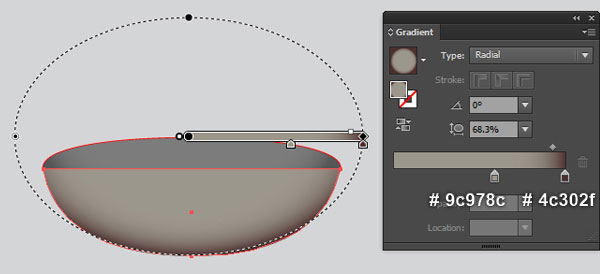
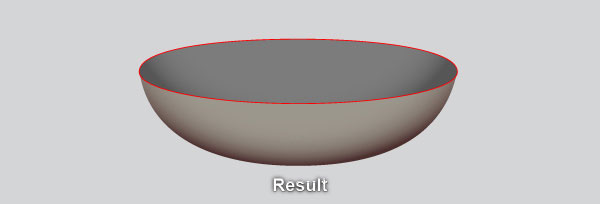
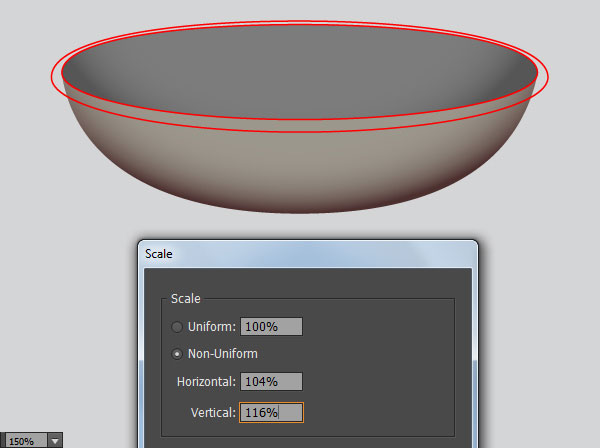
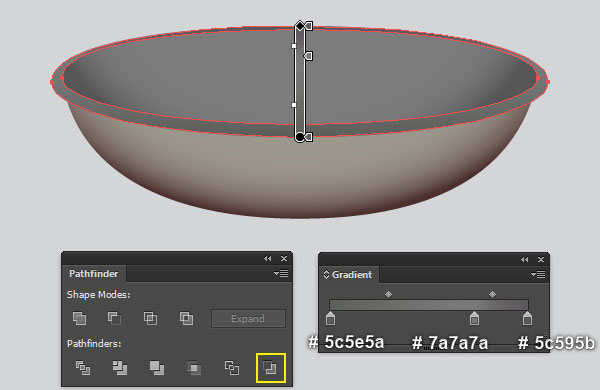
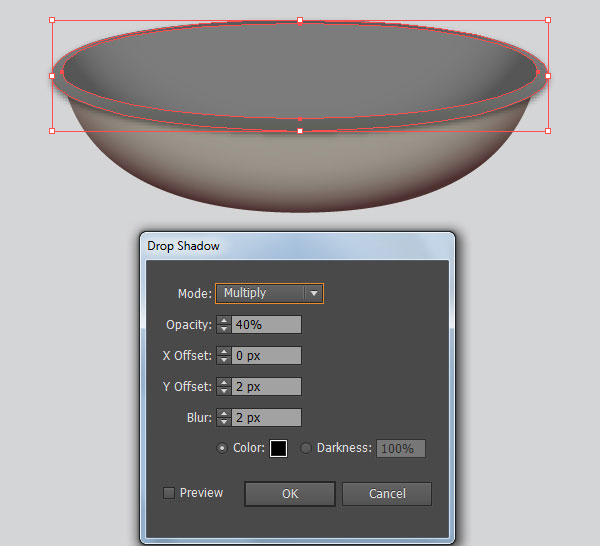
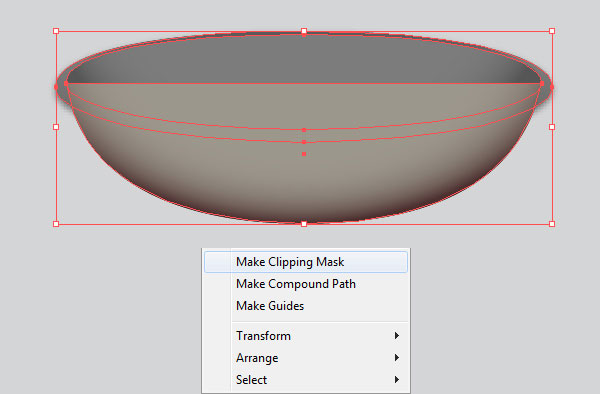
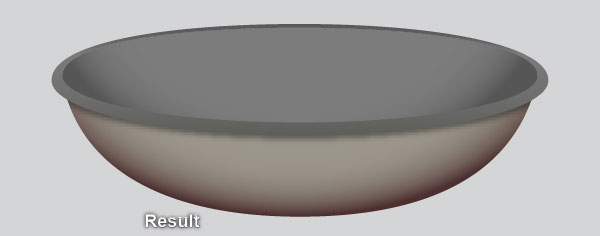
12. Before you continue, select the remaining red ellipse and bring it to front (Ctrl +Shift +Right Square Bracket). Keep this ellipse selected and go to the Object > Transform > Scale… Check the Non-Uniform, enter a 104% in the Horizontal box and 116% in the Vertical box, then click Copy. Still having the newly created ellipse selected and move it 3px down. Now reselect the two red ellipses, open the Pathfinder panel (Window > Pathfinder) and click on the Minus Back button. Remove the stroke of the resulting compound path and then fill it with the linear gradient like you see in the second image. Make sure that the resulting compound path is still selected and make a copy (Ctrl +C, Ctrl +F) of it. Keep this copy selected and go to the Effect > Stylize > Drop Shadow… Follow the data as shown in the third image and click OK. Now select the second shape created in the step 11 and make a copy of it, then bring the copy to front (Ctrl +Shift +Right Square Bracket). Still having the copy selected, hold down the Shift and click on the compound path with shadow effect applied in this step. Right-click on the artboard and then select the Make Clipping Mask section from the drop-down menu. Finally hide the clipping set behind the first compound path created in this step.
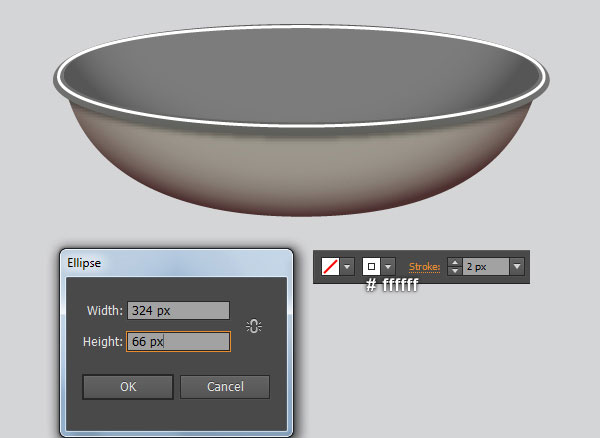
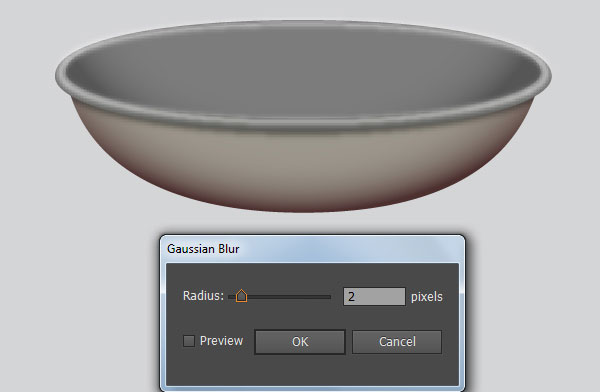
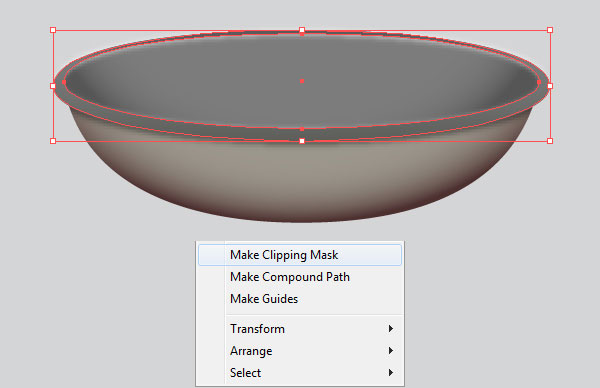
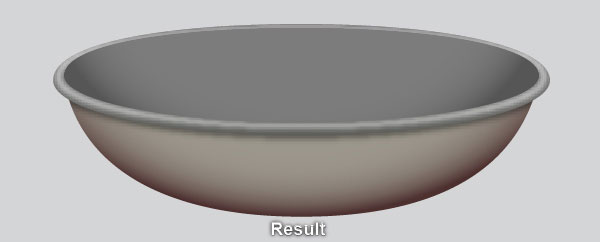
13. Pick the Ellipse Tool (L), create a 324 by 66px ellipse, with 2px white stroke (# ffffff) and no fill. Then place it to the position like you see in the first image. Keep the newly created ellipse selected and go to the Effect > Blur > Gaussian Blur… Enter a 2px Radius and click OK. Now select the first compound path created in the step 12 and make a copy (Ctrl +C, Ctrl +F) of it, then bring the copy to front (Ctrl +Shift +Right Square Bracket). Still having the copy selected, hold down the Shift and click on the ellipse with blur effect applied in this step. Right-click on the artboard and then select the Make Clipping Mask section from the drop-down menu.
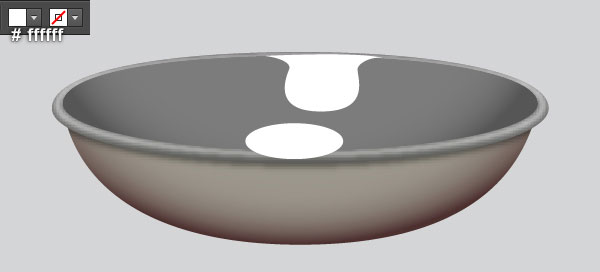
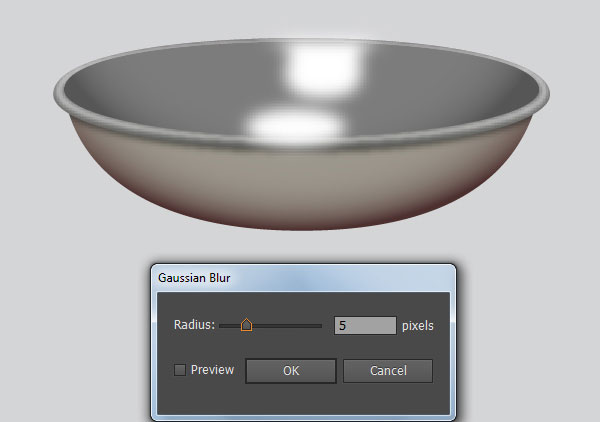
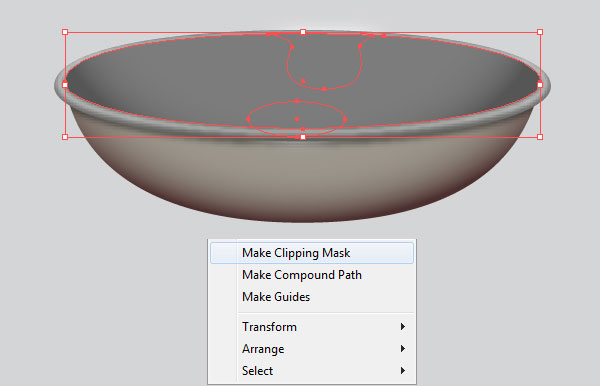
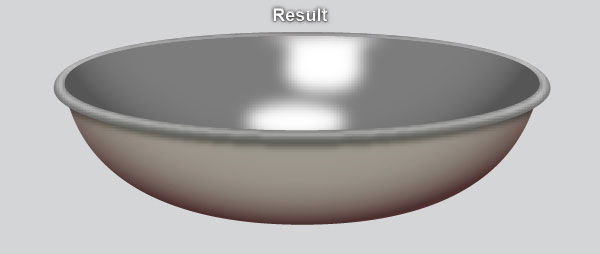
14. We are going to start making highlights and shadows on the bowl to give it more of a 3D look. With the help of the Ellipse Tool (L) and the Pen Tool (P), create two white shapes like you see in the first image. Once your shapes are drawn, reselect them and press (Ctrl +G) to group these shapes. Keep the newly created group selected, apply a 5px Gaussian Blur effect for them. Now select the ellipse created in the step 11 and make a copy (Ctrl +C, Ctrl +F) of it, then bring the copy to front (Ctrl +Shift +Right Square Bracket). Make sure that the copy is still selected, hold down the Shift and click on the group with blur effect applied in this step. Right-click on the artboard and then select the Make Clipping Mask section from the drop-down menu. Next select and group (Ctrl +G) all objects created from beginning step 10 to this time. The bowl is done!
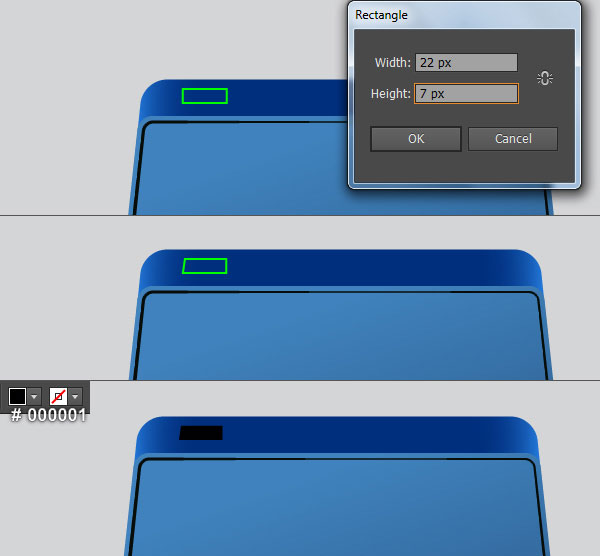
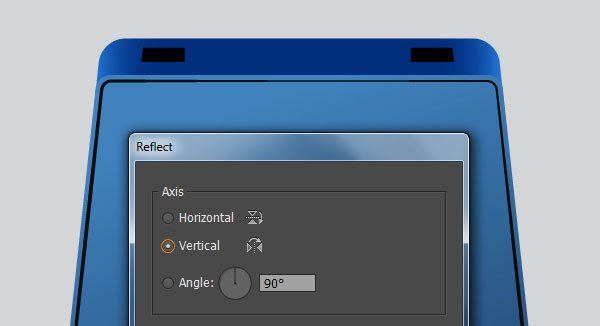
15. Pick the Rectangle Tool (M) and create a 22 by 7px green rectangle, then place it to the position like you see in the first image. With the Direct Selection Tool (A), select the top-left anchor point of the green rectangle and move it 1px to the right. Remove the stroke of the green object and then fill it with black (# 000001). Make sure that the black shape is still selected and go to the Object > Transform > Reflect… Check the Vertical and then click Copy. Drag the copy to the right and place it as shown in the last image. Don’t forget to hold the Shift key on the keyboard for straight dragging.
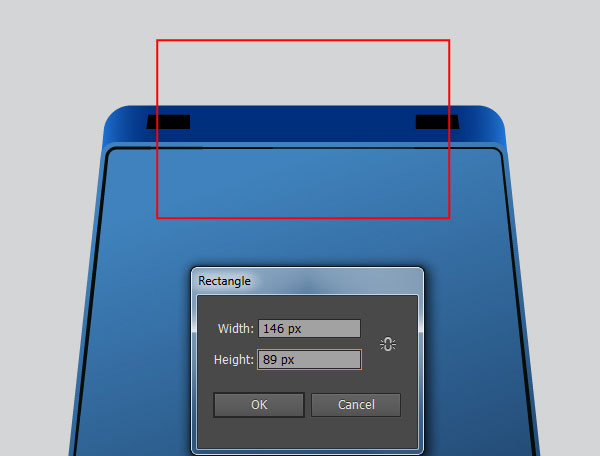
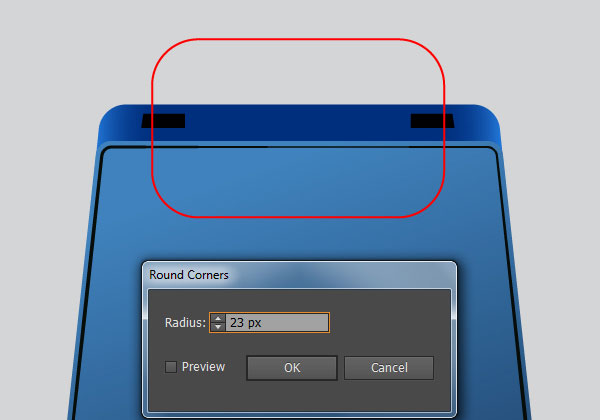
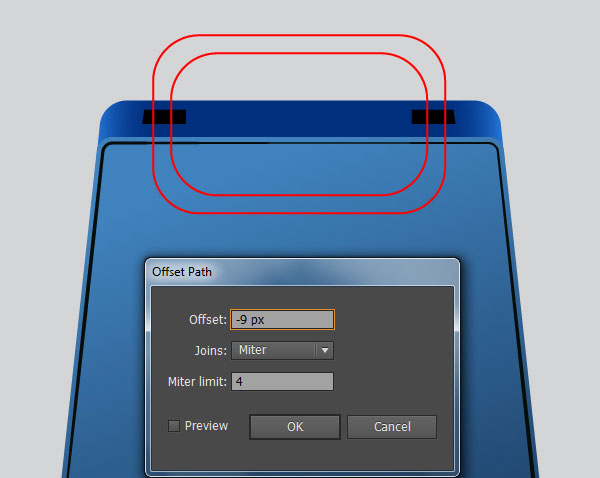
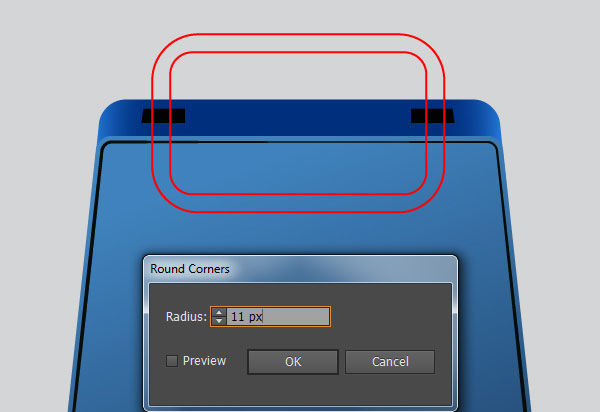
16. Pick the Rectangle Tool (M) and create a 146 by 89px red rectangle, then place it to the position as shown in the first image. Keep the newly created rectangle selected and go to the Effect > Stylize > Round Corners… Enter a 23px Radius and click OK. Still having the resulting rectangle selected and go to the Object > Path > Offset Path… Enter a -9px Offset and click OK. Make sure that the newly created rectangle is still selected, open the Appearance panel (Window > Appearance) and click on the Round Corners section. In the Round Corners dialog box, enter a 11px Radius and click OK. Finally select the two rounded rectangles created in this step and go to the Object > Expand Appearance.
17. Using the Line Segment Tool (\) create a horizontal line, with a yellow stroke and no fill. Before you continue, select the two red rounded rectangles, then open the Pathfinder panel (Window > Pathfinder) and click on the Minus Front button. Keep the resulting path selected, hold down the Shift and click on the horizontal line created in this step. Then click on the Divide button from the Pathfinder panel. Make sure that the resulting group is still selected, press (Ctrl +Shift +G) to ungroup it. Finally select the lower red object and remove it.
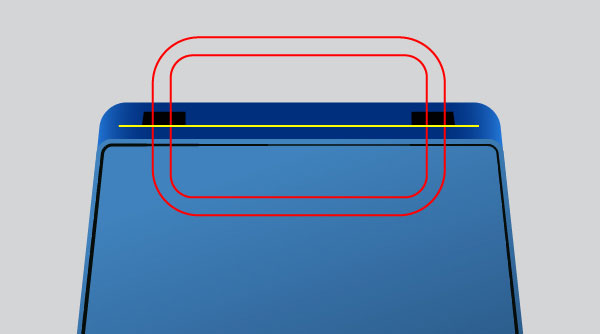
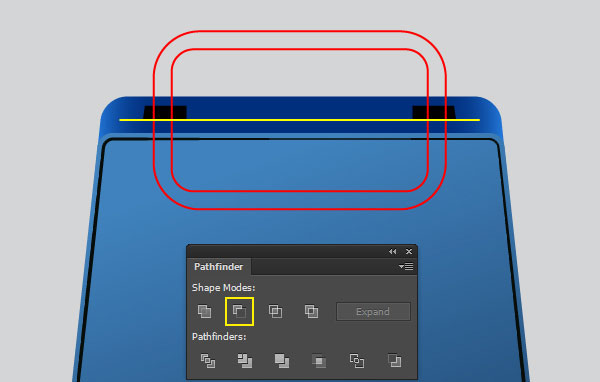
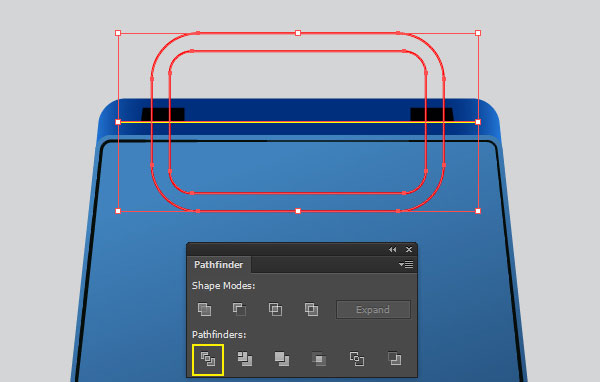
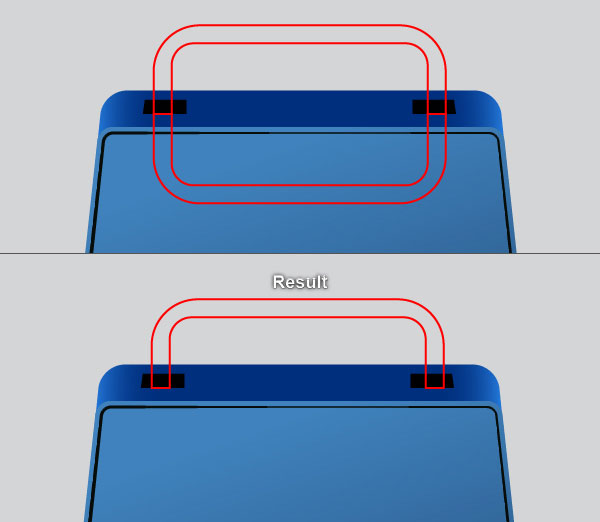
18. Select the red object created in the step 17, remove its stroke and fill this object with the linear gradient like you see in the first image. Keep the resulting shape selected and make a copy (Ctrl +C, Ctrl +F) of it. Move the copy 8px up and then replace the existing fill color with the radial gradient as shown in the second image. Next hide the resulting shape behind the first shape created in this step.
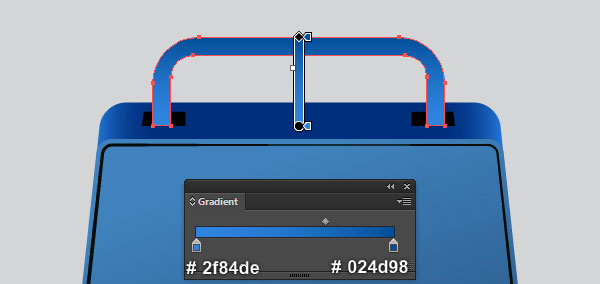
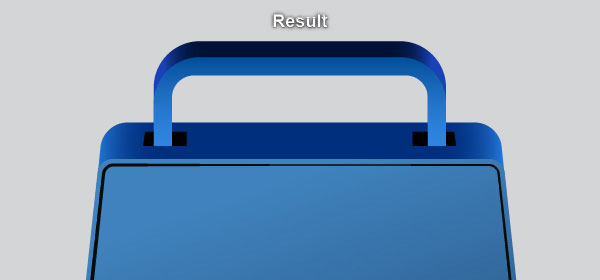
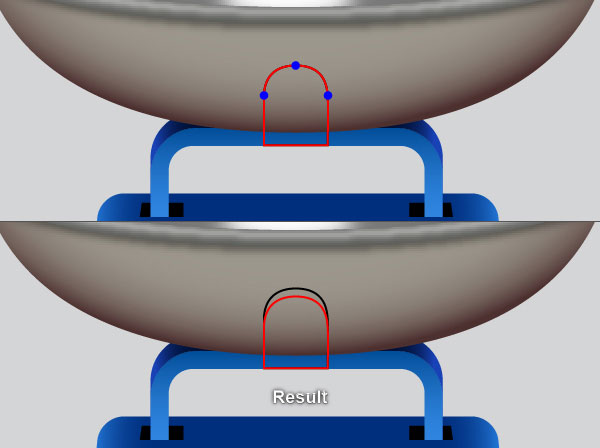
19. Before you continue, place the bowl to the position like you see in the first image. Pick the Rectangle Tool (M) and create a 32 by 25px black rectangle, then place it to the position as shown in the second image. With the Add Anchor Point Tool (+), click on the point highlighted with red to add a new anchor point for the black rectangle. Keep this anchor point selected and move it 15px up. Now with the help of the Convert Anchor Point Tool (Shift +C), click on the anchor point you just moved, hold mouse and drag it to the left while holding the Shift. After you are done adjusting the shape of the black object, make a copy (Cttrl +C, Ctrl +F) of it and then replace the existing stroke color of the copy with red. Now focus on the next to last image, select three anchor points highlighted with blue and then move them 4px down.
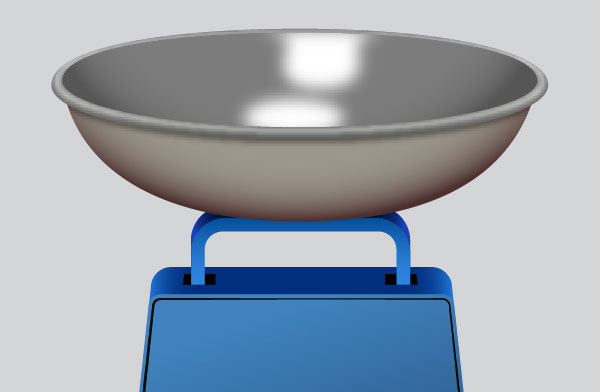
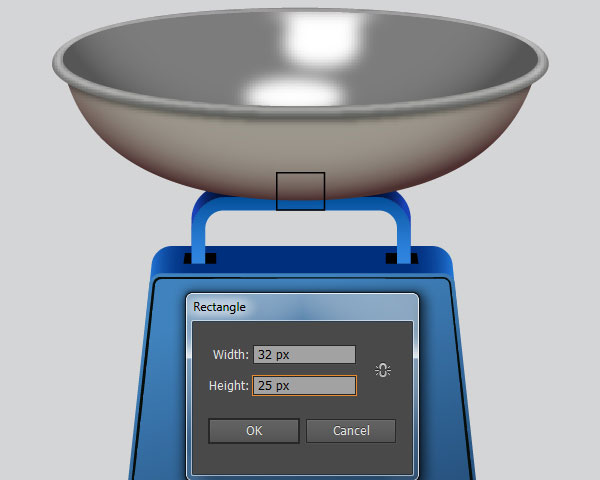
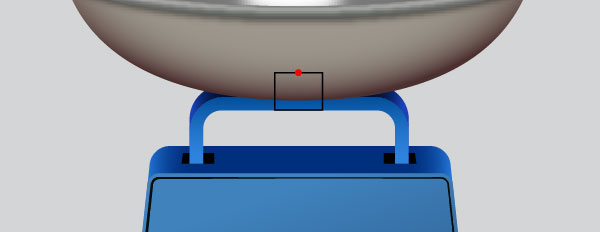
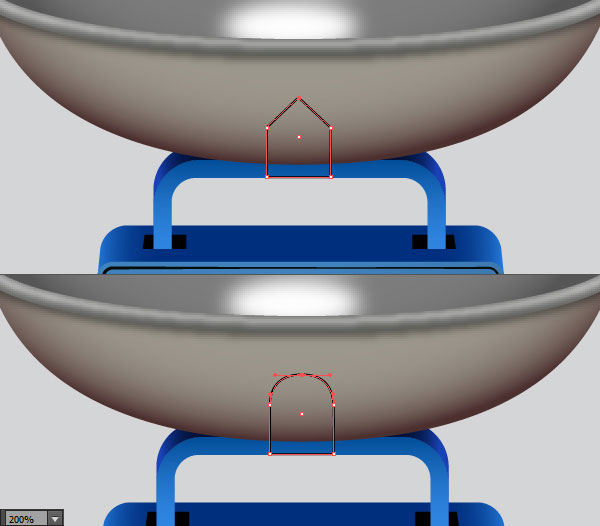
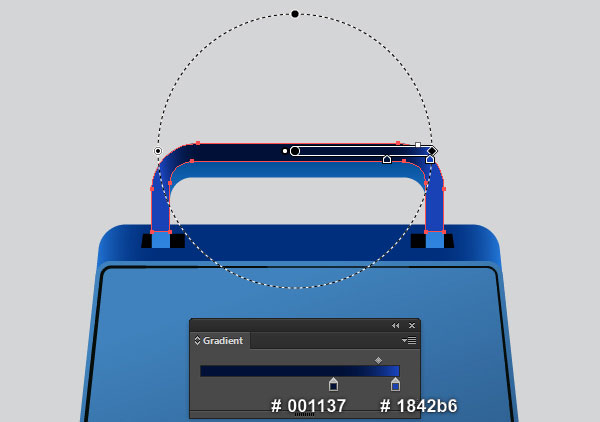
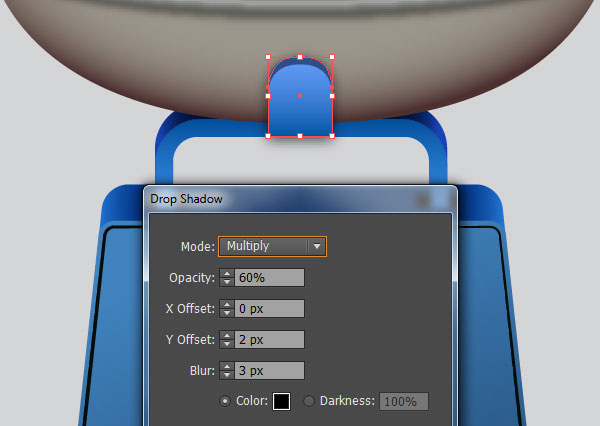
20. Select the two objects created in the step 19, remove their strokes and fill these objects with the linear gradients as shown in the first and the second image. Reselect the bigger shape created in this step and make a copy (Ctrl +C, Ctrl +F) of it. Keep the copy selected and go to the Effect > Stylize > Drop Shadow… Follow the data like you see in the third image and click OK. Having the resulting shape selected, press (Ctrl +X) to cut it. Then pick the Selection Tool (V), double-click on the clipping set created in the step 12 and press (Ctrl +F) to paste the shape was cut in this step. Finally, double-click on the anywhere outside of the clipping set.
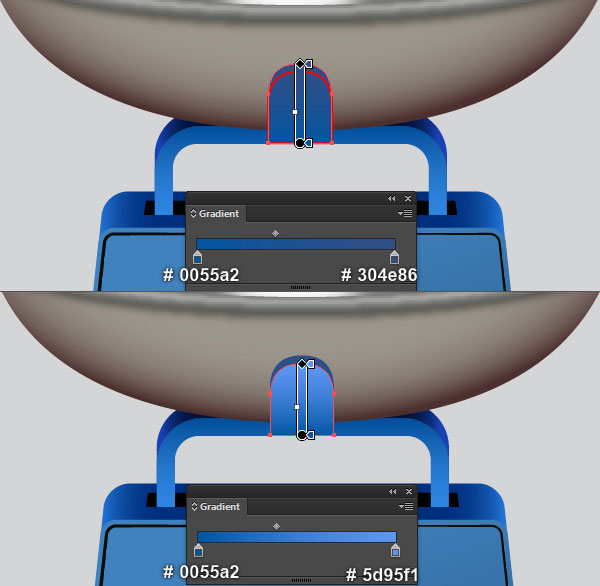
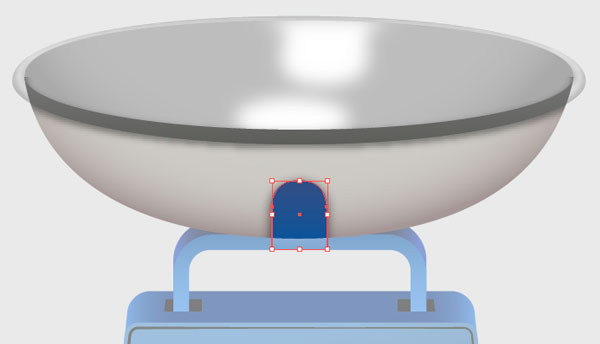
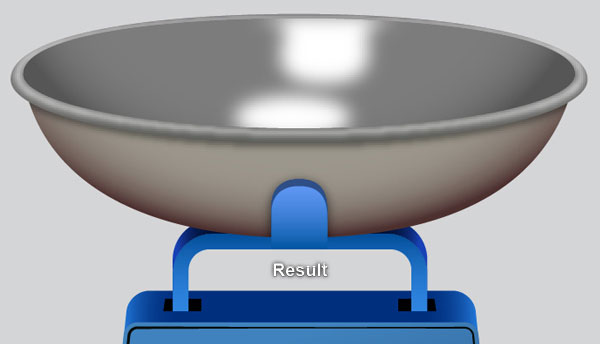
21. With the help of the Pen Tool (P) and the Gradient Tool (G), create two shapes like you see in the images below. Once your shapes are drawn, reselect them and press (Ctrl +G) to group these shapes. Still having the newly created group selected and go to the Object > Transform > Reflect… Check the Vertical and click Copy. Drag the newly created group to the right and place it as shown in the next to last image. Don’t forget to hold the Shift key on the keyboard for straight dragging. Finally hide the two groups created in this step behind the bowl.
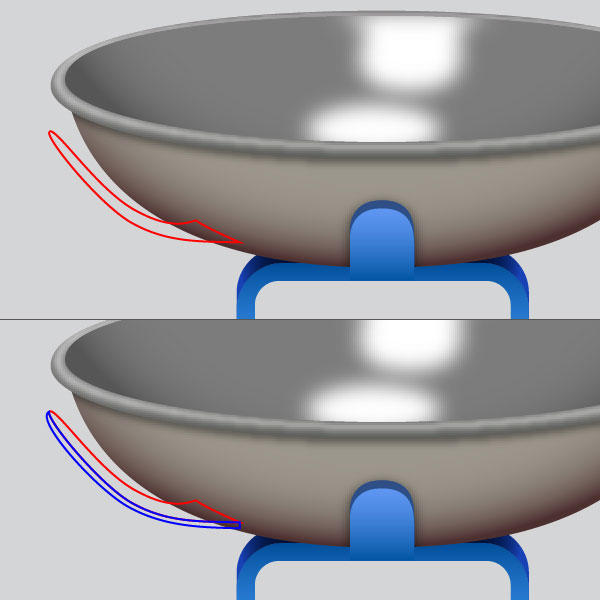
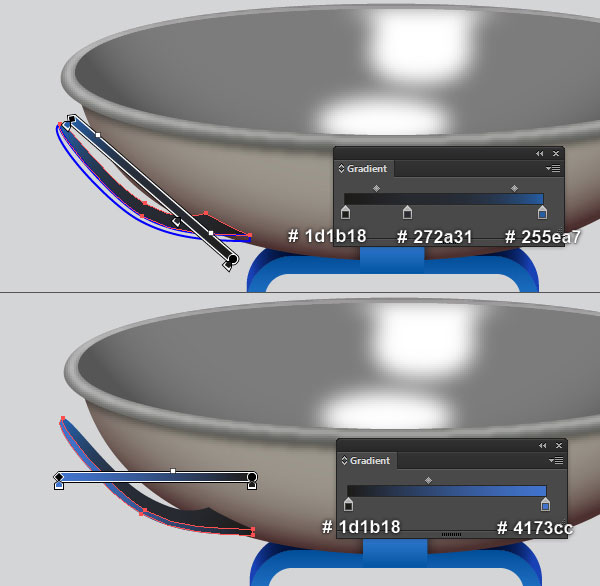
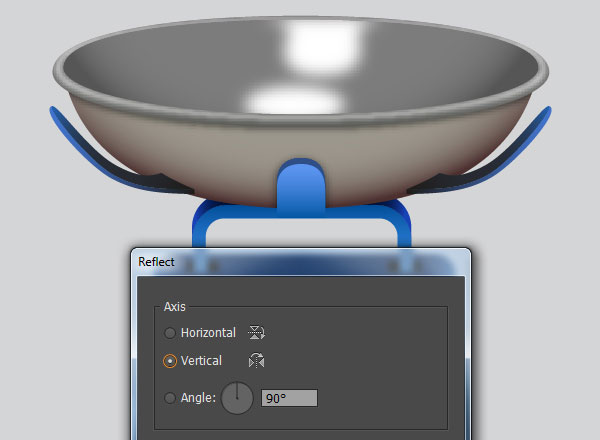
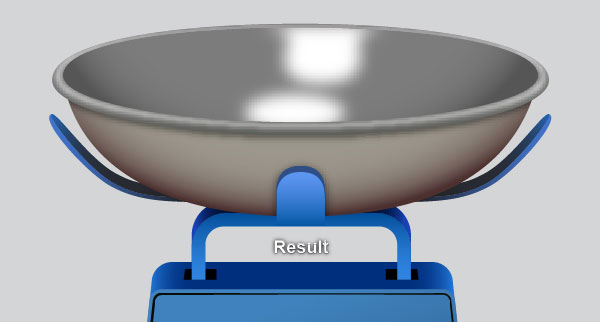
22. At this point your kitchen scale should look like in the next image:
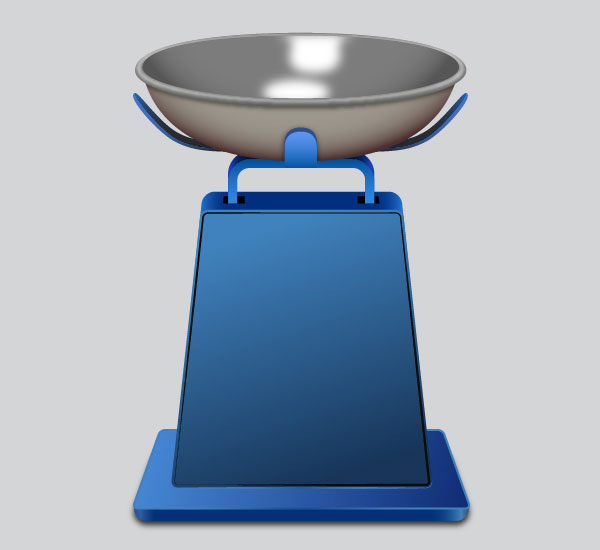
Create the Dial of the Kitchen Scale.
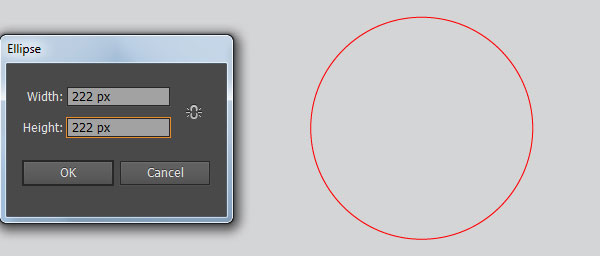
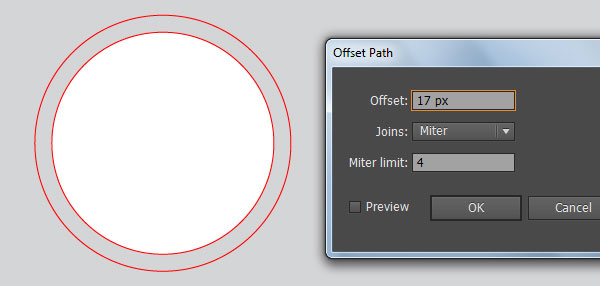
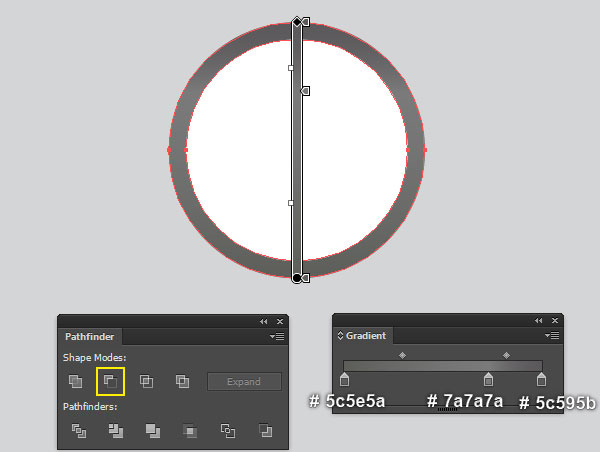
23. Pick the Ellipse Tool (L) and create a 222 by 222px red ellipse. Keep the newly created ellipse selected and make a copy (Ctrl +C, Ctrl +F) of it. Remove the stroke of the copy and fill it with white (# ffffff), then hide the resulting ellipse behind the red ellipse. Next select the red ellipse created in this step and go to the Object > Path > Offset Path… Enter a 17px Radius and click OK. Now select the two red ellipses, then open the Pathfinder panel (Window > Pathfinder) and click on the Minus Front button. Remove the stroke of the resulting compound path and then fill it with the linear gradient as shown in the last image.
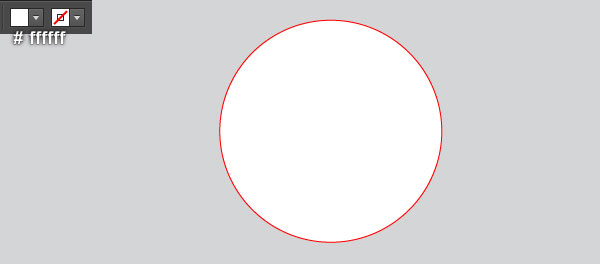
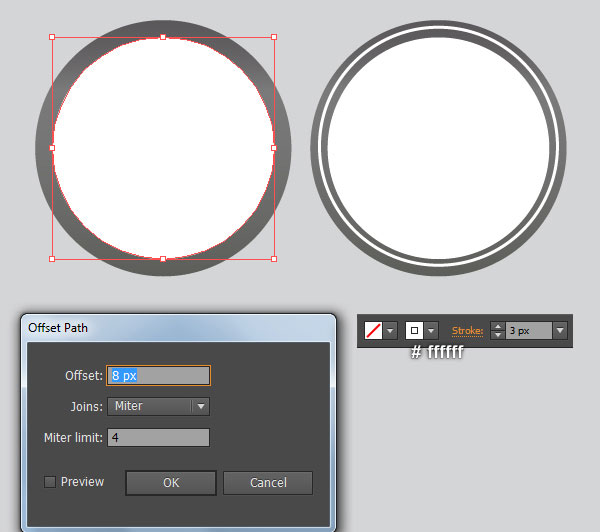
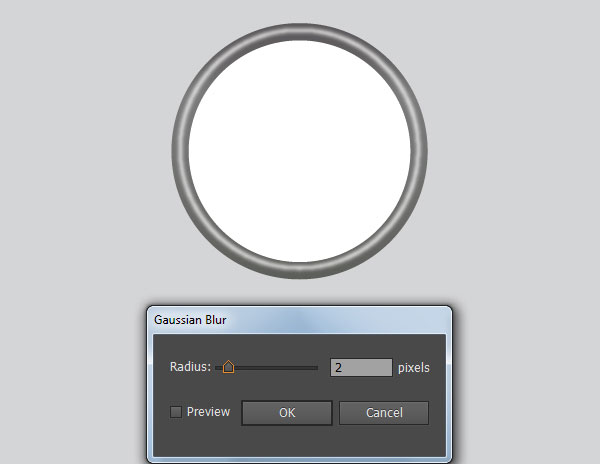
24. Select the white ellipse created in the step 23 and go to the Object > Path > Offset Path… Enter a 8px Offset and click OK. Keep the copy selected, swap the fill and stroke colors by clicking the bent double-headed arrow next to the Fill and Stroke color swatches in the Toolbox. Then change the stroke weight of the resulting ellipse to 3px. Still having this ellipse selected and apply a 2px Gaussian Blur effect for it.
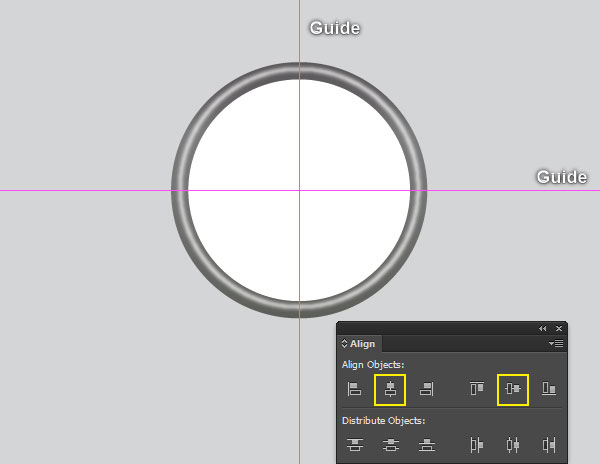
25. Show the Rulers (View > View Rulers > Show Ruler) or (Ctrl +R). Next drag a horizontal and vertical guide
from the Rulers (if the guides locked, go to the View > Guides > Lock Guides) or (Ctrl +Alt + ;). Now select the white ellipse created in the step 23, hold down the Shift, click on two newly created guides, release the Shift and then click on the white ellipse created in the step 23 again (to fixed its position). Next open the Align palette (Window > Align), click on the Horizontal Align Center button and then click on the Vertical Align Center button.
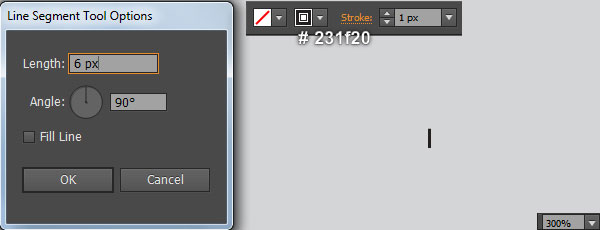
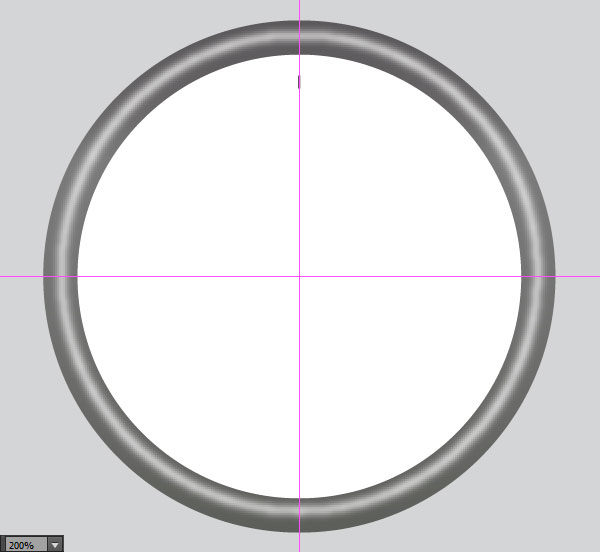
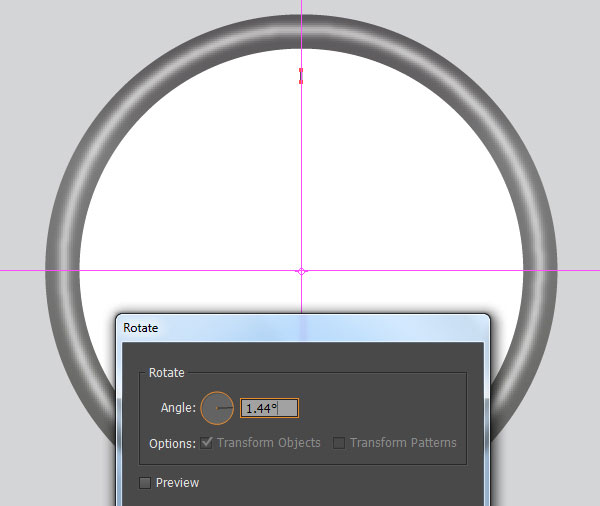
26. Using the Line Segment Tool (\) create a vertical line of length 6px, with a 1px very dark red stroke (# 231f20) and no fill. Next place newly created line to the correct position like you see in the second image. Keep this line selected, pick the Rotate Tool (R), then hold down the Alt and click on the intersection point of the two guides. In the Rotate dialog box, enter a 1.44 degrees Angle and click Copy. Repeat this by pressing (Ctrl +D). Do this until you get the results as shown in the last image. Before you continue, select the first line created in this step and press (Ctrl +C) to copy it. Next select and group (Ctrl +G) all lines created in this step.
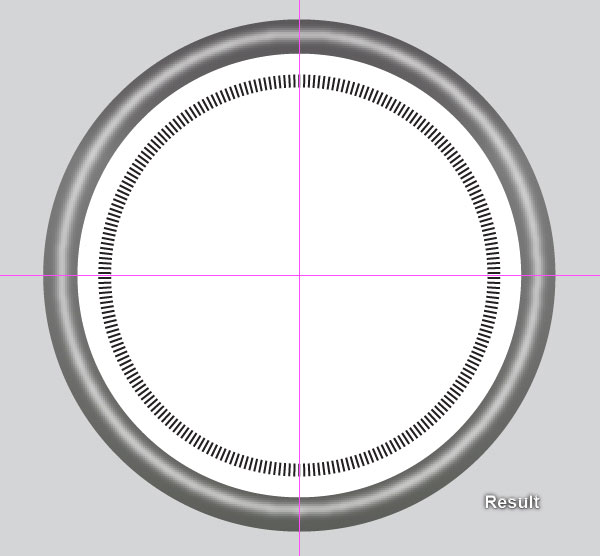
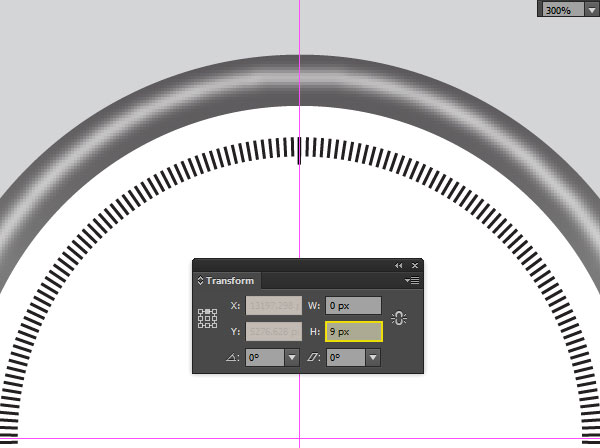
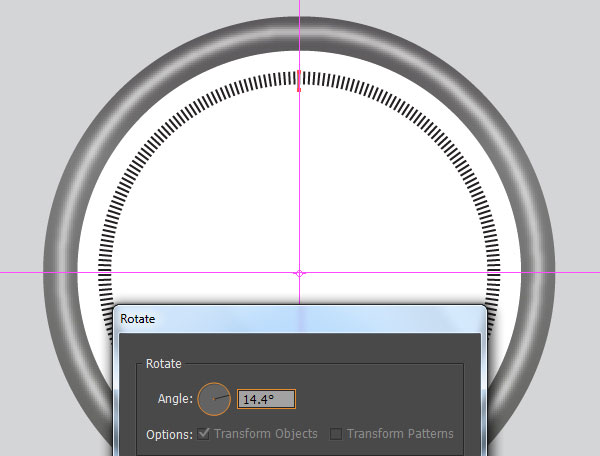
27. Before you continue, press (Ctrl +F) to paste the line was copied in the step 26. Keep this line selected and open the Transform panel (Window > Transform). Set the transfer reference point to top-center and change H to 9px. Still having the resulting line selected, pick the Rotate Tool (R), then hold down the Alt and click on the intersection point of the two guides. In the Rotate dialog box, enter a 14.4 degrees Angle and click Copy. Repeat this by pressing (Ctrl +D). Do this until you get the results as shown in the next to last image. Before you continue, select the first line created in this step and press (Ctrl +C) to copy it. Next select and group (Ctrl +G) all lines created in this step. Make sure that the newly created group is still selected and double-click on the Rotate Tool icon from the Toolbox. In the Rotate dialog box, enter a 7.2 degrees Angle and click OK.
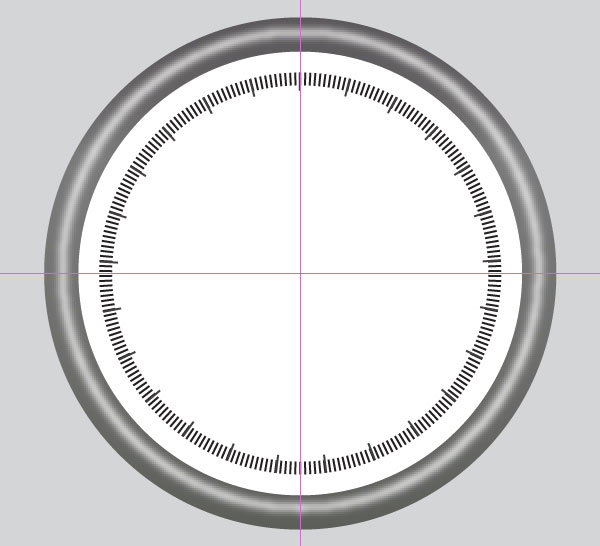
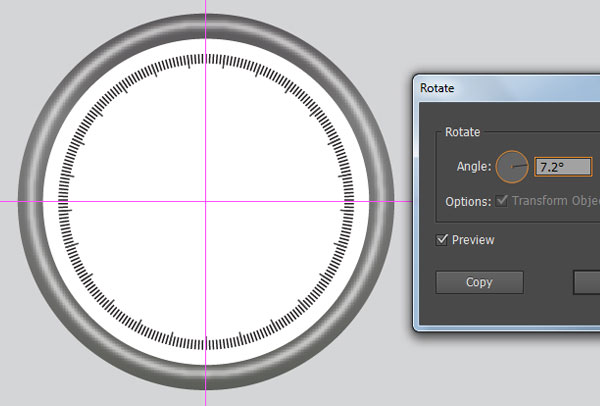
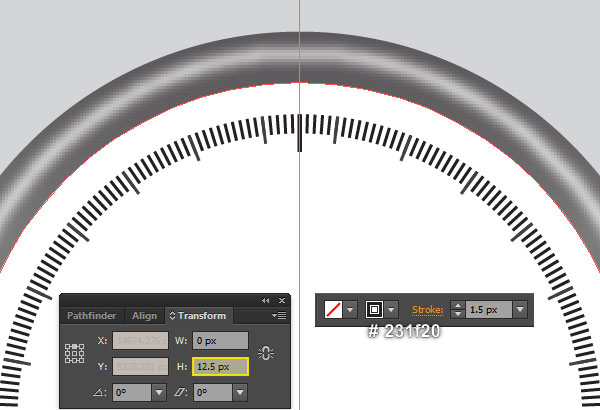
28. Before you continue, press (Ctrl +F) to paste the line was copied in the step 27. Keep this line selected and open the Transform panel (Window > Transform). Set the transfer reference point to top-center and change H to 12.5px. Still having the resulting line selected and change stroke weight to 1.5px. Having this line selected, pick the Rotate Tool (R), then hold down the Alt and click on the intersection point of the two guides. In the Rotate dialog box, enter a 14.4 degrees Angle and click Copy. Repeat this by pressing (Ctrl +D). Do this until you get the results as shown in the last image. Finally select and group (Ctrl +G) all lines created in this step.
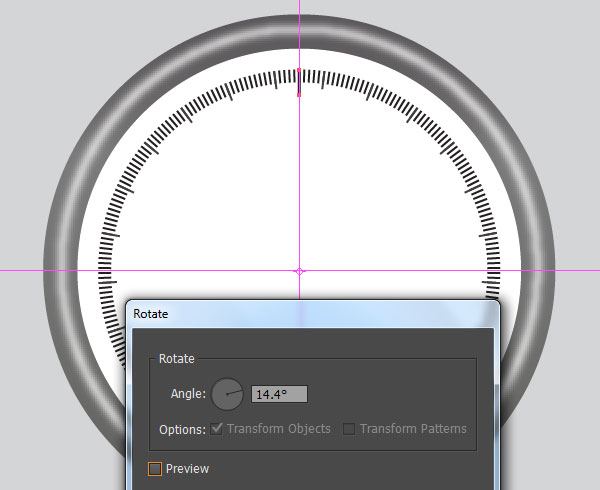
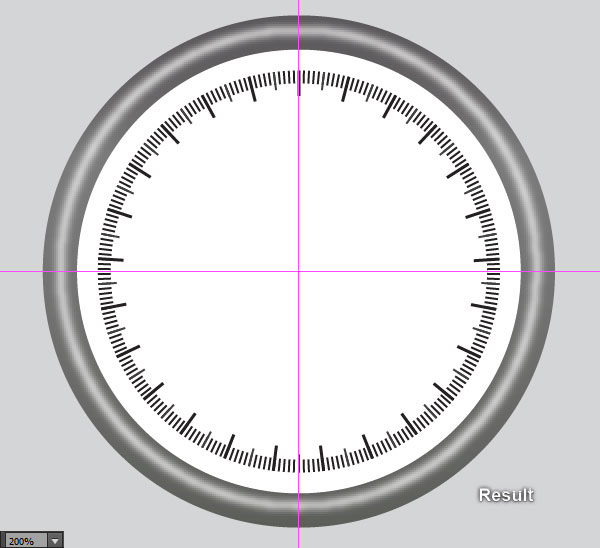
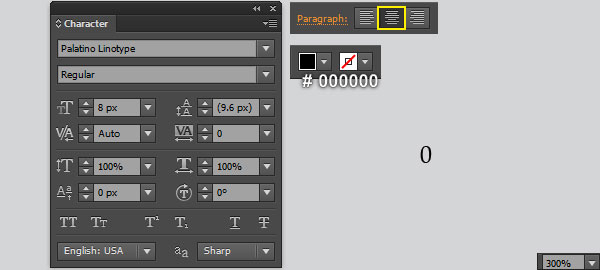
29. Open the Character panel (Window > Type > Character), select the Palatino Linotype font, make it Regular, and set the size to 8px. Now pick the Type Tool (T), simply click on your artboard. Then add the number “0” and set its color to black (# 000000). Keep the number “0” selected, open the Paragraph panel (Window > Type > Paragraph) and click on the Align Center icon. Next place the number “0” to the correct position like you see in the second image. Still having the number “0” selected, pick the Rotate Tool (R), then hold down the Alt and click on the intersection point of the two guides. In the Rotate dialog box, enter a 14.4 degrees Angle and click Copy. Repeat this by pressing (Ctrl +D). Do this until you get the results as shown in the last image.
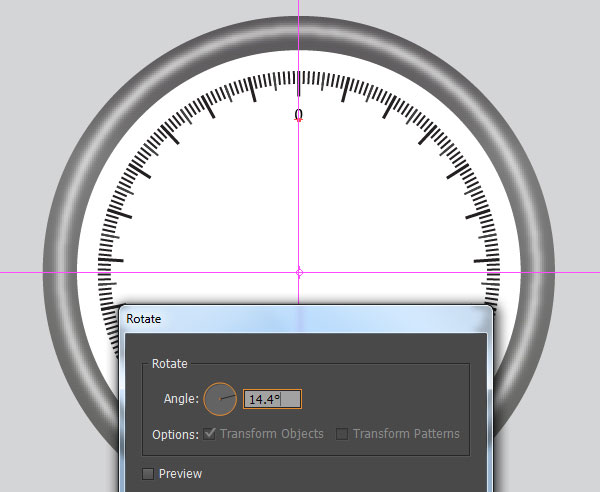
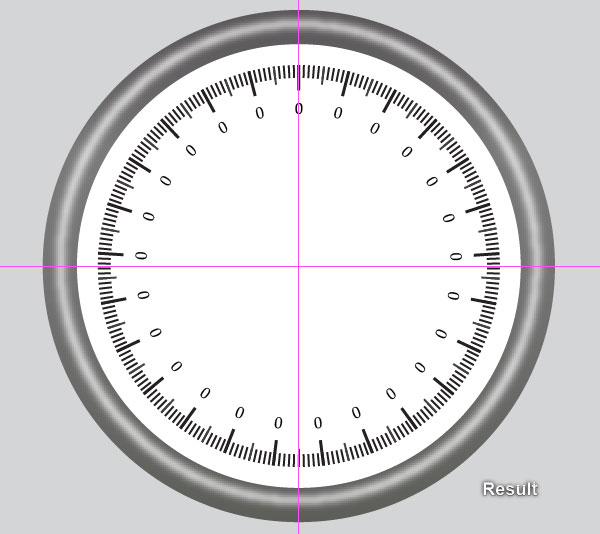
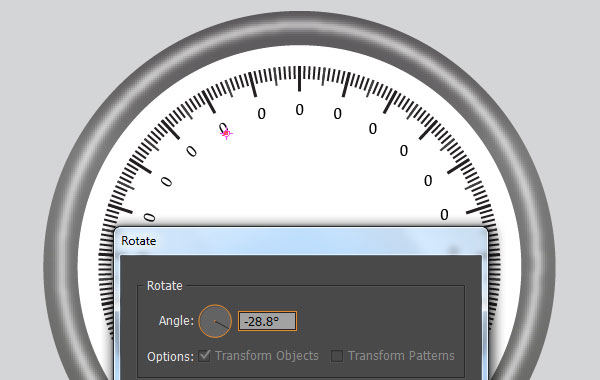
30. Now we have to rotate all the numbers “0” so they face the right direction. Select the number “0” as shown in the first image and go to Object > Transform > Rotate… Enter a 14.4 degrees Angle and click OK. Next select the number “0” as shown in the third image and press (Ctrl +D) twice to rotate this number an angle of about 28.8 degrees. Repeat the same technique for the remaining numbers “0” of the right part of the dial. In the end your numbers should looks like the final image shown.
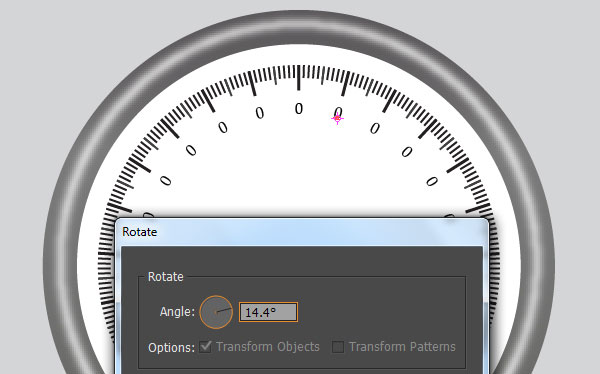
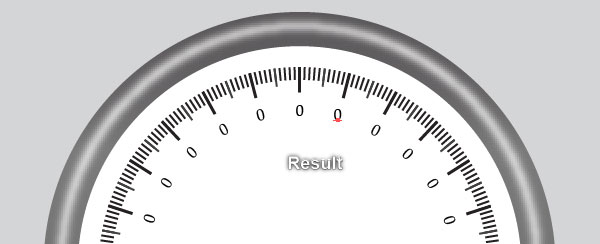
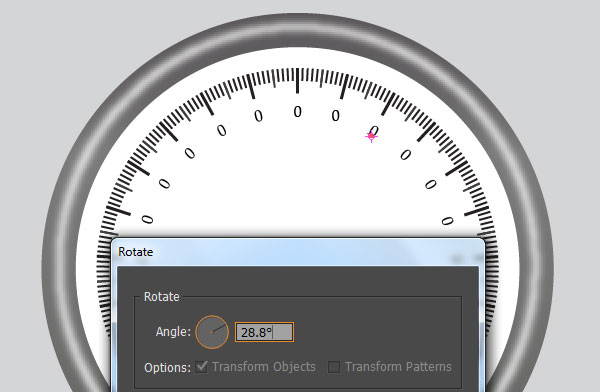
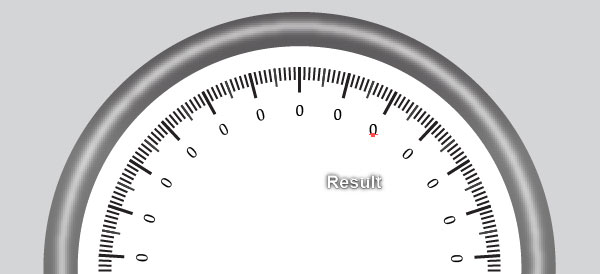
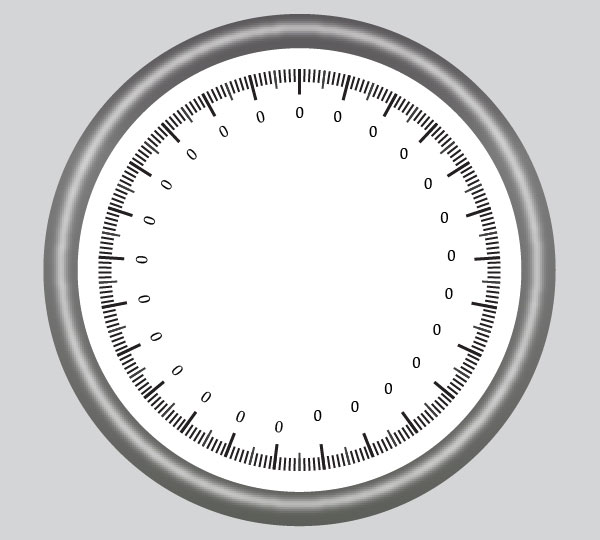
31. Select the number “0” as shown in the first image and go to Object > Transform > Rotate… Enter a -14.4 degrees Angle and click OK. Next select the number “0” as shown in the third image and press (Ctrl +D) twice to rotate this number an angle of about -28.8 degrees. Repeat the same technique for the remaining numbers “0” of the left part of the dial. In the end your numbers should looks like the final image shown.
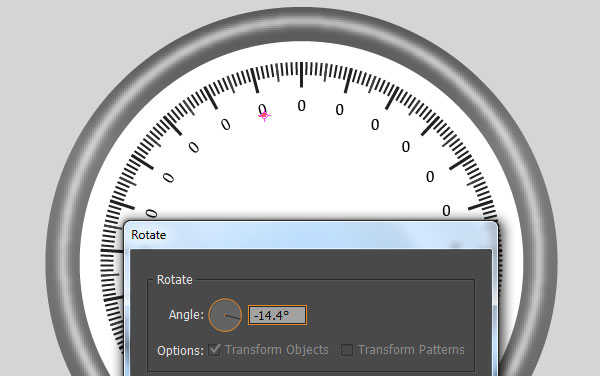
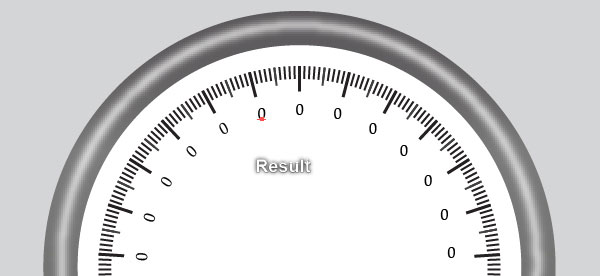
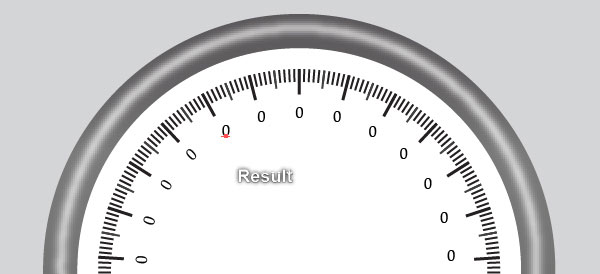
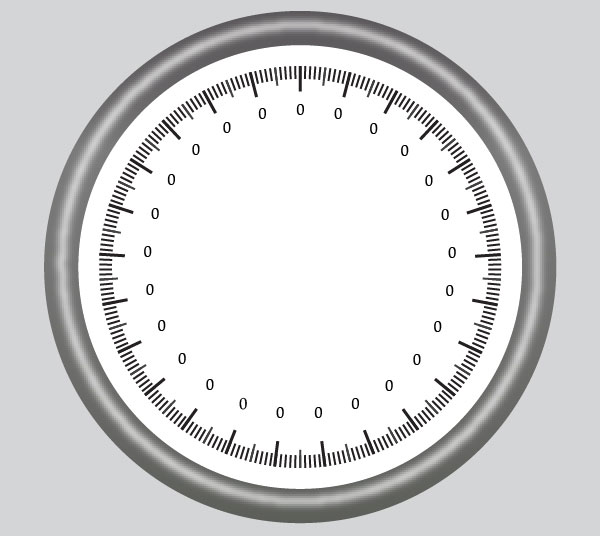
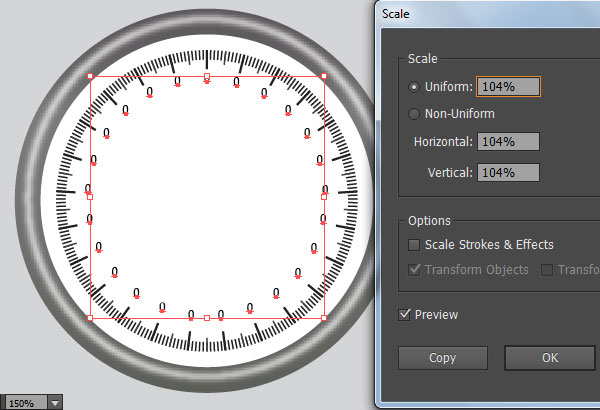
32. Select all numbers “0” created in the previous steps and go to the Object > Transform > Scale… Check the Uniform and enter a 104% in the Scale box, then click OK. Keep the resulting numbers “0” selected and then move them 3px down.
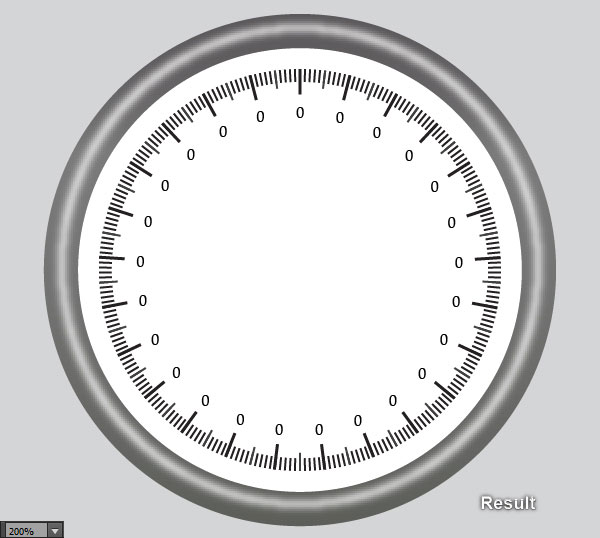
33. Use the Type Tool (T) to change numbers “0” to the correct numbers and letters as shown in the images below.
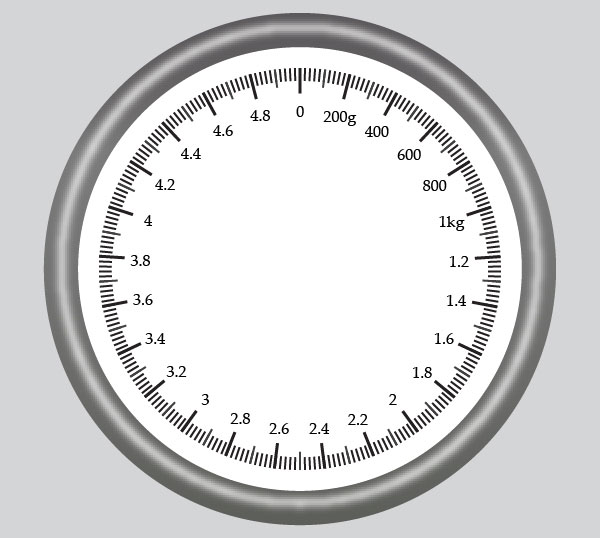
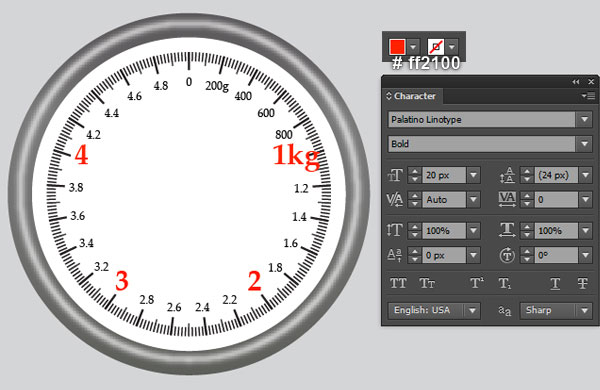
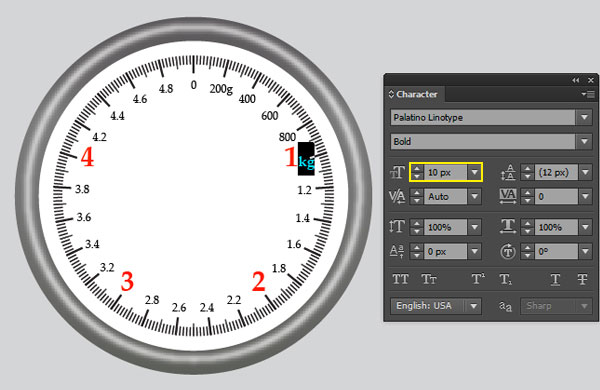
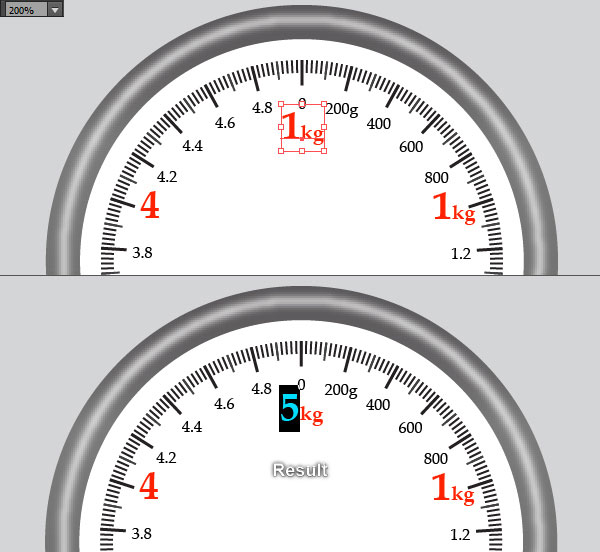
34. Select the numbers “2“, “3“, “4” and the “1kg” piece of text, then open the Character panel (Window > Type > Character). Change the font sizes to 20px and set their colors to pure red (# ff2100). Next with the Type Tool (T), select word “kg” and change the font size to 10px. Now select the “1kg” piece of text and make a copy (Ctrl +C, Ctrl +F) of it. Then place the copy to the position like you see in the third image. Focus on the last image, pick the Type Tool (T), select the number “1” and change it to number “5“.
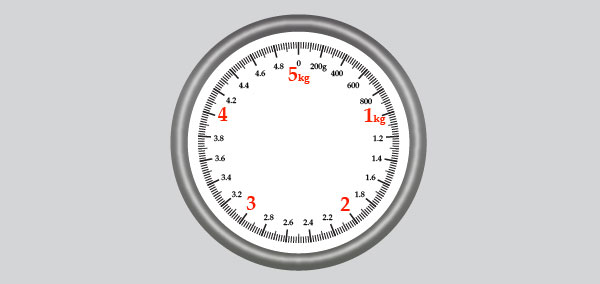
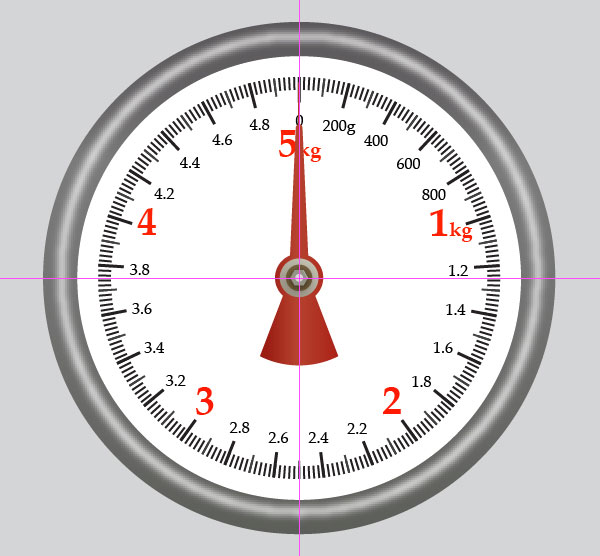
35. At this point the dial of the kitchen scale should look like in the next image:
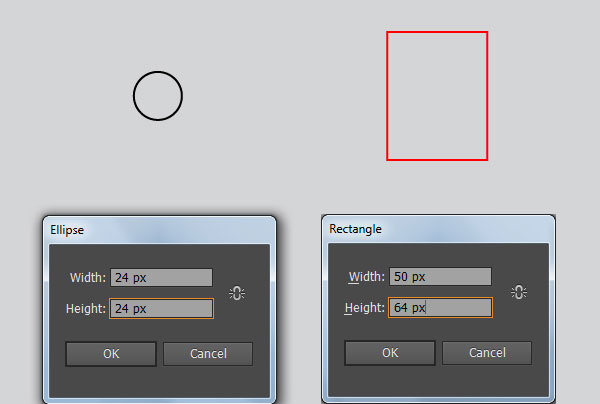
36. It’s time to draw the indicator needle. Pick the Ellipse Tool (L) and create a 24 by 24px black ellipse. Next with the Rectangle Tool (M), create a 50 by 64px red rectangle. Now reselect the two objects created in this step, open the Align panel (Window > Align) and click on the Horizontal Align Center button, then click on the Vertical Align Top button. With the help of the Direct Selection Tool (A), select the top-right anchor point of the red rectangle and remove it. Next select the top-left anchor point and move it 25px to the right.
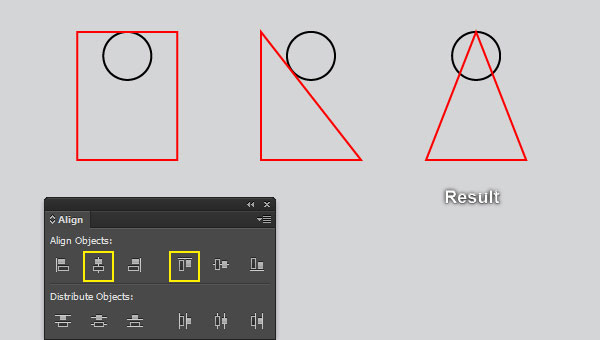
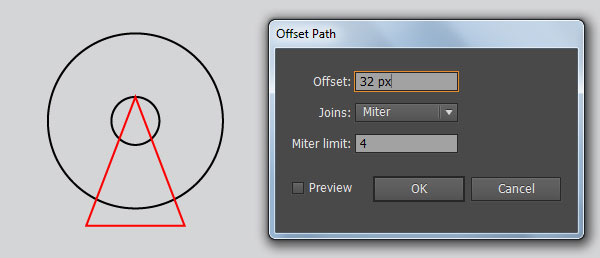
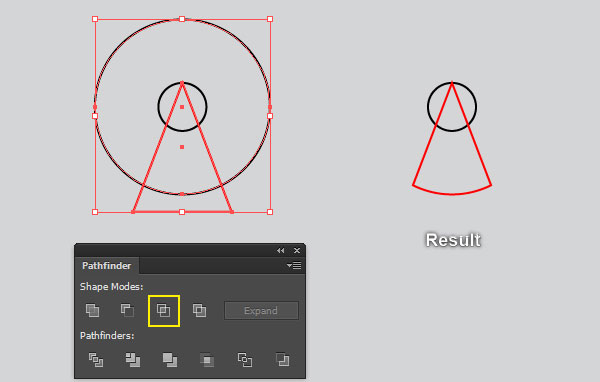
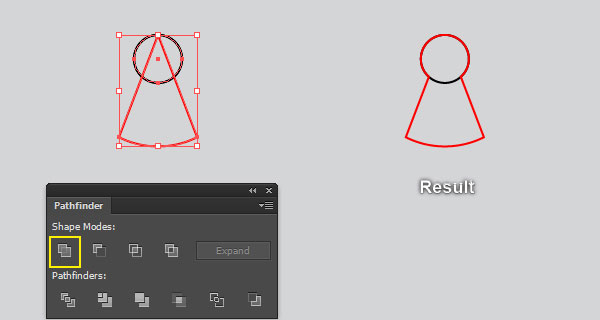
37. Select the black ellipse created in the step 36 and go to the Object > Path > Offset Path… Enter a 32px Offset and click OK. Keep the newly created ellipse selected, hold down the Shift and click on the red object created in the step 36. Then open the Pathfinder panel (Window > Pathfinder) and click on the Intersect button. Before you continue, select the black ellipse created in the step 36 and make a copy (Ctrl +C, Ctrl +F) of it. Still having the copy selected, hold down the Shift and click on the red object. Next click on the Unite button from the Pathfinder panel.
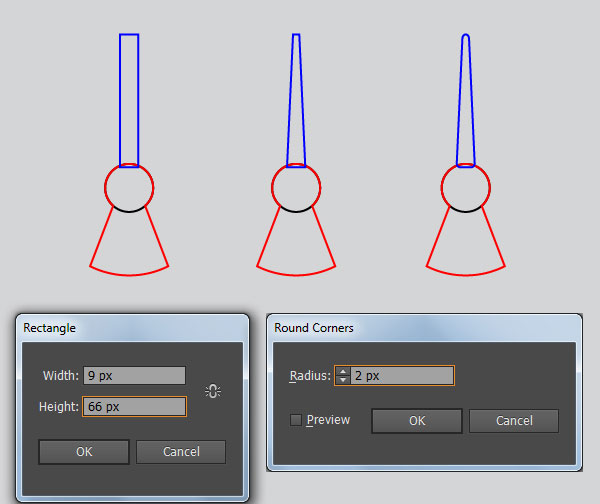
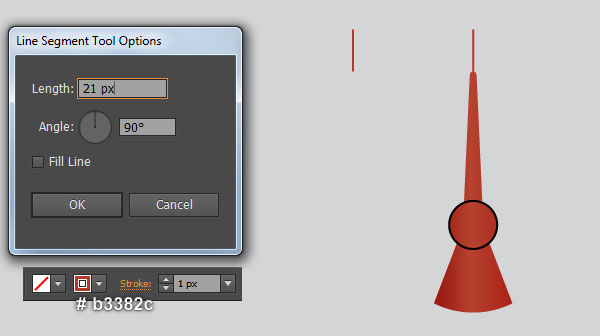
38. Pick the Rectangle Tool (M) and create a 9 by 66px blue rectangle , then place it to the position like you see in the first image. With the Direct Selection Tool (A), select the top-left anchor point of the blue rectangle and move it 3px to the right. Next select the top-right anchor point and move it 3px to the left. Keep the blue object selected and go to the Effect > Stylize > Round Corners… Enter a 2px Radius and click OK. Still having the resulting object selected and go to the Object > Expand Appearance. Make sure that the blue object is still selected, hold down the Shift and click on the red object created on the step 37. Next open the Pathfinder panel (Window > Pathfinder) and click on the Unite button. Remove the stroke of the resulting object and fill it with the linear gradient like you see in the sixth image. Then hide the resulting object behind the black ellipse created in the step 36. Now using the Line Segment Tool (\) create a vertical line of length 21px, with a 1px strong red stroke (# b3382c) and no fill. Finally place this line to the correct position as shown in the last image.
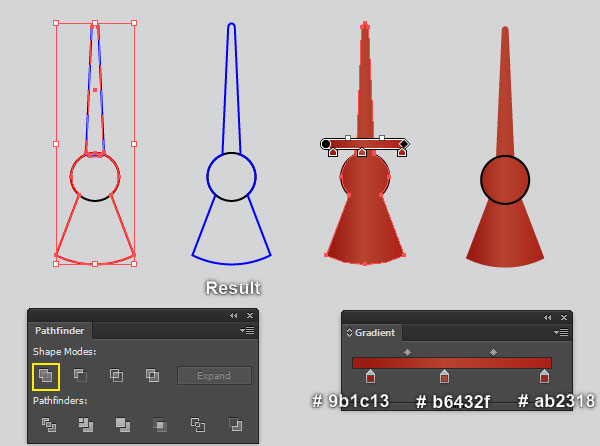
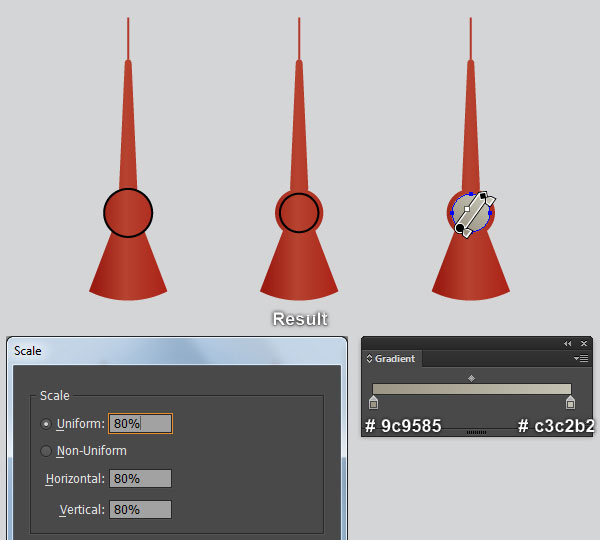
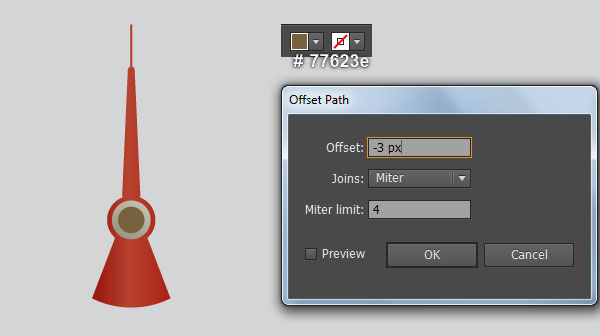
39. Select the black ellipse and go to the Object > Transform > Scale… Check the Uniform, enter a 80% in the Scale box and click OK. Remove the stroke of the resulting ellipse and then fill it with the linear gradient like you see in the third image. Keep this ellipse selected and go to the Object > Path > Offset Path… Enter a -3px Offset and click OK. Then replace the existing fill color of the newly created ellipse with dark orange (# 77623e).
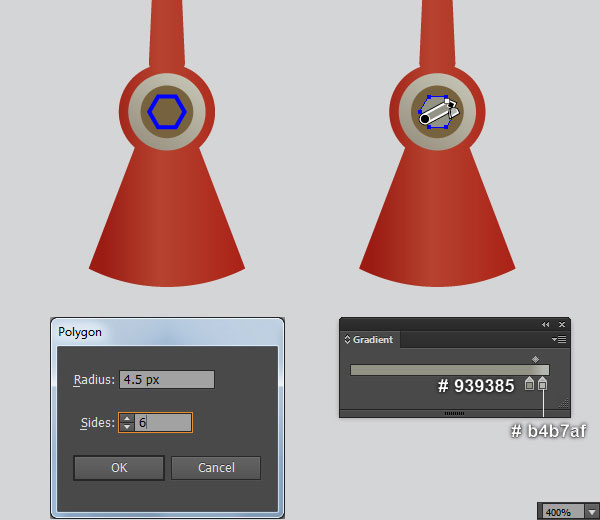
40. Pick the Polygon Tool from the Toolbox and simly click on the artboard. In the Polygon dialog box, enter a 4.5px in the Radius box, 6 in the Sides box and click OK. Then place this hexagon to the position like you see in the first image. Remove the stroke of the newly created hexagon and then fill it with the linear gradient as shown in the second image. Keep the resulting hexagon selected and go to the Effect > Stylize > Drop Shadow… Follow the data as shown in the third image and click OK. Now select the smaller ellipse created in the step 39 and go to the Object > Path > Offset Path… Enter a -4.5px Offset and click OK. Then bring the newly created ellipse to front (Ctrl +Shift +Right Square Bracket). Finally replace the existing fill color of this ellipse with light grayish magenta (# dad5da).
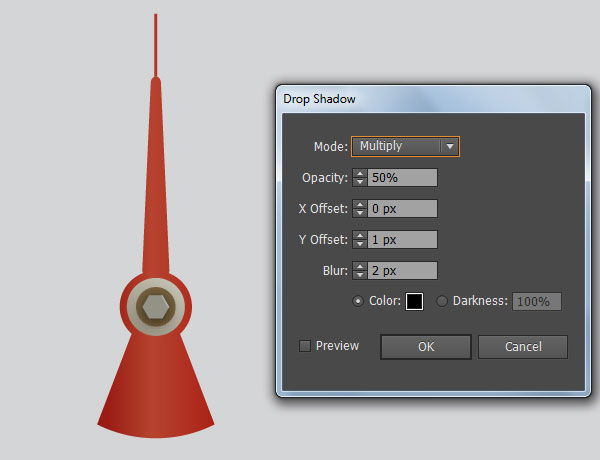
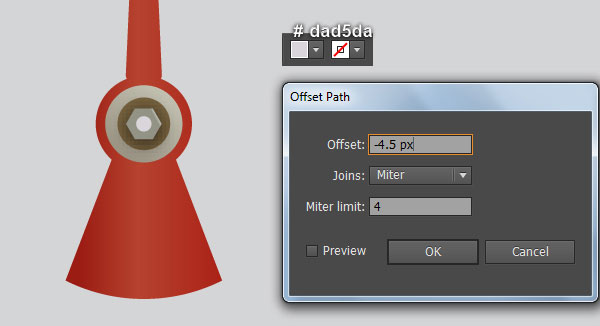
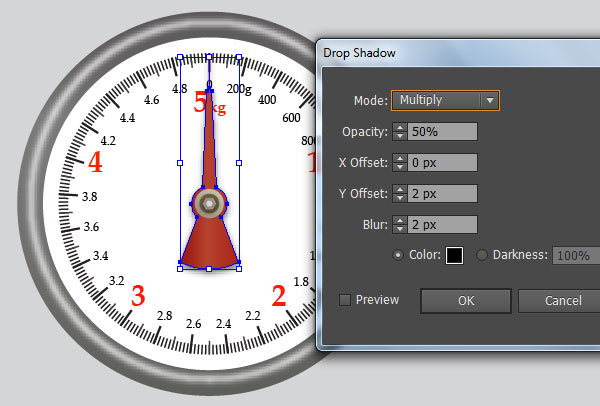
41. Select and group (Ctrl +G) all objects created from beginning step 36 to this time. The indicator needle is done! Next place it to the position like you see in the first image. Now pick the Selection Tool (V) and double-click on the indicator needle. Select the dark red shape and go to the Effect > Stylize > Drop Shadow… Follow the data like you see in the second image and click OK. Finally double-click on the anywhere outside of the group just edited.
42. We will continue with the screws. With the help of the Ellipse Tool (L) and the Gradient Tool (G), create an ellipse like you see in the first and the second image. Make a copy (Ctrl +C, Ctrl +F) of the newly created ellipse and replace the existing fill color of the copy with grayish yellow (# b4b5ac). Move the resulting ellipse 1px down and then hide it behind the first ellipse created in this step.
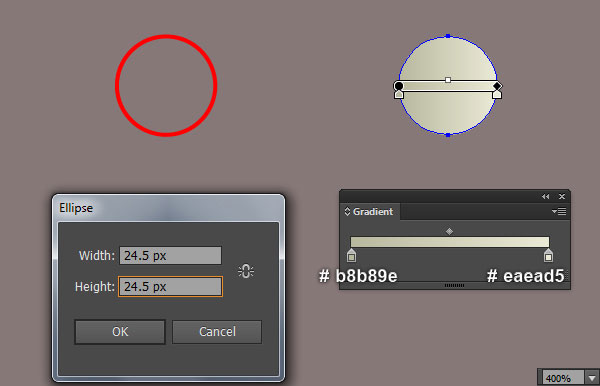
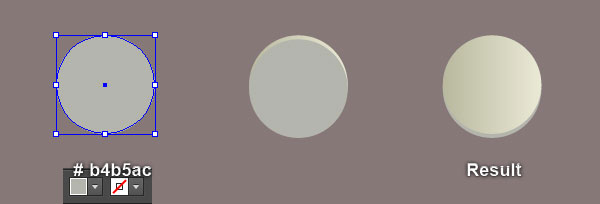
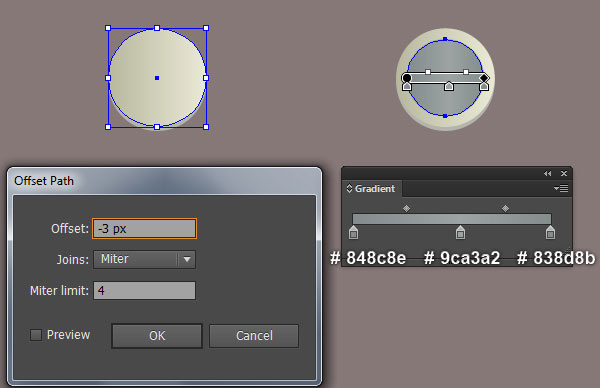
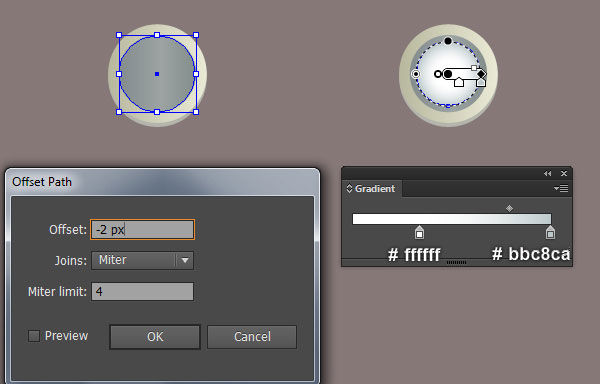
43. Select the first ellipse created in the step 42 and go to the Object > Path > Offset Path… Enter a -3px Offset and click OK. Then replace the existing fill color of the newly created ellipse with new linear gradient as shown in the second image. Keep the resulting ellipse selected and open the Offset Path dialog box again. Enter a -2px Offset and click OK. Then replace the existing fill color of the newly created ellipse with the radial gradient as shown in the last image.
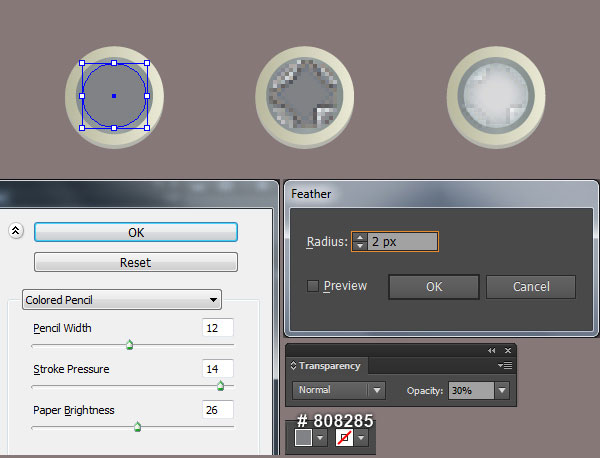
44. Select the smaller ellipse created in the step 43 and make a copy (Ctrl +C, Ctrl +F) of it, then replace the existing fill color of the copy with dark grayish blue (# 808285). Keep the resulting ellipse selected and go to the Effect > Artistic > Colored Pencil… Follow the data like you see in the second image and click OK. Apply a 2px Feather effect for the resulting ellipse and then reduce its Opacity to 30%.
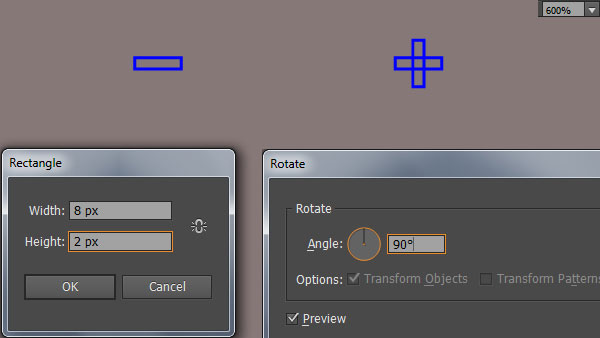
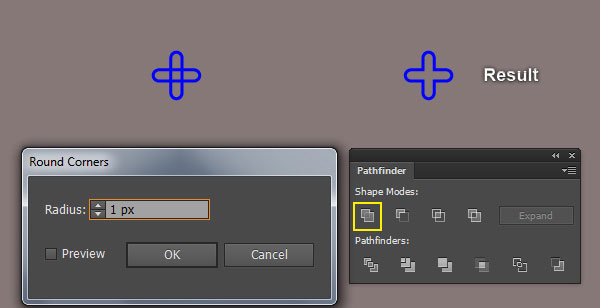
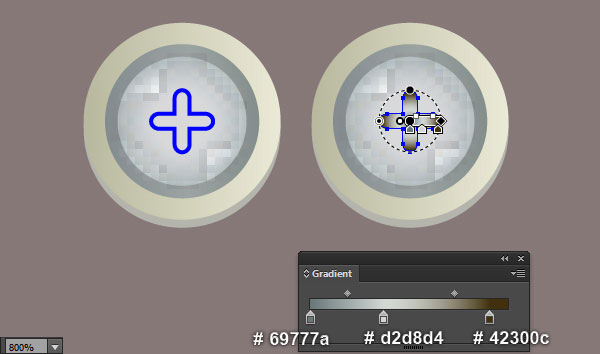
45. Pick the Rectangle Tool (M) and create a 8 by 2px blue rectangle. Still having the newly created rectangle selected and go to the Object > Transform > Rotate… Enter a 90 degrees Angle and click Copy. Reselect the two blue rectangles and go to the Effect > Stylize > Round Corners… Enter a 1px Radius and click OK. Keep the resulting rectangles selected and go to the Object > Expand Appearance. Next open the Pathfinder panel (Window > Pathfinder) and click on the Unite button. Place the resulting object to the position like you see in the next to last image. Remove the stroke of this blue object and then fill it with the radial gradient as shown in the last image.
46. Select the shape created in the step 45 and make a copy (Ctrl +C, Ctrl +F) of it. Keep the copy selected, swap the fill and stroke colors by clicking the bent double-headed arrow next to the Fill and Stroke color swatches in the Toolbox. Change the stroke weight of the resulting object to 0.5px and then replace the existing stroke color with very dark grayish green (# 41463c). Still having the resulting object selected and apply a 1px Feather effect for it. Now reselect the two objects created from beginning step 45 to this time and go to the Object > Transform > Rotate… Enter a 12 degrees Angle and click OK. Finally select and group (Ctrl +G) all objects created from beginning step 42 to this time. The screw is ready and looks like in the last image.
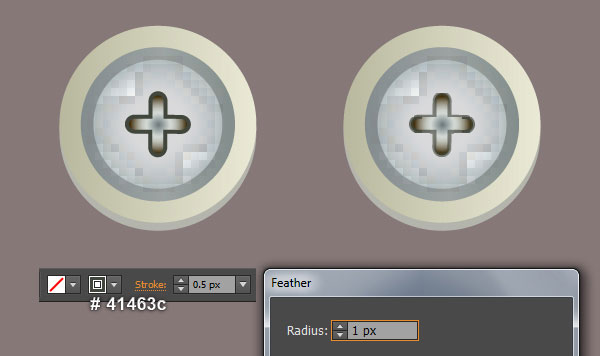
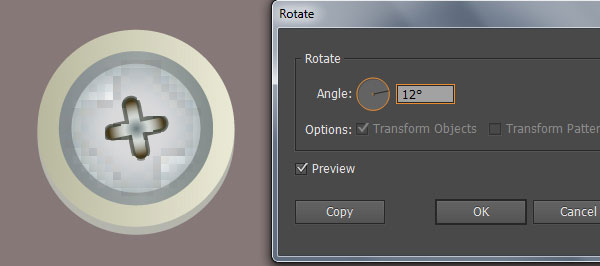
47. Likewise, repeat the same process as the previous steps to draw the second screw. Next place these screws to the positions like you see in the last image below.

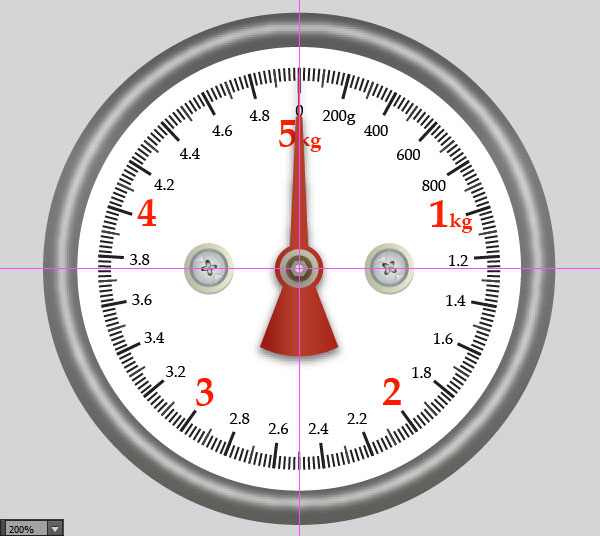
48. Select and group (Ctrl +G) all objects created from beginning step 23 to this time. The dial of the kitchen scale is done! Next place this dial to the position as shown in the first image.
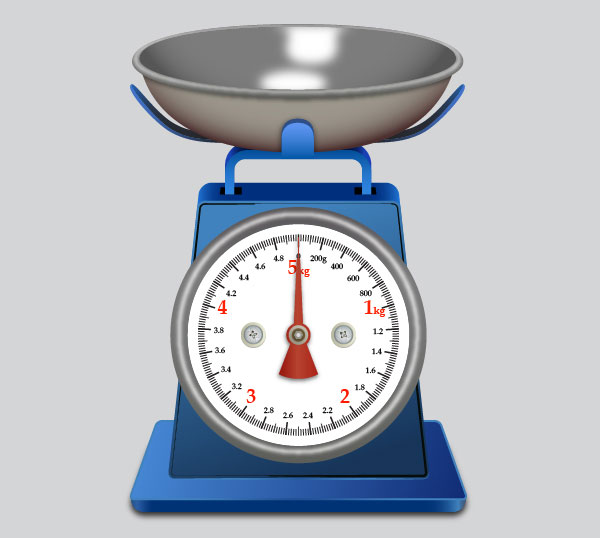
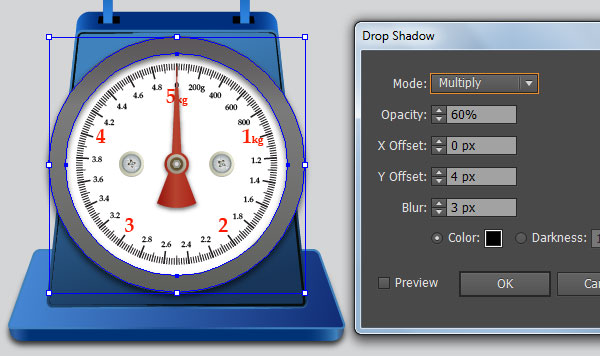
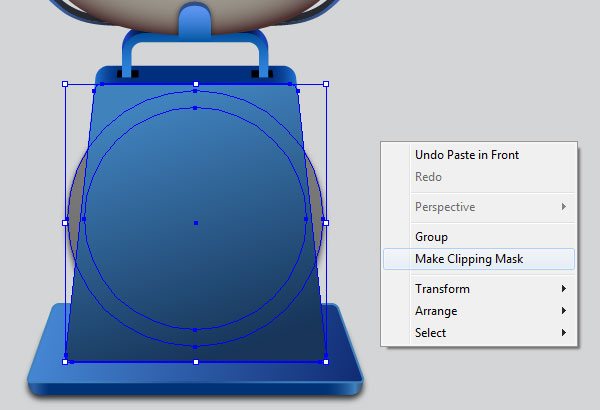
49. Pick the Selection Tool (V) and double-click on the dial. Select the compound path as shown in the first image and press (Ctrl +C) to copy it. Next double-click on the anywhere outside of the dial and press (Ctrl +F) to paste the compound path was copied in this step. Keep this object selected and go to the Effect > Stylize > Drop Shadow… Follow the data like you see in the second image and click OK. Now select the first shape created in the step 8 and make a copy (Ctrl +C, Ctrl +F) of it, then bring the copy to front (Ctrl +Shift +Right Square Bracket). Still having this copy selected, hold down the Shift and click on the compound path with shadow effect applied in this step. Right-click on the artboard and then select the Make Clipping Mask section from the drop-down menu. Finally hide the clipping set behind the dial of the kitchen scale.
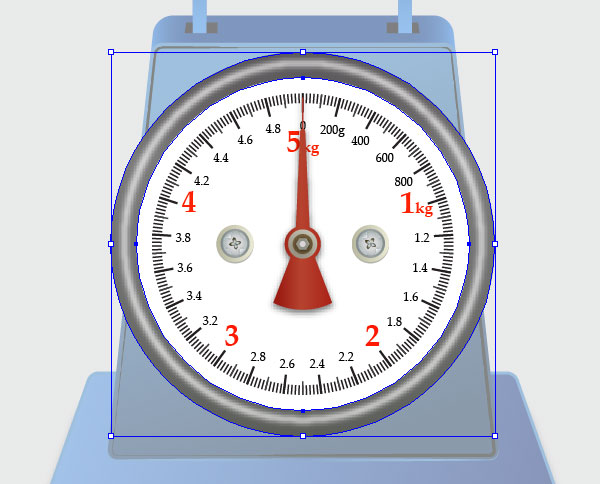
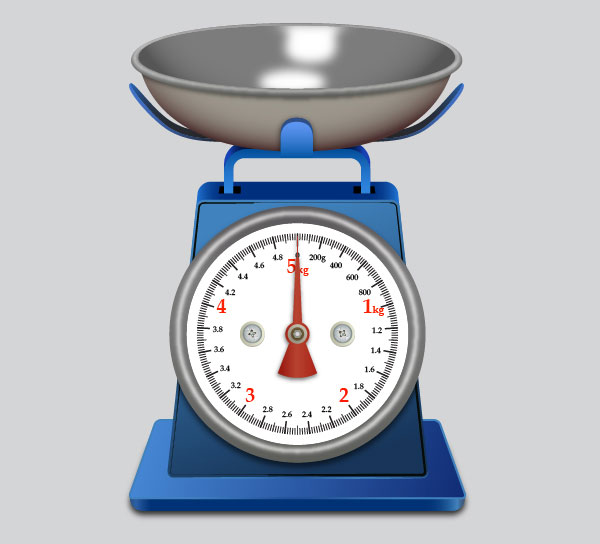
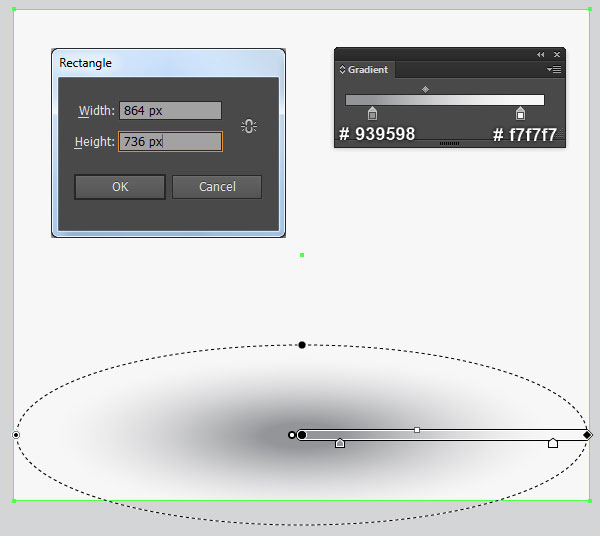
50. Before you continue, select and group (Ctrl +G) all objects created from beginning step 2 to this time. We are done with the kitchen scale for the moment. It’s time for the background now. With the help of the Rectangle Tool (M) and the Gradient Tool (G), create a 864 by 736px rectangle like you see in the first image. The last thing to do is place the kitchen scale into the newly created background.
And We’re Done!
