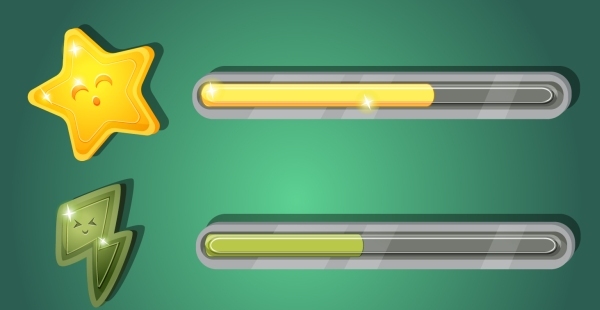
There is so much you can create for your own game interface and for this tutorial I am going to show you how to create Game Progress Bar with a cute recourse icon using Adobe Illustrator. We will use the Pathfinder panel to combine objects into new shapes, add the Transparency effects to objects and many more. So, let’s get started.
1. Create a new document
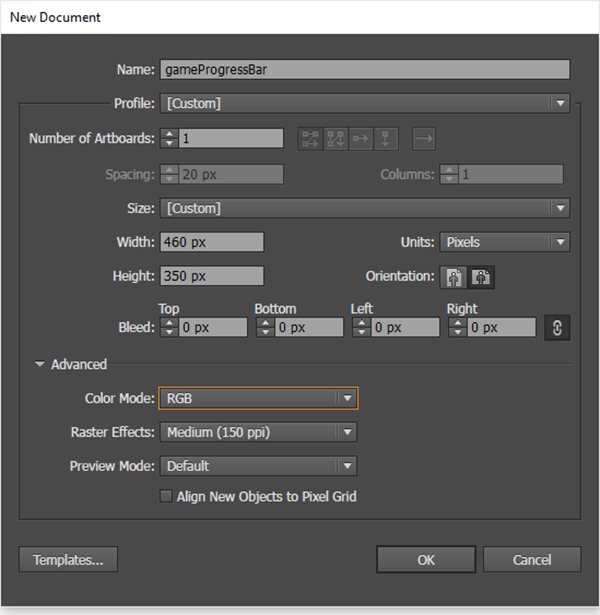
Open up Adobe Illustrator and set up a New Document (Ctrl + N). Name your document, select Pixels from the Units drop-down menu, and enter 460 in the Width box and 350 in the Height box. Click on the Advanced button, select RGB from the Color Mode drop-down menu, Screen (150ppi) and before you hit OK make sure that the Align New Objects to Pixel Grid box is unchecked.
2. Create the Star Icon
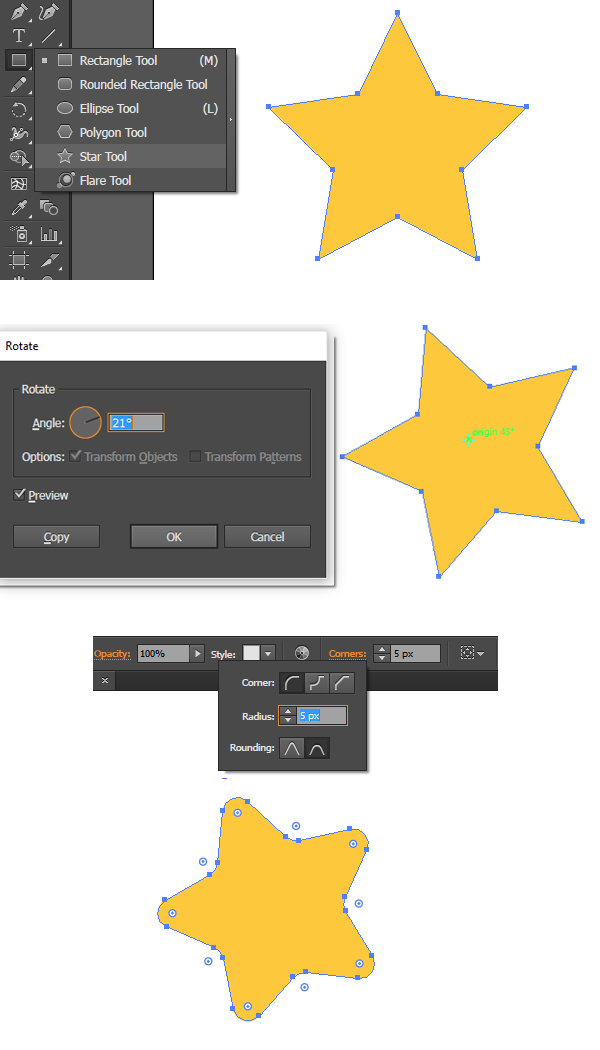
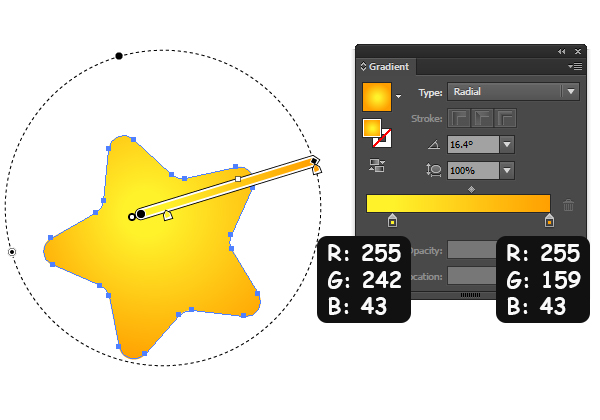
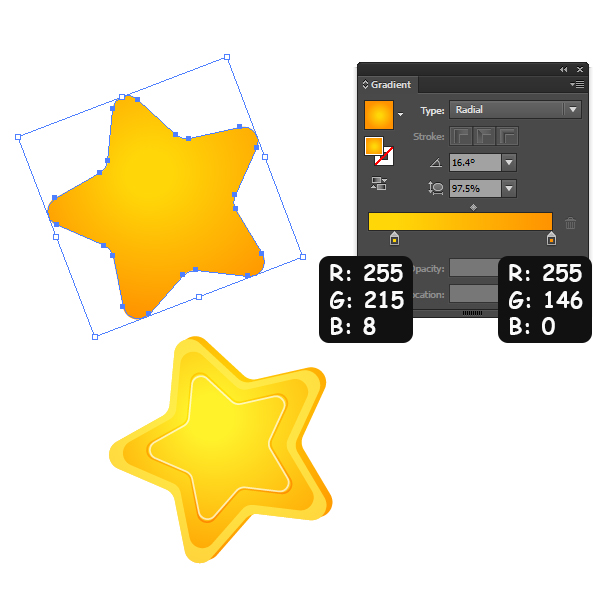
Step 1: Let’s create the star icon. Pick the Star Tool, click and drag to draw holding the Shift key. Set the Width of the star to 86 px. Pick the Rotate Tool (R) and click on the star’s center holding the alt key. Now you will see the Rotate Tool’s (R) dialog box. Set the Angle to 21 and hit OK. Keep the star selected and pick the Direct Selection Tool (A), set the corner radius to 5 px and the Rounding to Absolute. Fill the object with gradient and no stroke (See in the images below).
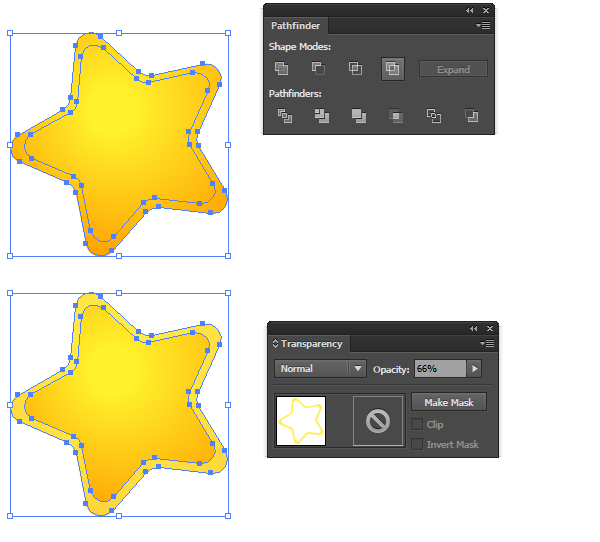
Step 2: Copy the star and paste in front (Ctrl + C, Ctrl + F) 2 times. Now keep the new object selected and size it down holding Alt + Shift keys. Select the object we copied before and the new one and go to Pathfinder Panel, choose Exclude. Set the color of the new object to 255, 239, 90 and the opacity to 66%.
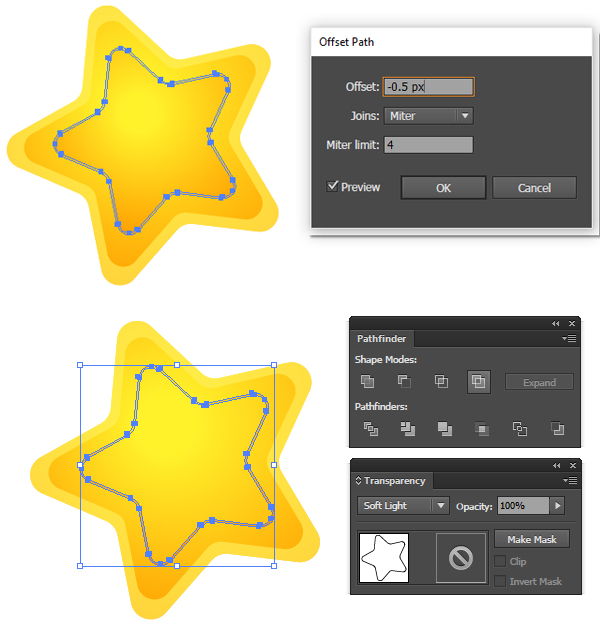
Step 3: Again copy the star and paste in front (Ctrl + C, Ctrl + F). Now keep the new object selected and size it down holding Alt + Shift keys. Then go to Object > Path > Offset Path. Set the Offset to -0.5 px. Select the object we created before and the new one and go to Pathfinder Panel, choose Exclude. Set the color of the new object to Black, the Blending Mode to Soft Light and the Opacity to 100%.
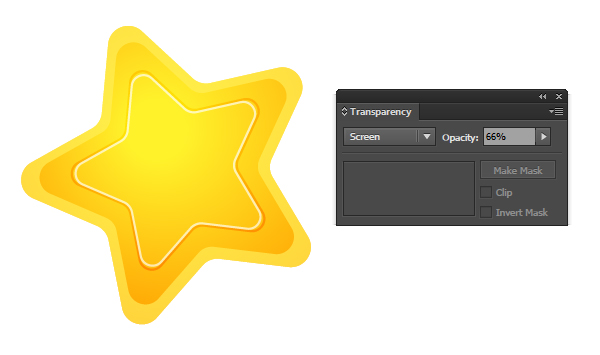
Step 4: Copy that new object and paste in front (Ctrl + C, Ctrl + F). Now keep the copied object selected and size it down holding Alt + Shift keys. Set the color of it to White, the Blending Mode to Screen and the Opacity to 66%.
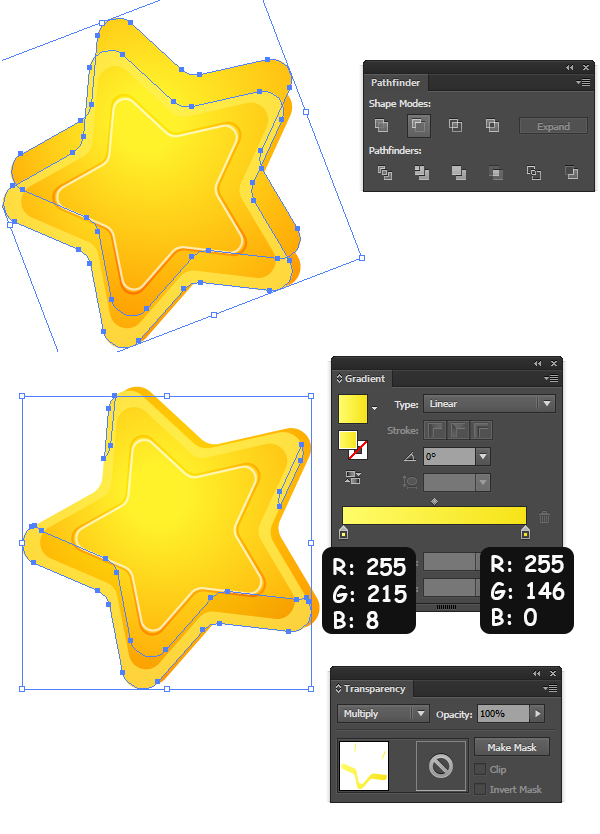
Step 5: Now copy the main star shape and paste in back (Ctrl + C, Ctrl + B). Keep the object selected, hold down the Shift key and move the object to the right pressing the Right Arrow Key 2 times. Then Move it up holding the Shift key and pressing the Up Arrow key 1 time. Fill the object with gradient (See in the images below).
Step 6: Now let’s make a little shadow. Copy the main star shape and paste in front (Ctrl + C, Ctrl + F) 2 times. Keep the new object selected and move it to the right and up just a little bit. Select the both copied objects and go to Pathfinder Panel, choose Minus Front. Set the Blending Mode to Multiply and the Opacity to 100%. Fill it with gradient.
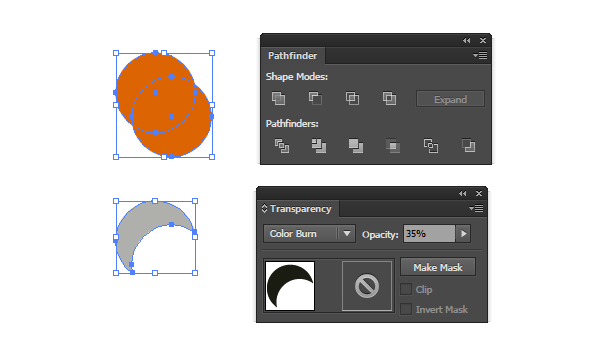
Step 7: In this step we will create a cute face for the star. Pick the Ellipse Tool (L) and draw a circle with 10px width and height. For now just fill any color you want, but no stroke. Copy the object and holding the Shift key move it to the right by pressing the Right Arrow key 2 times and move it down by pressing the Down Arrow key 3 times. Now select both of them and go to Pathfinder Panel, choose Minus Front. This will be the eye shape. Fill the new object to 26,28,18. Then set the Blending Mode to Color Burn and the opacity to 35%.
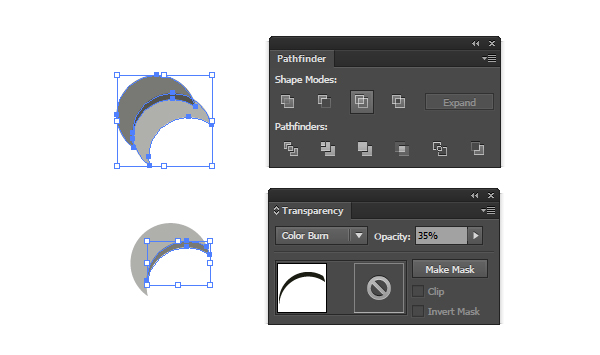
Step 8: Now let’s add some effects. Copy the eye shape and paste in front (Ctrl + C, Ctrl + F) 2 times. Select the new object and place it as shown in the image below. Now select both of the new objects and go to Pathfinder Panel, choose Intersect. Fill the new object to Black. Then set the Blending Mode to Color Burn and the opacity to 35%.
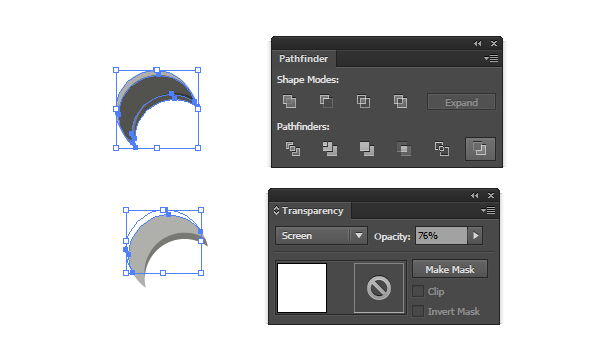
Step 9: Again copy the eye shape and paste in front (Ctrl + C, Ctrl + F) 2 times. Select the new object and place it as shown in the image below. Now select both of the new objects and go to Pathfinder Panel, choose Minus Back. Fill the new object to White. Then set the Blending Mode to Screen and the opacity to 76%.
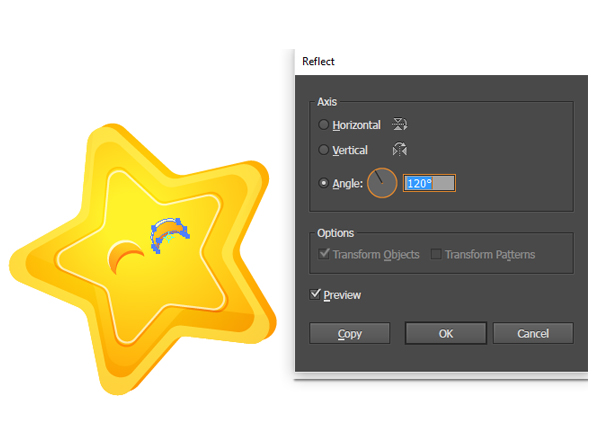
Step 10: Group all the 3 objects and place it onto the star. As you see we got a nice effect for the eye. Select the eye group, copy and paste in front (Ctrl + C, Ctrl + F). Select the new object and place it as shown in the image below. Now pick the Reflect Tool (O) and click on the center of the object holding the Alt key. Set the Reflection angle to 120 and hit OK.
Step 11: So the same way we can create a mouth for the star. Just follow the steps for the eye shape. In this case for the mouth I did a simple oval shape. Please see the image below.
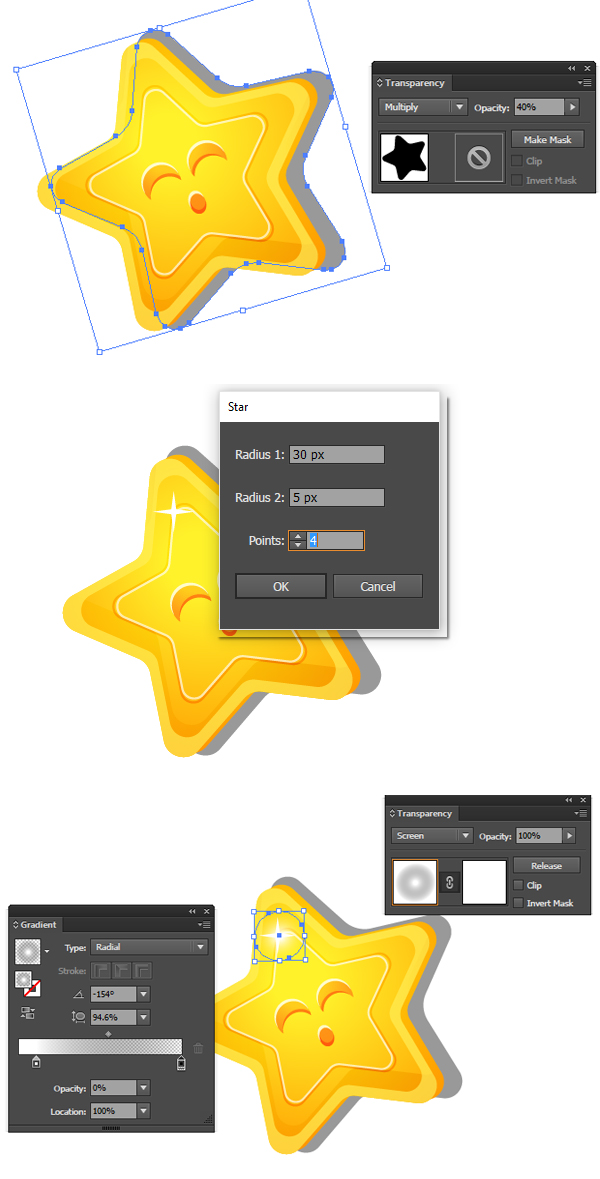
Step 12: For the final touch we will add some shine and back shadow to our cute star. So, to make the back shadow copy the main star shape and paste it to back (Ctrl + C, Ctrl + B). Move it to the right and up to drop some shadow. Set the color of that shape to Black, set the Blending Mode to Multiply and the opacity to 40%.
For adding some shine effect to our star pick the Star Tool and click on the Artboard. Now you see its pop-up window. Set the Radius 1 to 30px, the Radius 2 to 5px and the Points to 4. Hit OK. Size it down as shown in the image below and set the color to White. To make it more shiny lets create some gradient. Draw a circle with 14px Width and Height. And fill with gradient (From White -100% to Black-0% )as shown in the image below. Set the Blending Mode to Screen and Opacity to 100%. Place it behind the little shine star.
3. Create the Progress Bar
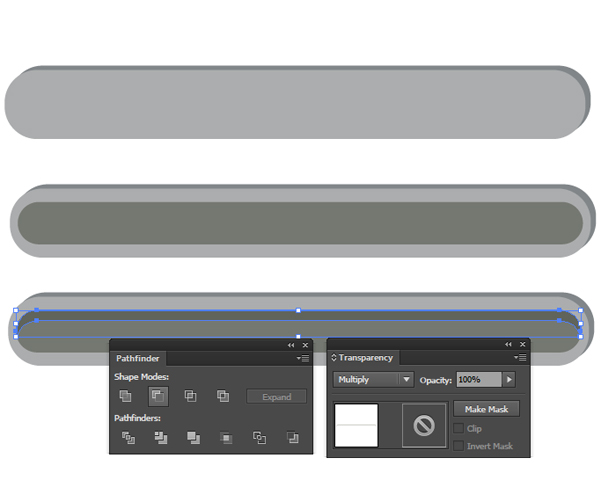
Step 1: Pick the Rounded Rectangle Tool, click on the Artboard, so will open up its window. Set the Width to 219px and the Height to 26px, set the Corner Radius to 12px. Hit OK. Set the color to 173,171,174 and no stroke. Select the shape, copy and paste to back (Ctrl + C, Ctrl + B). Move it to the right and up holding the Shift key by pressing the Arrow keys 2 times for each. Fill the new object to 129,134,137. Now copy the front shape again and paste in front (Ctrl + C, Ctrl + F). Set the Width to 214px and the Height to 16px. Again copy the new object and paste in front (Ctrl + C, Ctrl + F) 2 times. Move the one to down 3 times holding Shift key by pressing the Down Arrow key. Now select the both objects and go to Pathfinder Panel, choose Minus Front.
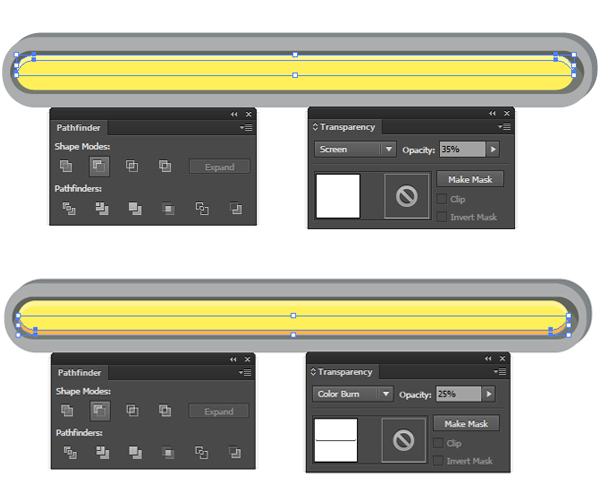
Step 2: Pick the Rounded Rectangle Tool, click on the Artboard, and will open up its window. Set the Width to 208px and the Height to 13px, set the Corner Radius to 7px. Hit OK. Fill the color to 255,239,79 and no stroke.
Place it as shown in the image below. Select the shape, copy and paste in front (Ctrl + C, Ctrl + F) 2 times. Select one and move it down. Then select the both new shapes and go to Pathfinder Panel, choose Minus Front. Set the Blending Mode to Screen and opacity to 35%. Again select the shape, copy and paste in front (Ctrl + C, Ctrl + F) 2 times. Select one and move it up. Then select the both new shapes and go to Pathfinder Panel, choose Minus Front. Set the Blending Mode to Color Burn and opacity to 25%.
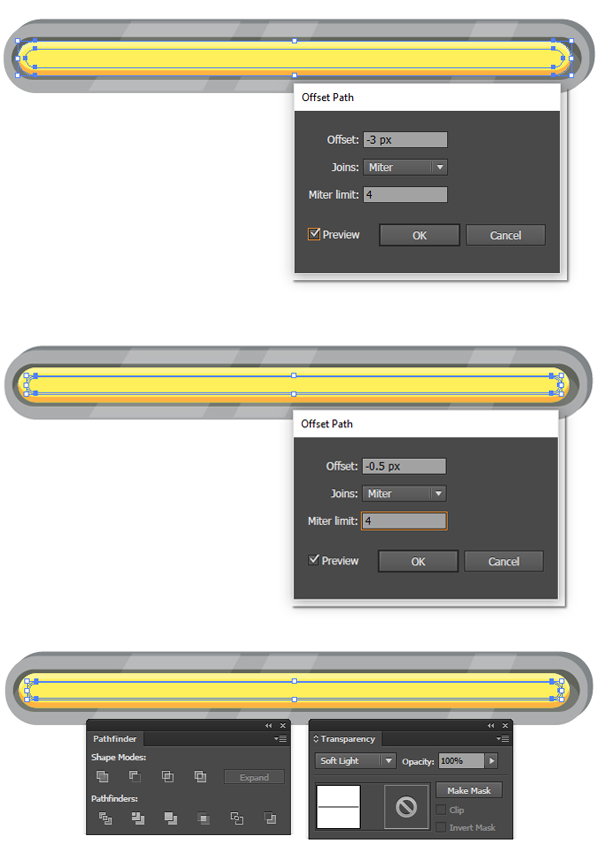
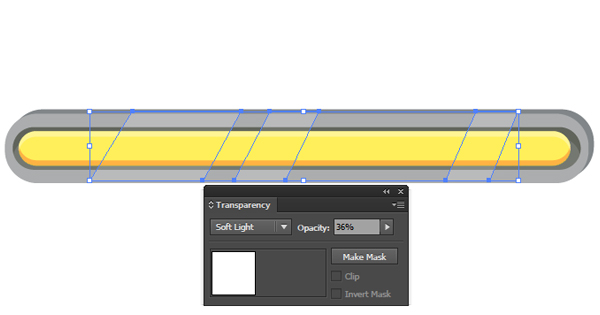
Step 3: Pick the Pen Tool and draw some shine on the bar. Fill the objects White and set the Blending Mode to Soft Light, Opacity to 36%. Group the objects and place it behind the yellow object. See the image below.
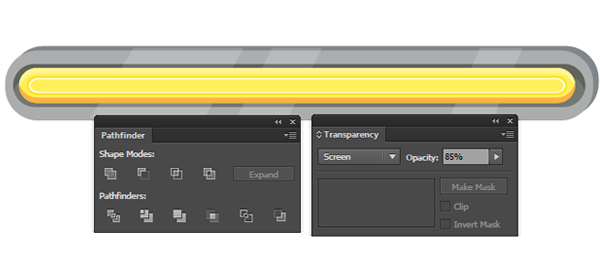
Step 4: Select the yellow shape and go to Object > Path > Offset Path. Set the Offset to -3 px. Keep the new object selected and again go to Object > Path > Offset Path. Set the Offset to -0.5 px. Select the two objects and go to Pathfinder Panel, choose Exclude. Fill the color to black and no stroke. Set the Blending Mode to Soft Light and opacity to 100%. Again select the new shape, copy and paste in front (Ctrl + C, Ctrl + F). Down its size a little bit and set the color to White. Set the Blending Mode to Soft Light and opacity to 100%.
Step 5: At the end add some shining stars on it and back shadow as we did with the star icon. You can also make the yellow shape shorter, so the progress bar will look dynamic. Finally put all together with a nice background.
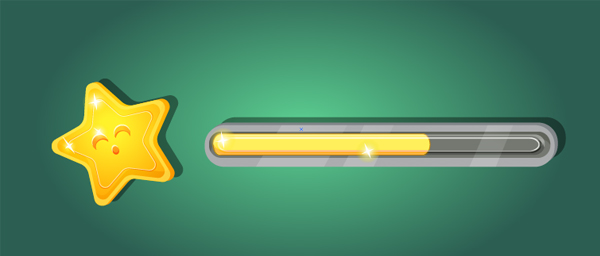
You can also do another kind of shapes (heart, energy, leaf and so on) just follow the same steps above.
That is it. Thank you all, I will be happy to see Your versions of game progress bars 🙂

