In today’s tutorial, we’re going to take an in-depth look behind the process of creating a visibility icon, and see how we can make some simple shapes and turn them into a finished usable product.
So, assuming you already have the software running in the background, bring it up and let jump straight into it!
Program: Adobe Illustrator CS6 – CC 2020
Difficulty: Beginner
Estimated Completion Time: 20 Minutes
Step 1
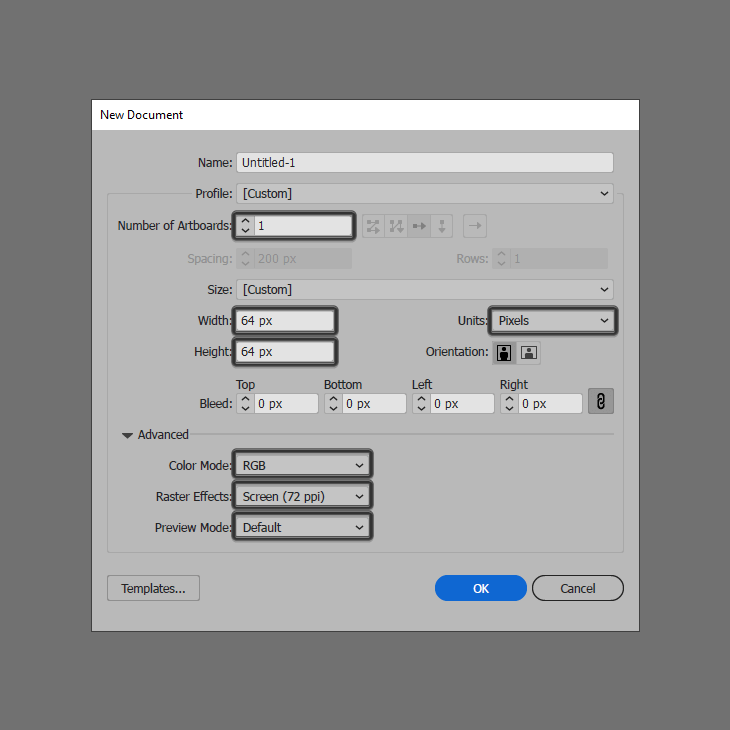
As we with every new project, we’re going to start by setting up a New Document, by heading over to File > New (or by using the Control-N keyboard shortcut), which we will then adjust as follows:
Profile: Web
Number of Artboards: 1
Width: 64 px
Height: 64 px
Units: Pixels
Step 2
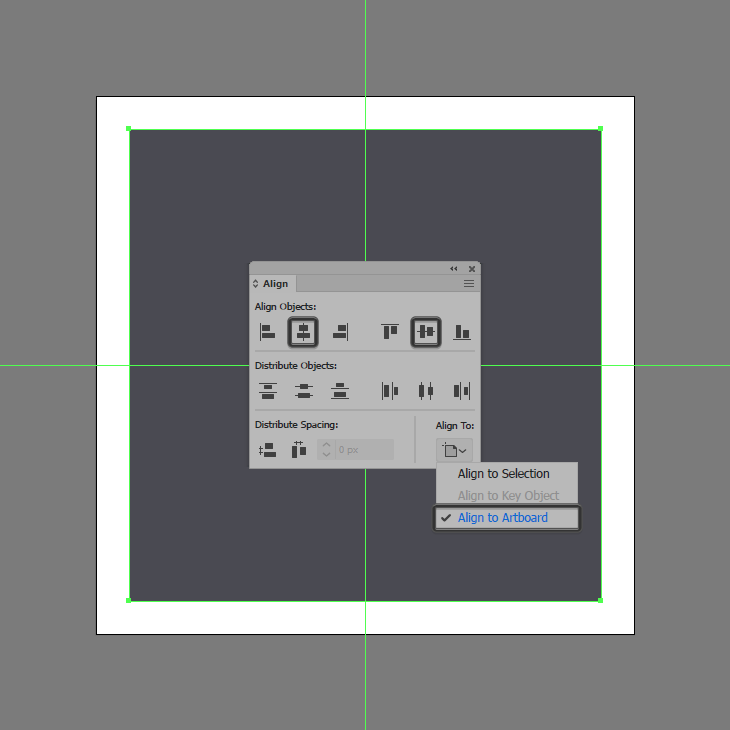
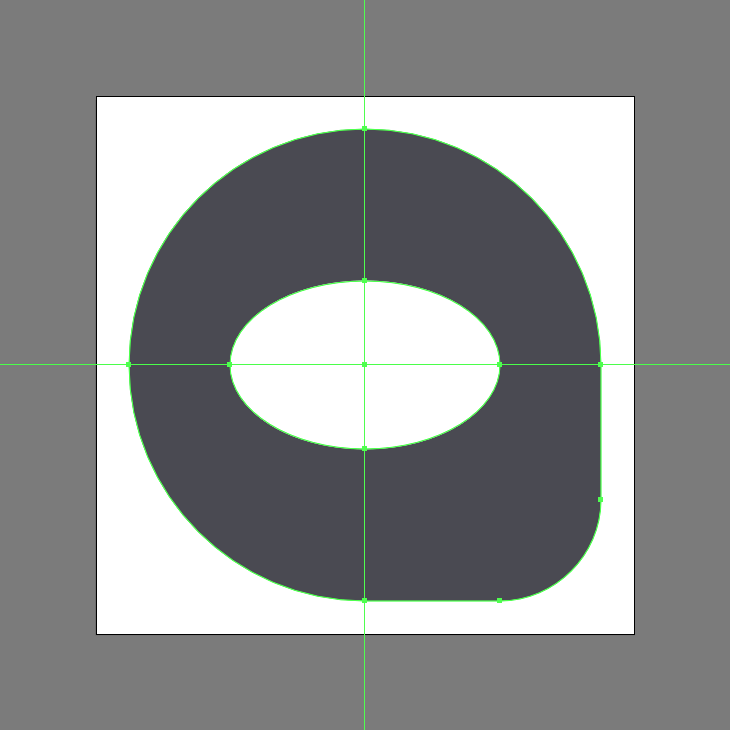
Create the main shape for the icon’s body using a 56 x 56 px square, which we will color using #494951 and then center align to the underlying Artboard using the Align panel’s Horizontal and Vertical Align Center options.
Step 3
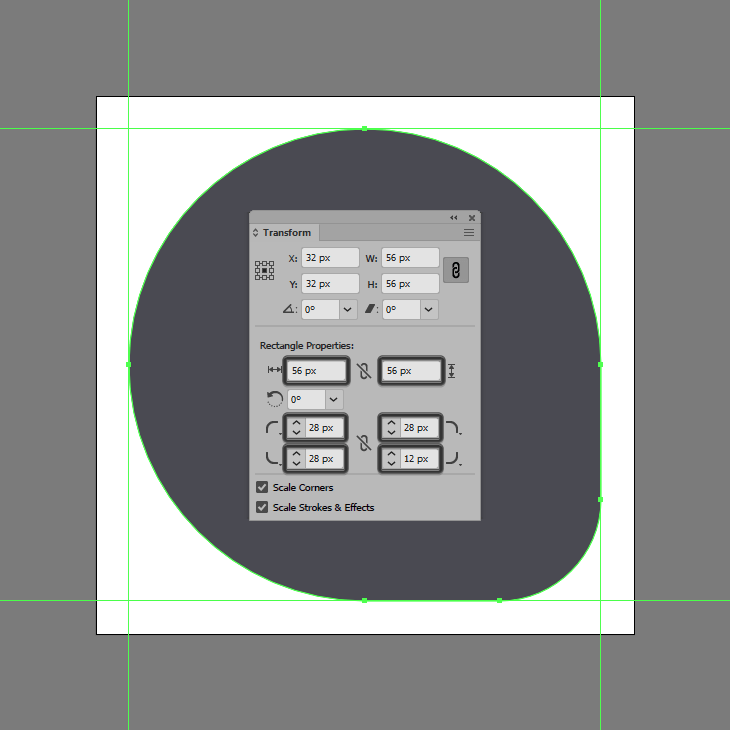
Adjust the shape that we’ve just created, by opening up the Transform panel, and then setting the Radius of its bottom-right corner to 12 px, and its remaining ones to 28 px.
Step 4
Add the main shape for the eye using a 32 x 20 px ellipse, which we will color using #ffffff and then center align to the square that we’ve just adjusted.
Step 5
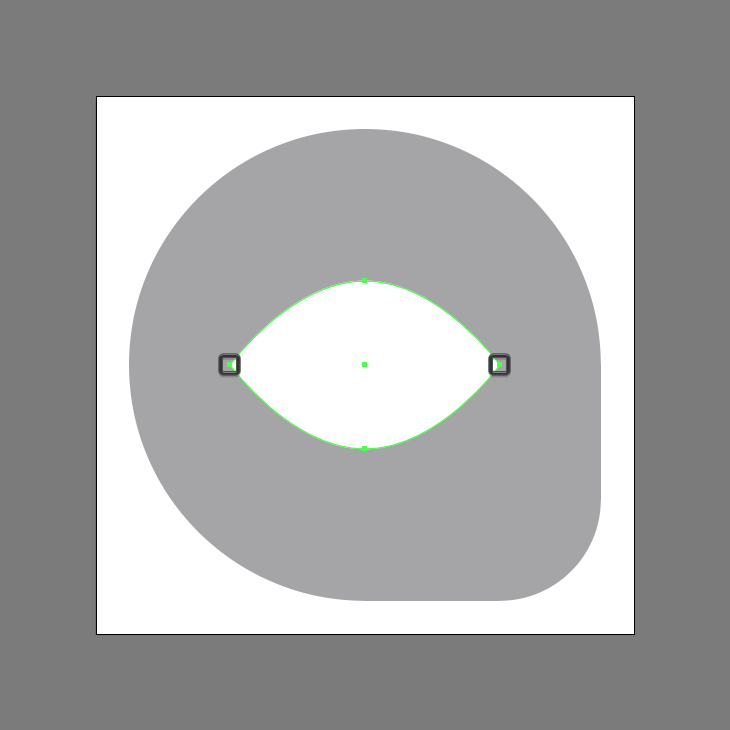
Adjust the ellipse by grabbing the Anchor Point Tool (Shift-C), and then pinching its side anchor points as seen in the reference image by simply clicking on them.
Step 6
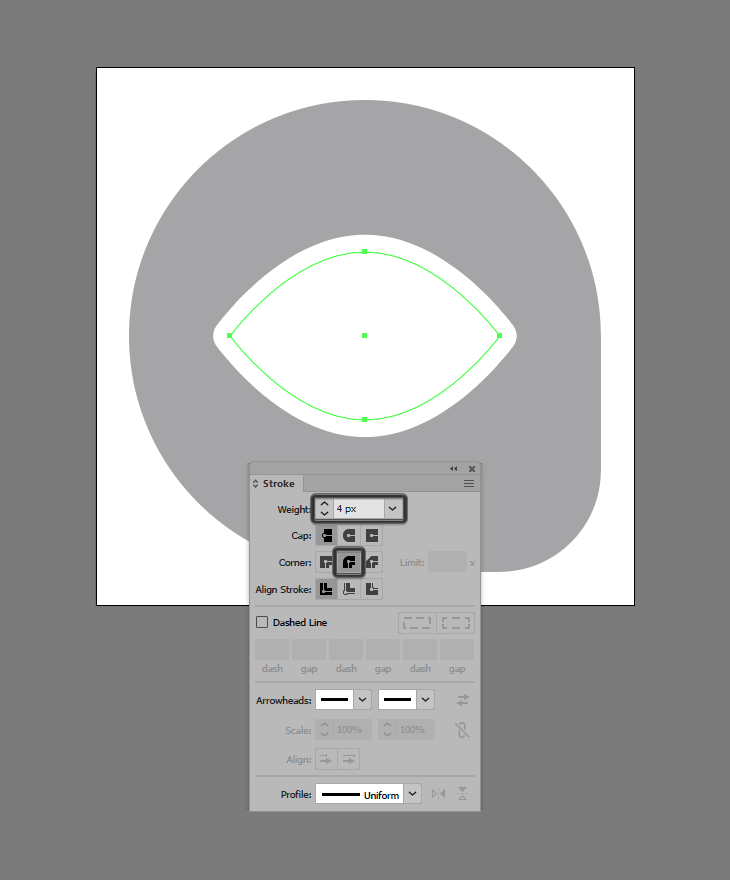
Increase the resulting shape’s roundness, by creating a copy of it (Control-C), which we will paste in front (Control-F) and then adjust by first flipping its Fill with its Stroke (Shift-X), and then opening up the Stroke panel and setting its Weight to 4 px and its Corner to Round Join. Once you’re done, select and group the two shapes together using the Control-G keyboard shortcut.
Step 7
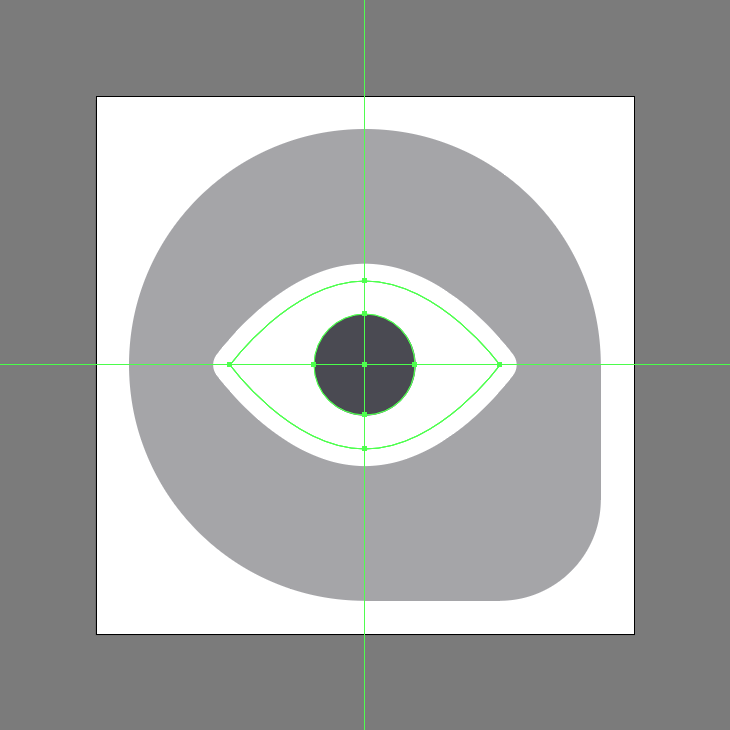
Add the iris using a 12 x 12 px circle, which we will color using #494951 and then center align to the eye’s main body.
Step 8
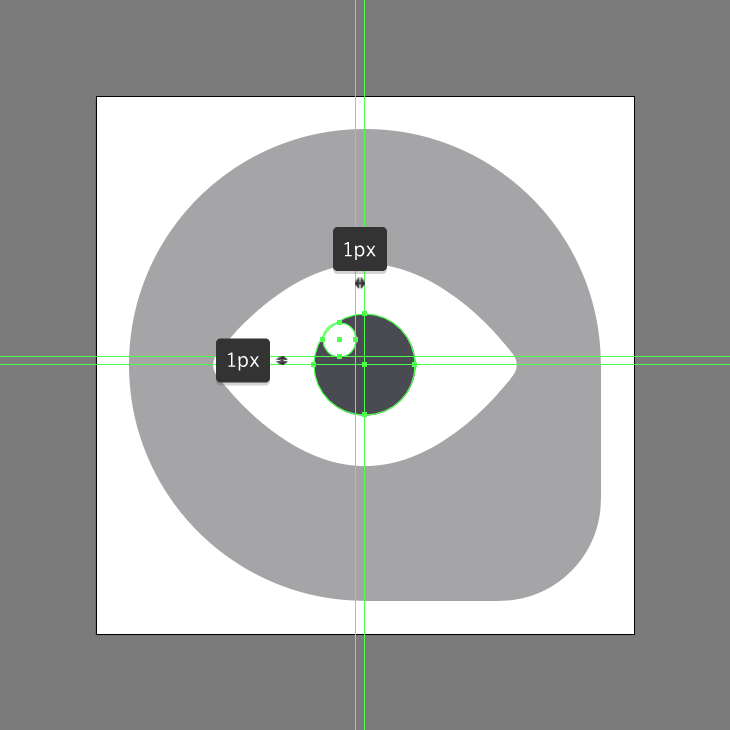
Create the little highlight using a 4 x 4 px circle (#ffffff), which we will position onto the iris as seen in the reference image. Once you have the shape in place, make sure you select and group (Control-G) all of the eye’s composing shapes before moving on to the next step.
Step 9
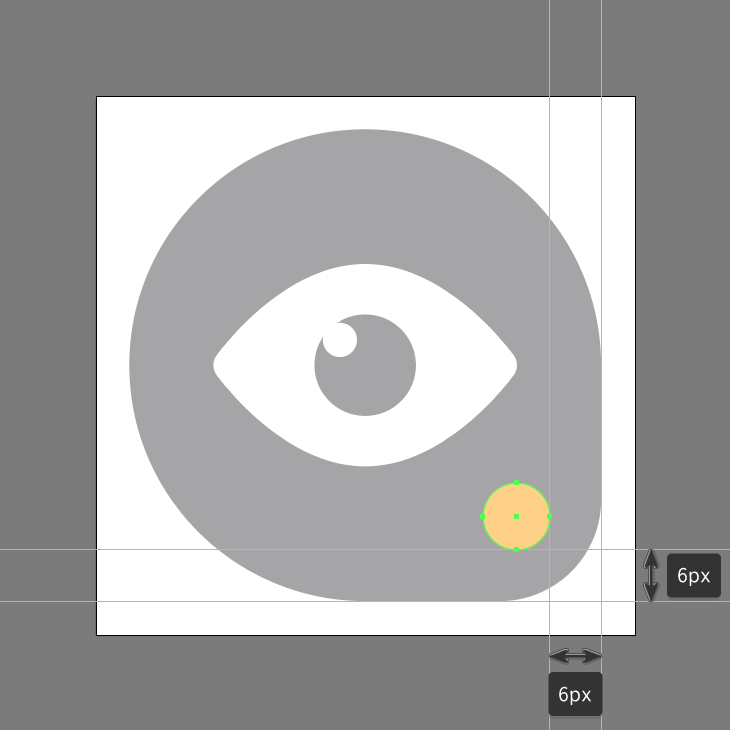
Finish off the icon and with it the project itself, by creating an 8 x 8 px circle (#ffd188), which we will position onto the larger shape’s bottom-right corner, at a distance of just 6 px. Take your time, and once you’re done, don’t forget to select and group (Control-G) all of the icon’s composing shapes before finally hitting that save button.
Great Work!
As always, I hope you had fun working on the project, and most importantly managed to learn something new and useful during the process.
That being said, if you have any questions, feel free to post them within the comments section and I’ll get back to you as soon as I can!
