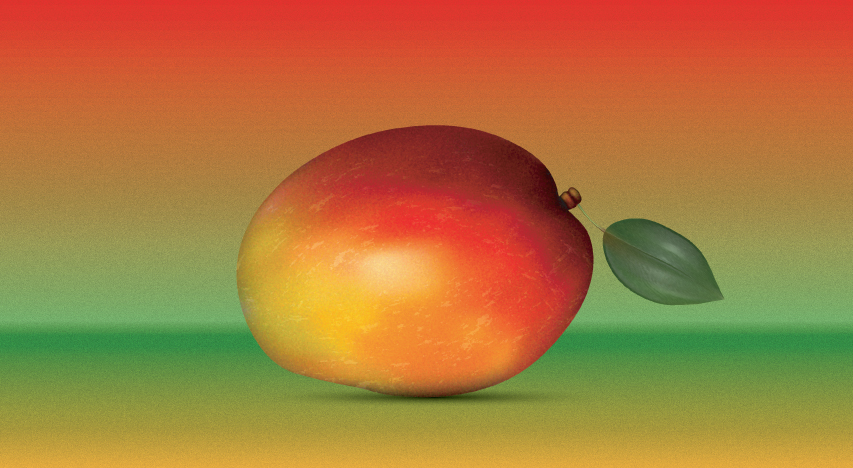
In the following Adobe Illustrator tutorial you will learn to use Gradient Mesh and Textures to create a realistic Mango.
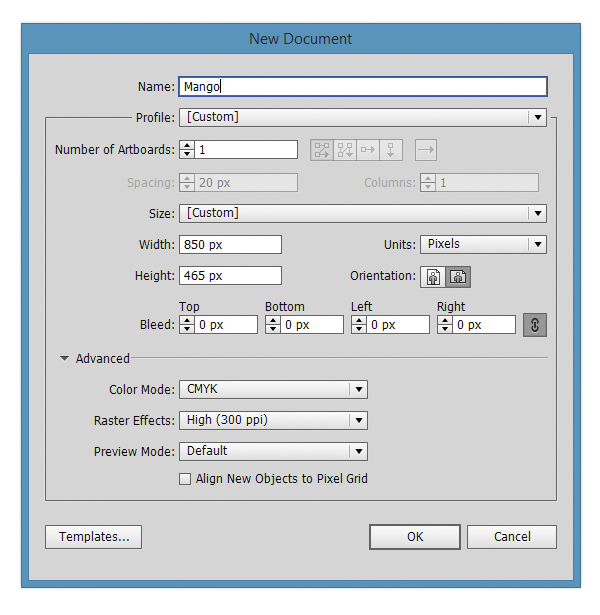
1. Open Adobe Illustrator and create a new document (Ctrl + N). Select CMYK Color Mode, 300 PPI Raster Effects and make sure that Align New Objects to Pixel Grid is unchecked.
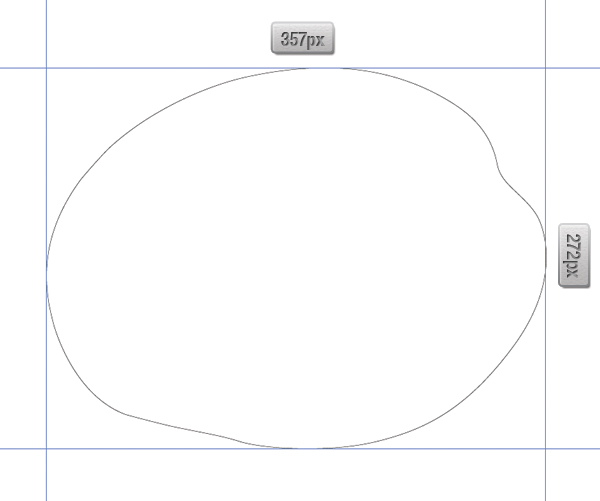
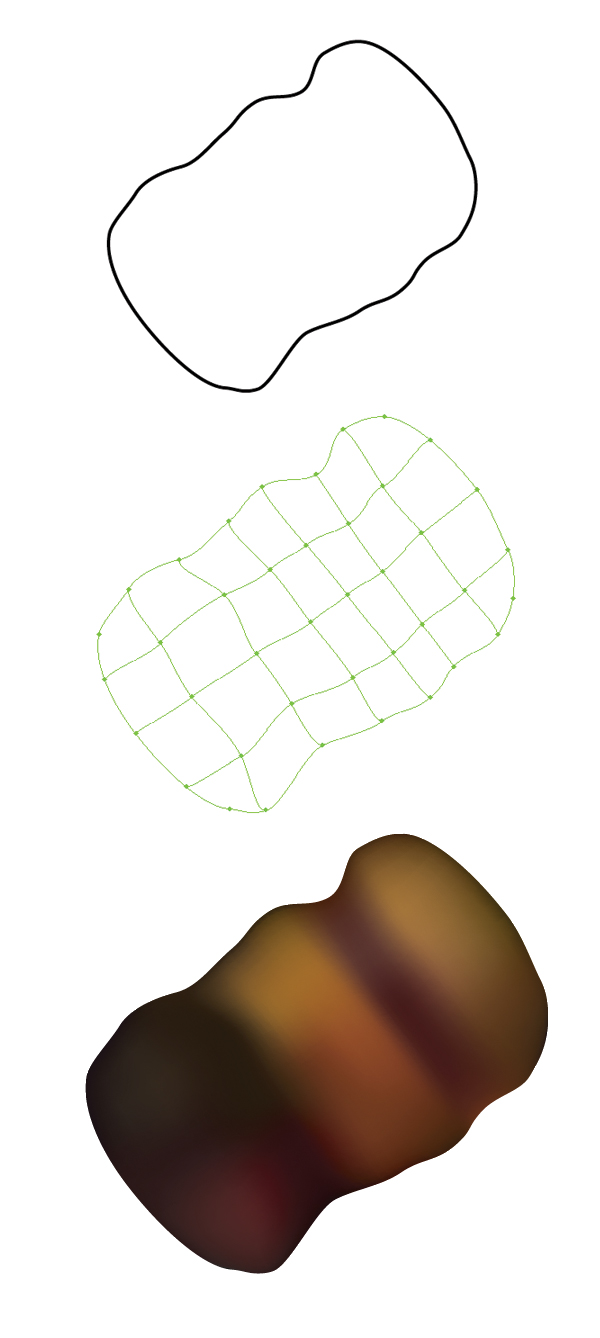
2. Using the Pen Tool (P) draw the shape of the mango similar to the one in the image below. I made some guidlines in order to see how big it needs to be. Don’t forget to make a backup copy of this shape, we will use it later.
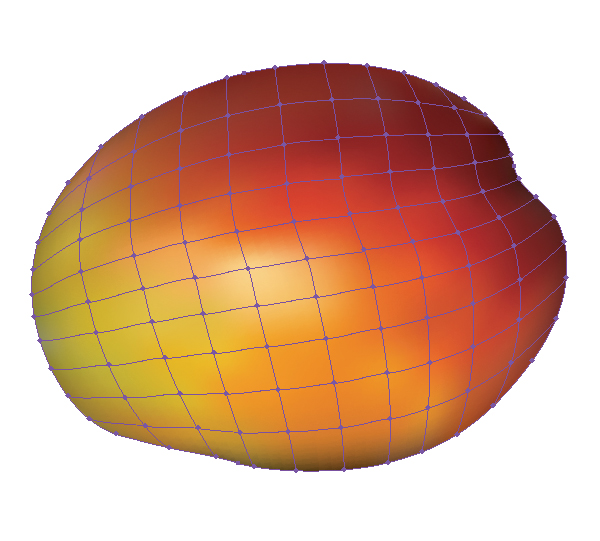
3. Now with the shape selected go to Object > Create Gradient Mesh. Enter a value of 10 to rows and 10 as well for the columns and hit the ok button. You can move the mesh points with the Direct Selection Tool (A). 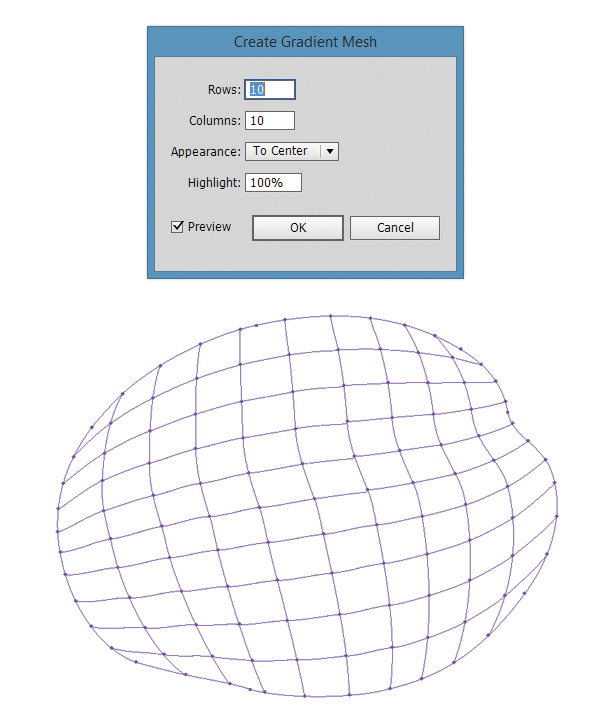
4. Now with the Direct Selection Tool (A) select step by step every mesh point and fill it them with colors. It doesn’t need to look exactly like in the image below, use your imagination.
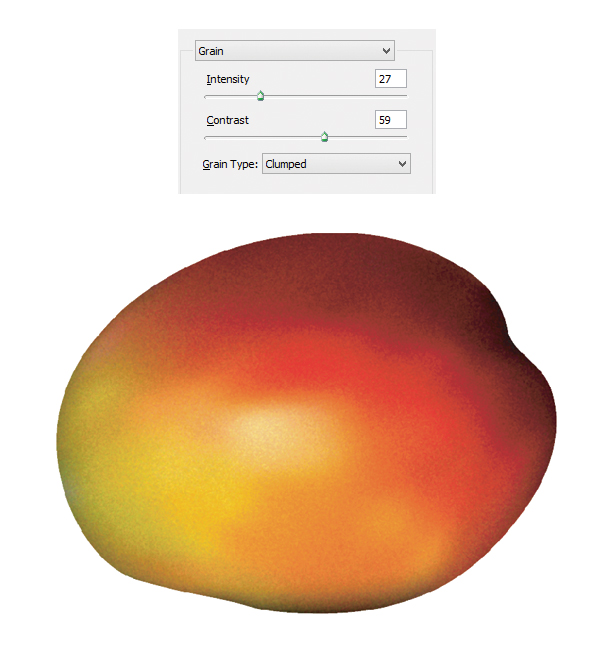
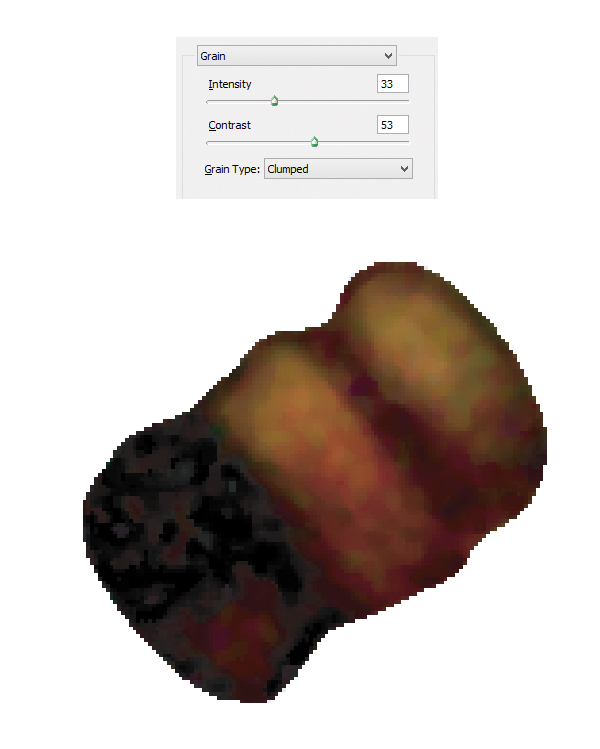
5. After you finish filling the mango with colors, select the shape and got to Effects > Texture > Grain. Enter the values from the screenshot below then hit the Ok button.
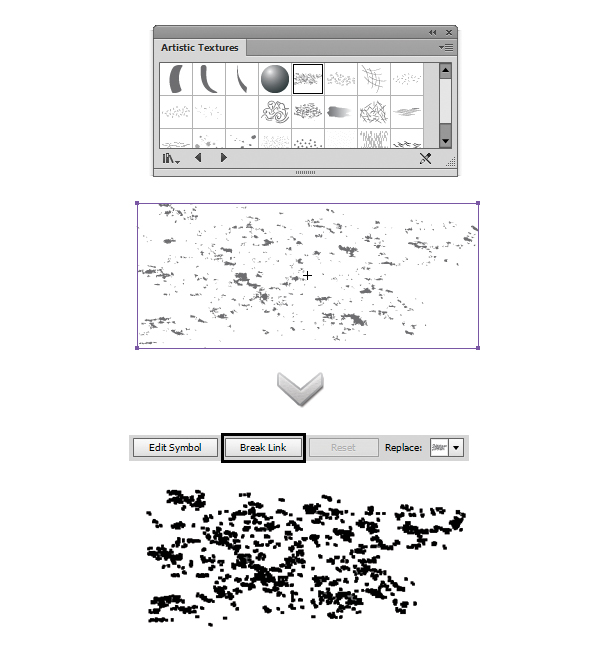
6. It’s time to add a texture to the mango. Got to Window > Symbols and from Symbols Library select Artistic textures then you will find „Charcoal” symbol. Drag it into your artwork the click Break Link in order to edit the texture.
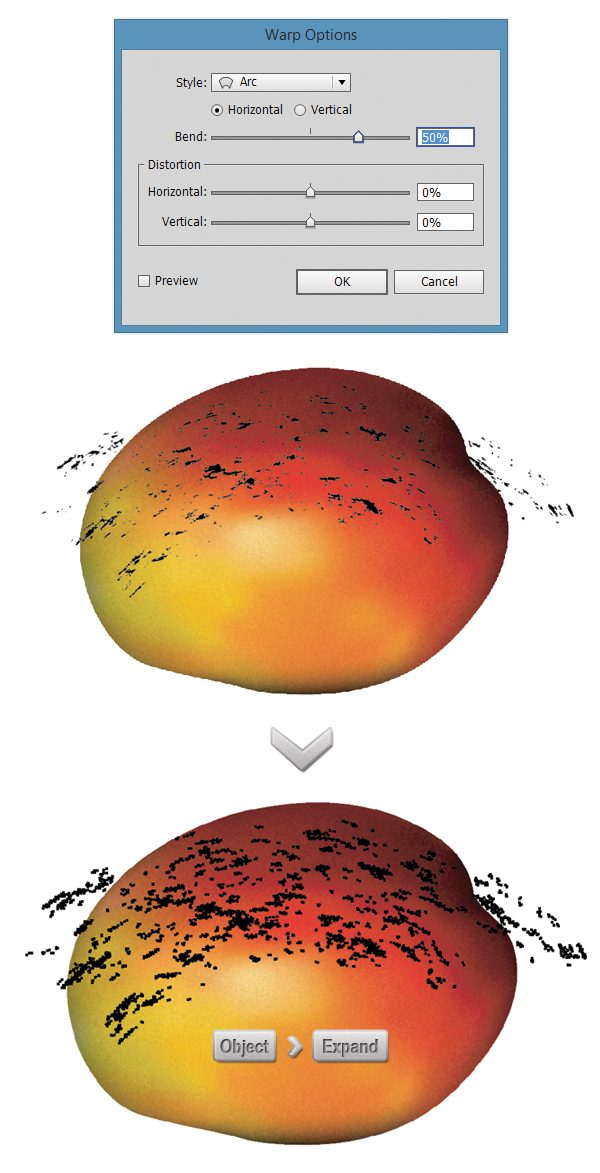
7. With the texture selected go to Object > Envelope Disort > Make with Warp, enter a value of 50% then hit the Ok button. After this go to Object > Expand then hit the OK button.
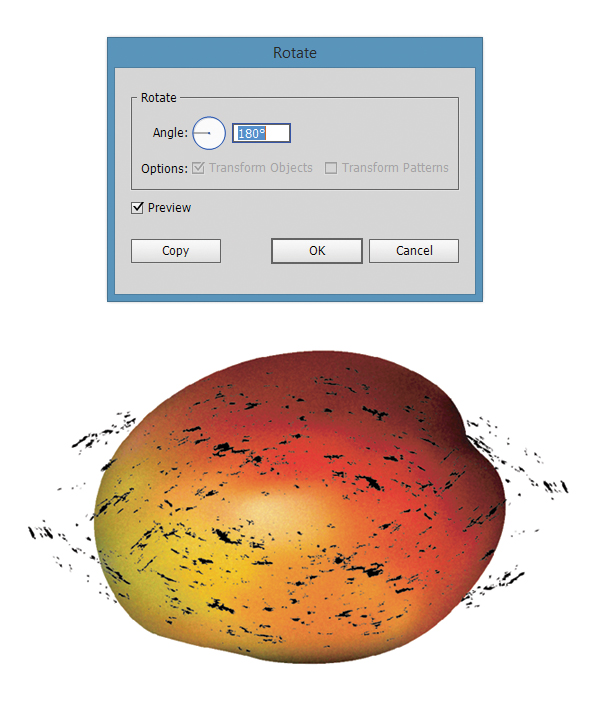
8. With the shape selected use the Rotate Tool (R) to rotate 180 degrees the shape then hit the Copy button.
9. Now select the first shape we made (from step 1), move it in front of the other shapes using the shortcut Ctrl + Shift + ] then select textures (both the original one and the rotated one) and the mango shape and got o Object > Clipping Mask > Make (Ctrl + 7). 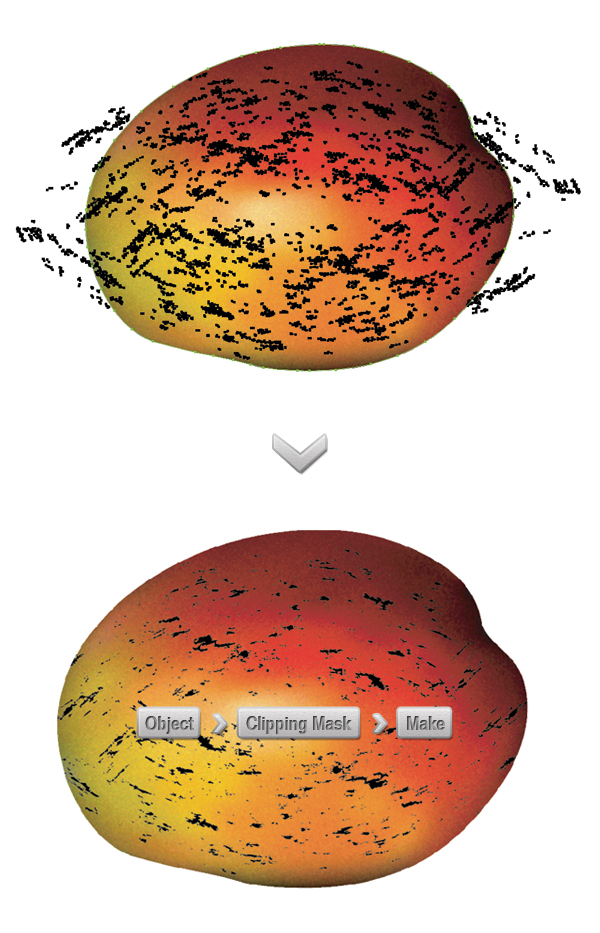
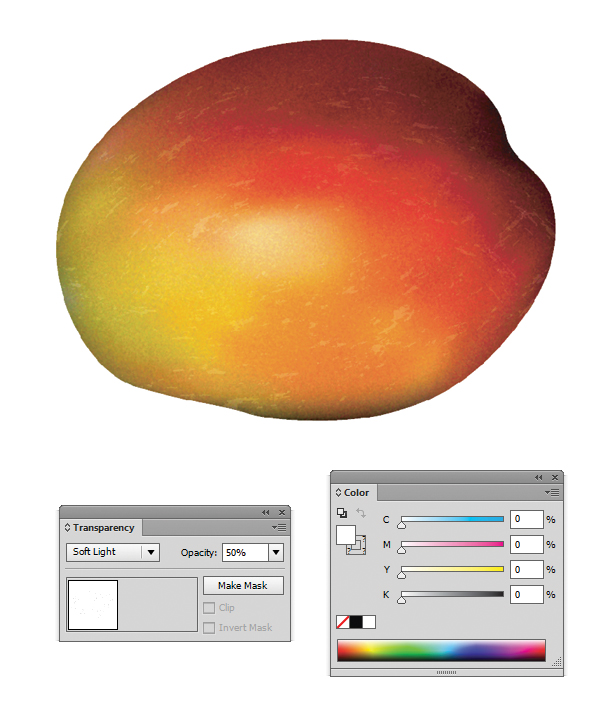
10. Now select the texture and fill it with white and from the Transparency Panel change the blending mode to Soft Light then lower the opacity to 50%.
11. Let’s draw the stalk of the mango. With the Pen Tool (P) draw a shape similar to the one from the image below then convert it into a Gradient Mesh like we did in step 3 with the mango shape. Again using the White Arrow Tool (A) select the mesh points and fill them with colors like in the image below.
12. With the stalk shape still selected go to Effects > Texture > Grain. Enter the values from the screenshot below then hit the Ok button.
13. Now let’s draw the steam of the leaf. Again using the Pen Tool (P), draw a shape similar to the one below and then convert it into a Gradient Mesh.
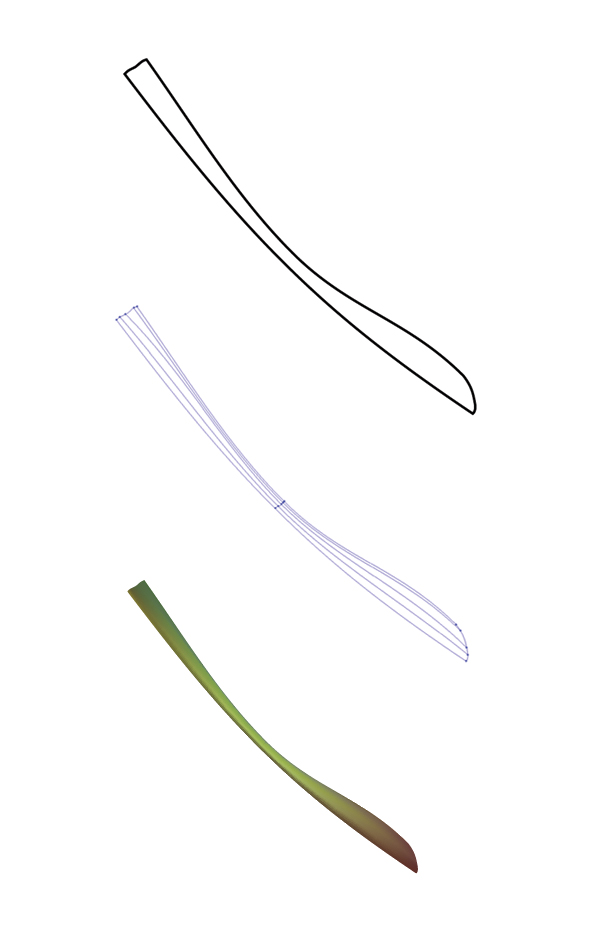
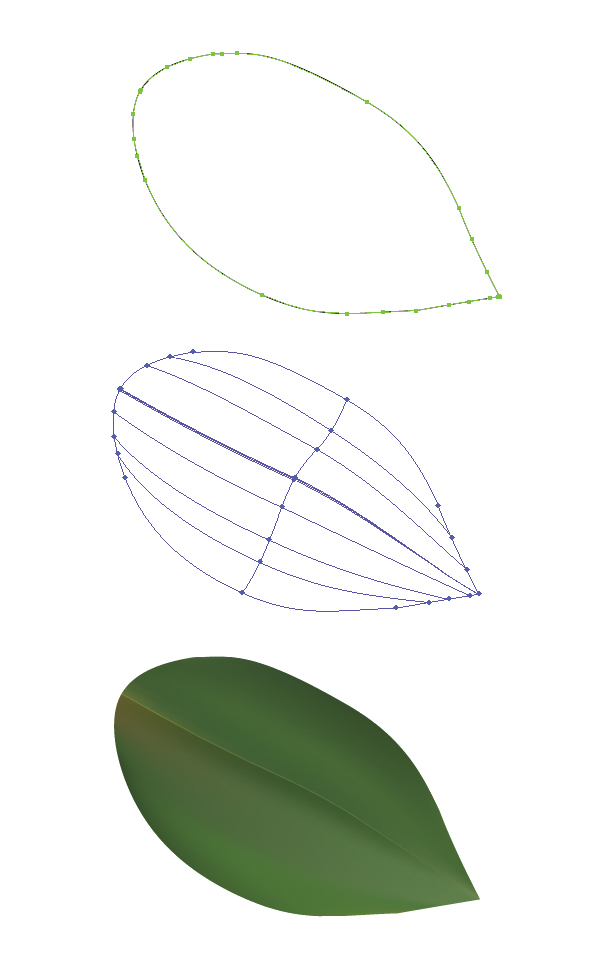
14. Now let’s draw the leaf. Again using the Pen Tool (P), draw a shape similar to the one below and then convert it into a Gradient Mesh.
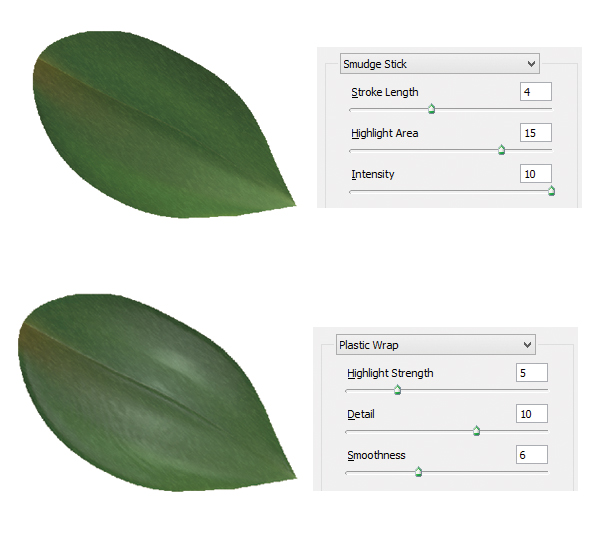
15. With the leaf shape selected go to Effects > Artistic > Smudge Stick, enter the values below and then hit the Ok button. Apply a Plastic Wrap effect by going to Effects > Artistic Plastic Wrap and then enter the values below.
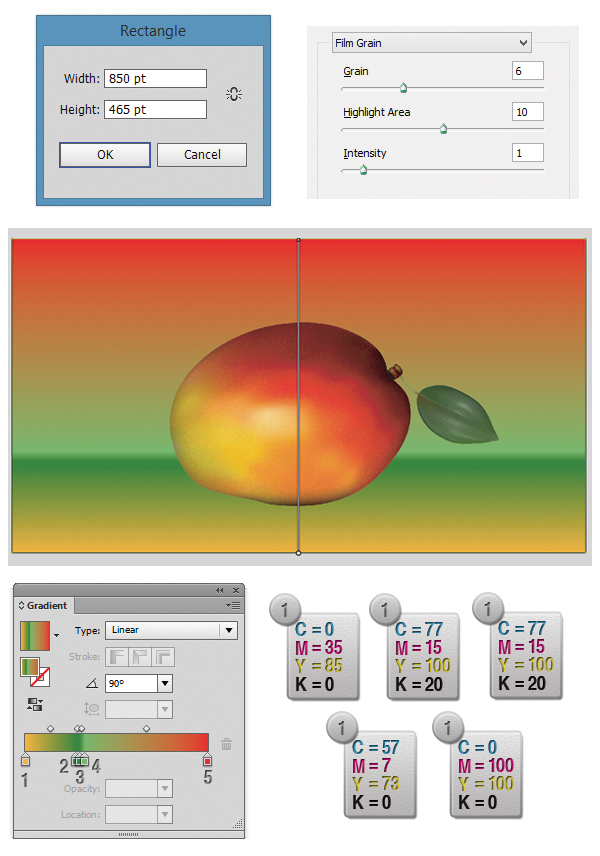
16. Now that we are done with the mango, let’s draw the background. Draw a 850x465px rectangle and then fill it with a multicolor Gradient. Then with the rectangle selected got o Effects > Texture > Film Grain and enter the values from the image below.
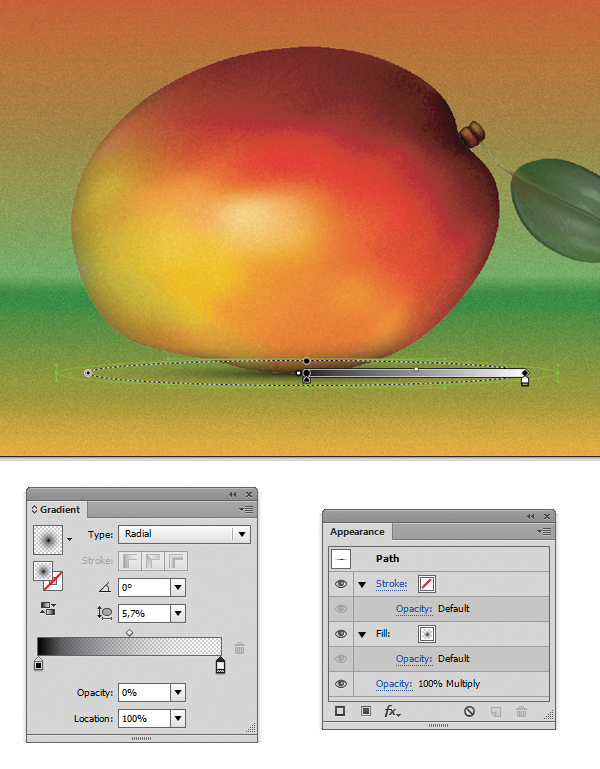
17. We are at the final step, the mango shadow. With the Elipse Tool (L) create a circle then fill it with a Black to White Radial Gradient. Make sure that the White has the Opacity 0 then from the Transparency Panel set the Blending mode to Multiply.
18. Here is the result of our work:
Did you enjoy this tutorial? If you want to see my work, you can find me on Behance. Thanks!

