Follow this tutorial and learn how to draw a Magic Hat in Adobe Illustrator. The tutorial is composed of two main parts, creating the hat and creating the head of the rabbit. You will start from basic shapes, complex gradients and with a few distortion techniques that involve the Direct Selection Tool, Roughen and Transform effects you will easily create the shapes that you need. The Align and the Pathfinder options also play an important role in this tutorial. So let’s begin!
Create a New Document
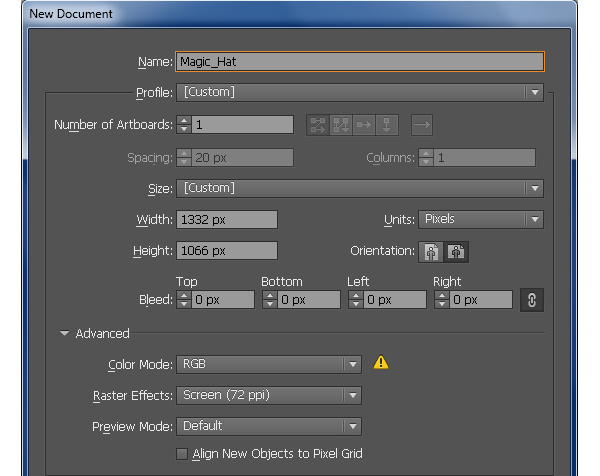
1. Launch Illustrator and then press (Ctrl + N) to create a New document. Select Pixels from the Units drop-down menu, enter 1332 in the width box and 1066 in the height box then click on the Advanced button. Select RGB, Screen (72ppi) and make sure that the Align New Objects to Pixel Grid box is unchecked before you click OK.
Create the Hat
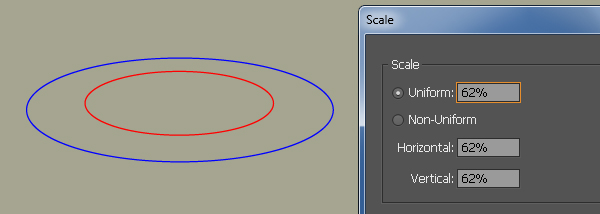
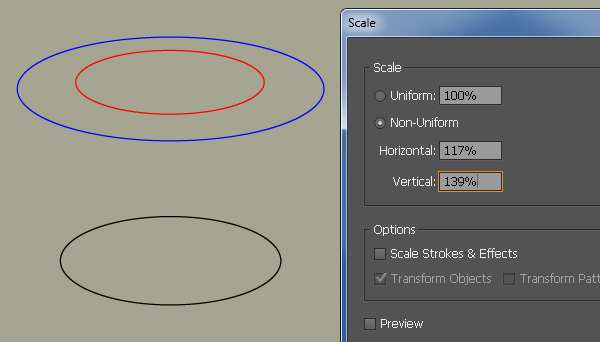
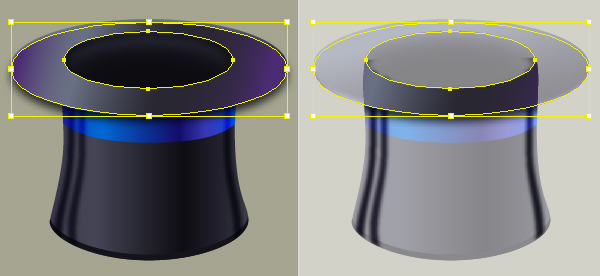
2. Pick the Ellipse Tool (L) and create a 460 by 156px ellipse. Make sure that the newly created ellipse is still selected and go to the Object > Transform > Scale… Check the Uniform, enter a 62 in the Scale box and click Copy. Then replace the existing stroke color of the copy with red and move it 10px up. Keep the red ellipse selected and go to the Object > Transform > Scale… Check the Non-Uniform, enter a 117 in the Horizontal box and enter a 139 in the Vertical box, then click Copy. Replace the existing stroke color of the copy with black and then move it 268px down.

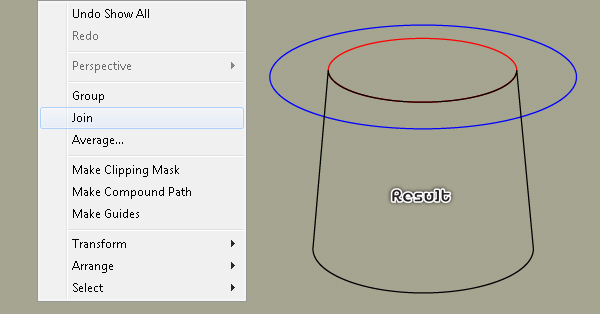
3. Select the red ellipse and make a copy (Ctrl +C, Ctrl +F) of it, then replace the existing stroke color of the copy with black. With the help of the Direct Selection Tool (A) and the Shift, select four anchor points highlighted with yellow of the two black ellipses, then click on the “Cut path at selected anchor points” button from the Properties bar. This make these two ellipses becomes four paths. Select two upper paths and remove them. Now select two remaining paths, right click on the artboard and then select the Join section from the drop-down menu. Next right click on the artboard again, then select the Join section. The resulting object should look like the third image below.
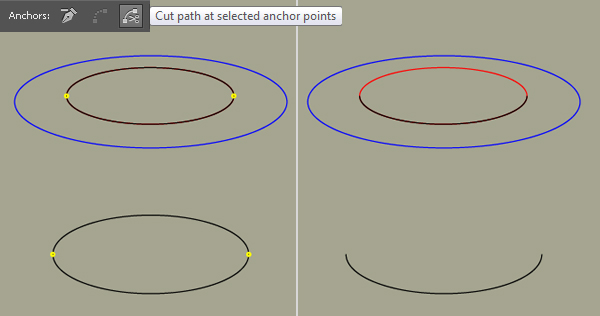
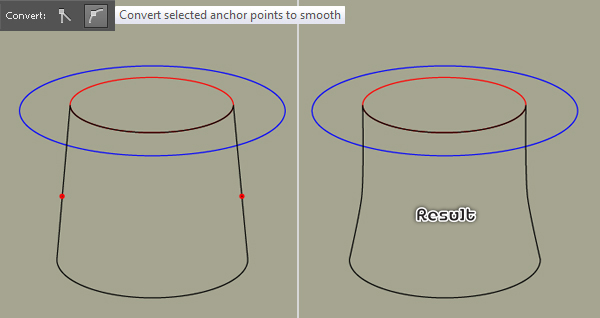
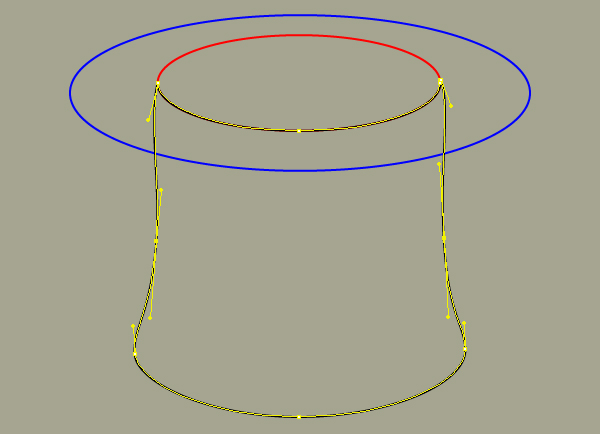
4. Pick the Add Anchor Point Tool (+) and add two anchor points in the points highlighted with red. With the Direct Selection Tool (A), select the left anchor point you just added and move it 12px to the right. Next select the right anchor point and move it 12px to the left. Now select the two anchor points you just moved and click on the “Convert selected anchor points to smooth” button from the Properties bar. Next with the help of the Direct Selection Tool (A), adjust the handles of the anchor points of the black object as shown in the last image.
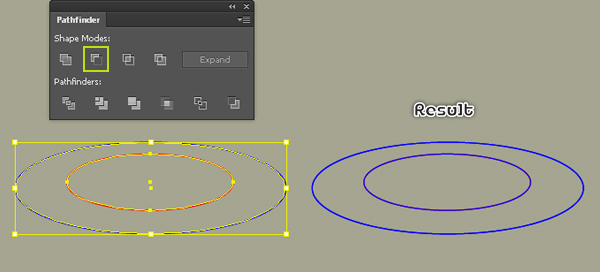
5. Before you continue, select the black object and hide it (Ctrl +3). Now select the two remaining ellipses and make a copy (Ctrl +C, Ctrl +F) of them. Still having these copies selected, open the Pathfinder palette (Window > Pathfinder) and click on the Minus Front button. Keep the resulting object selected, remove the stroke color of it and then fill this object with the linear gradient as shown in the last image. Finally hide the resulting shape behind the two original ellipses.
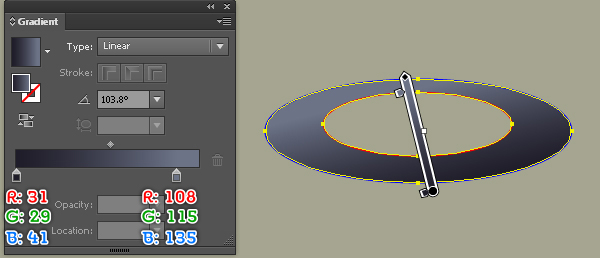
6. Select the red ellipe and remove its stroke, then fill this ellipse with the radial gradient as shown below. Keep the resulting ellipse selected and make a copy (Ctrl +C, Ctrl +F) of it. Next remove the fill color of the copy and add a 2px stroke (apply the linear gradient within stroke).

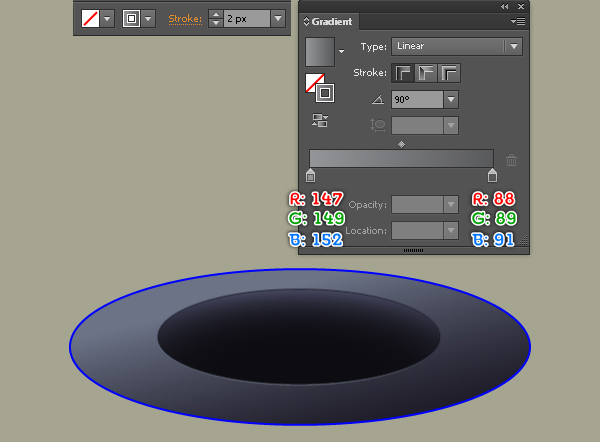
7. Select the shape created in the step 5 and make a copy (Ctrl +C, Ctrl +F) of it, then replace the existing color of the copy with new linear gradient. Still the resulting shape selected, move it 5px down and then hide this shape behind the shape created in the step 5.
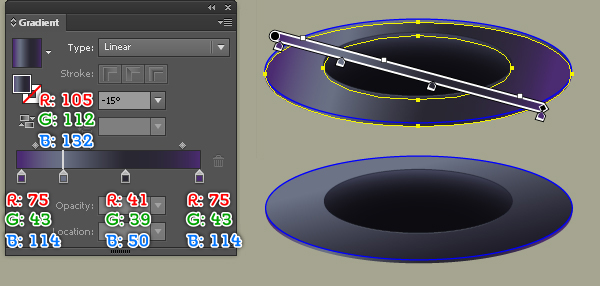
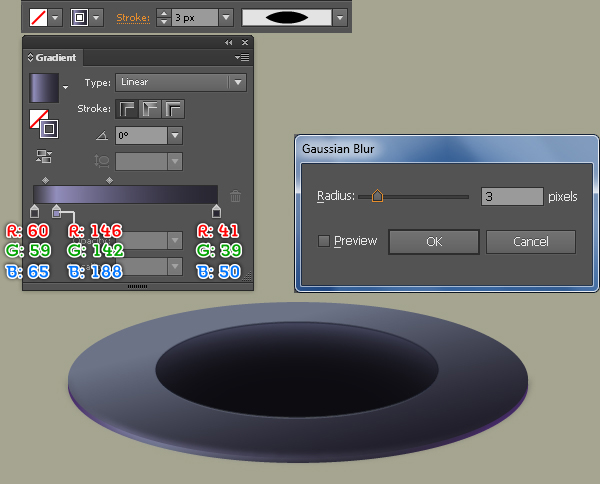
8. Select two anchor points highlighted with red of the black ellipse and then click on the “Cut path at selected anchor points” button from the Properties bar. This make the blue ellipse becomes two paths. Select the upper path and remove it. Next select the remaining path and add a 3px stroke (apply the linear gradient within stroke). Then apply the Width Profile 1 and a 3px Gaussian Blur effect for the resulting path. Now select the shape created in the step 7 and make a copy (Ctrl +C, Ctrl +F) of it, then bring the copy to front (Ctrl +Shift +Right Square Bracket). Keep the newly created shape selected, hold down the Shift and click on the path with blur effect applied in this step, then go to the Object > Clipping Mask > Make (Ctrl +7).
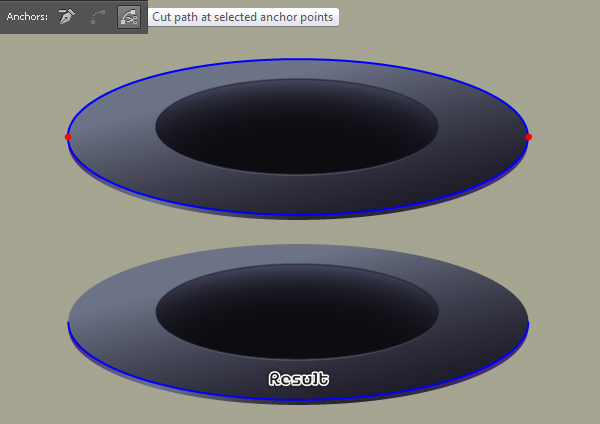
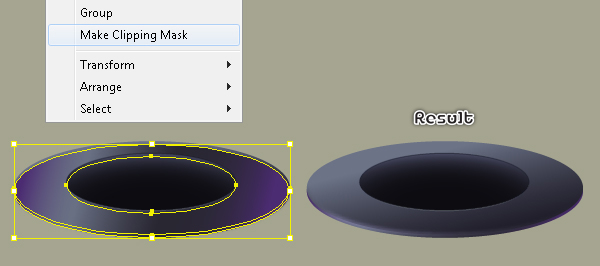
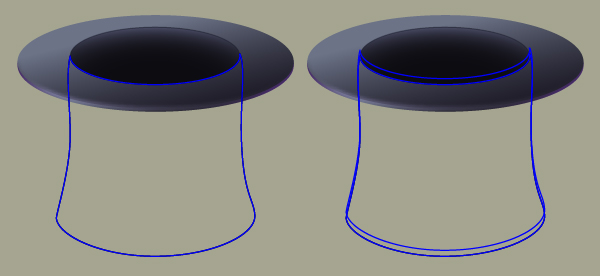
9. Before you continue, press (Ctrl +Alt +3) to show the black object hidden in the step 5, then bring this object to front (Ctrl +Shift +Right Square Bracket). Make sure that the black object is still selected and make a copy (Ctrl +C, Ctrl +F) of it, then replace the existing color of the copy with blue. Keep the blue object selected and duplicate it once (Ctrl +C, Ctrl +F), then move the copy 10px up. Now select two blue objects created in this step, open the Pathfinder palette (Window > Pathfinder) and click on the Minus Front button, then press (Ctrl +G) to ungroup the resulting group. Next select two blue paths as shown in the next to last image and remove them.
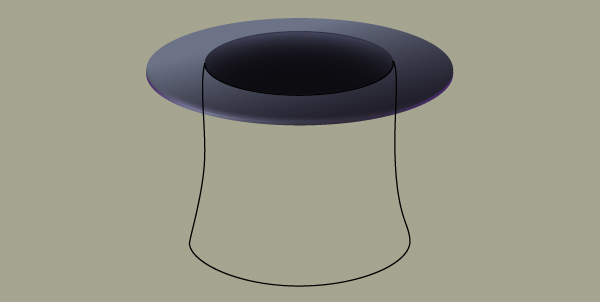
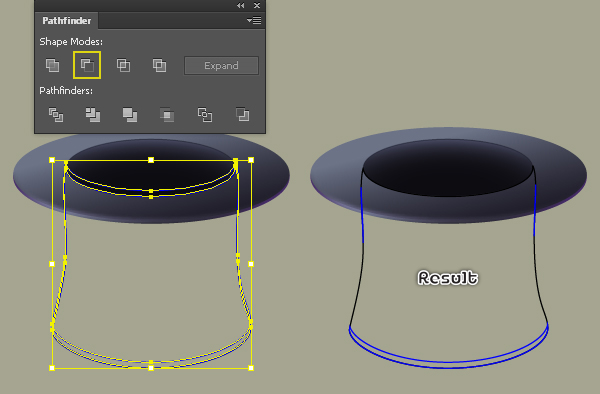
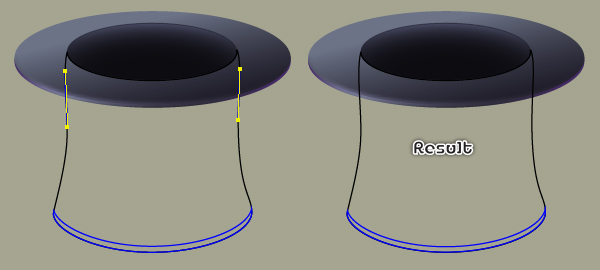
10. Pick the Pen Tool (P) and create a red object like you see in the image below. Next select the black, the blue and the red objects, then send them to back (Ctrl +Shift +Left Square Bracket).
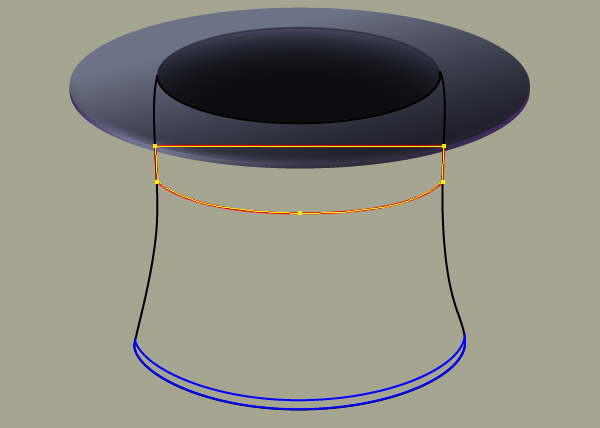
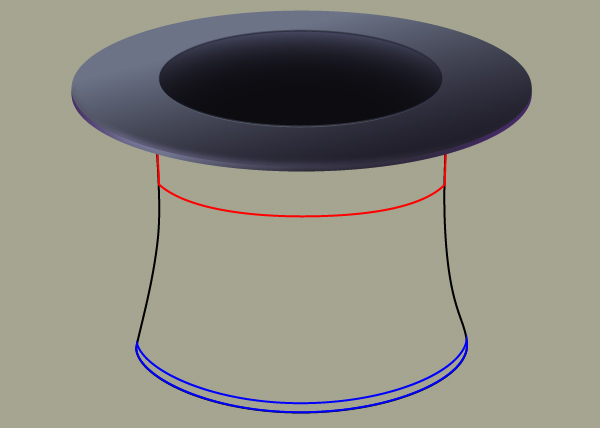
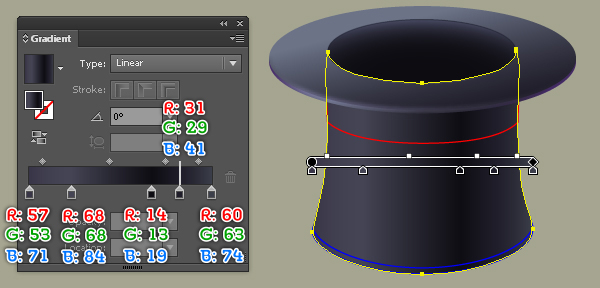
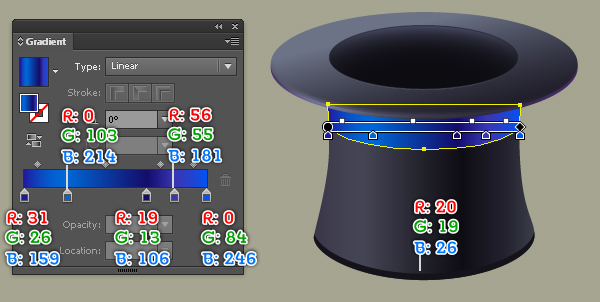
11. Select the black object and remove its stroke, then fill this object with the linear gradient as shown below. Next select the blue object, remove its stroke and fill this object with R=20, G=19, B=26. Finally select the red object and remove its stroke, then fill this object with the linear gradient like you see in the second image.
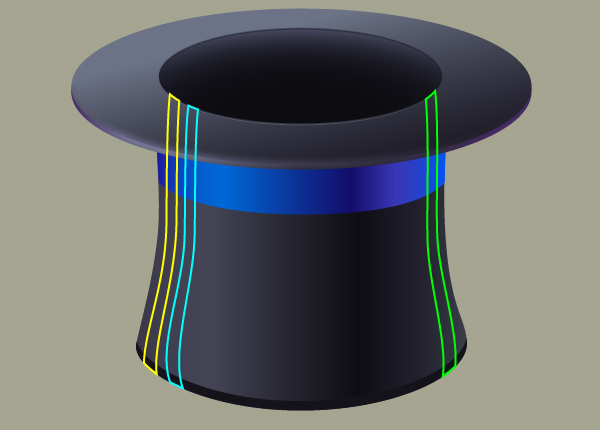
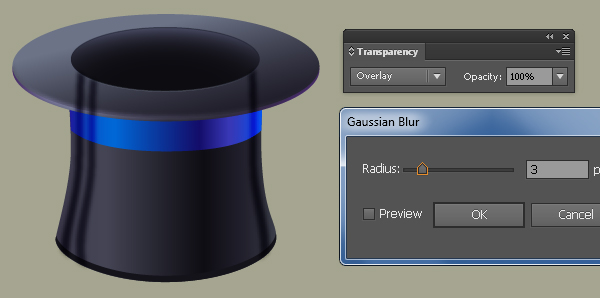
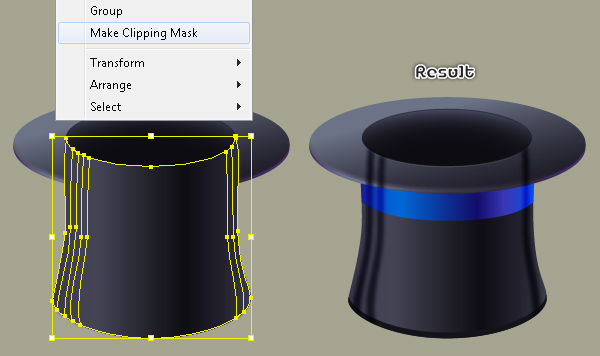
12. With the Pen Tool (P) create three objects as shown below. Once your objects are drawn, reselect them and remove their strokes, then fill these objects like you see in the second image. Now select and group (Ctrl +G) three shapes created in this step, then apply a 3px Gaussian Blur effect for the newly created group and change the Blending Mode to Overlay. Next select the biggest shape created in the step 11 and make a copy (Ctrl +C, Ctrl +F) of it, then bring the copy to front (Ctrl +Shift +Right Square Bracket). Keep this copy selected, hold down the Shift and click on the group created in this step, then go to the Object > Clipping Mask > Make (Ctrl +7). Finally hide this clipping set behind the shape created in the step 7.
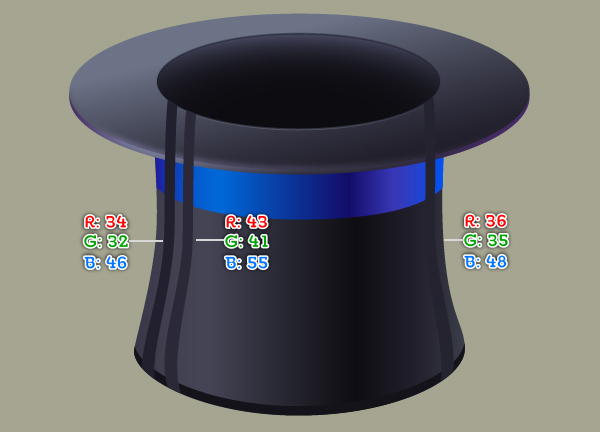
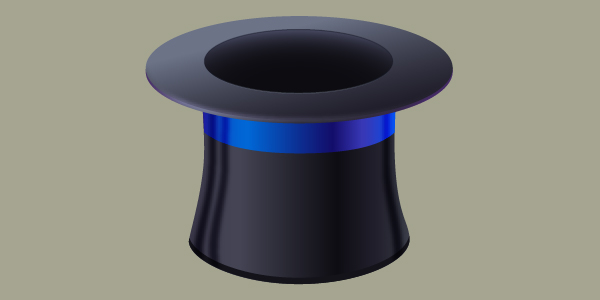
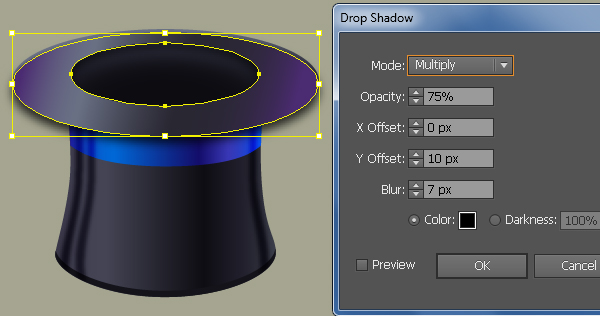
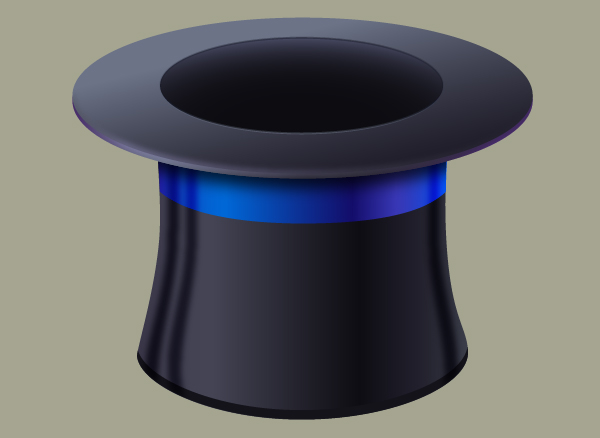
13. Select the shape created in the step 7 and make a copy (Ctrl +C, Ctrl +F) of it, then bring the copy to front (Ctrl +Shift +Right Square Bracket). Still having the newly created shape selected and go to the Effect > Stylize > Drop Shadow… Follow the data as shown below and click OK. Keep the resulting shape selected, press (Ctrl +X) to cut it. Then pick the Selection Tool (V), double-click on the clipping set created in the step 12 and press (Ctrl +F) to paste the shape was cut in this step. Finally, double-click on the anywhere outside of the clipping set. The hat is ready and looks like in the last image below.
Create the Head of the Rabbit
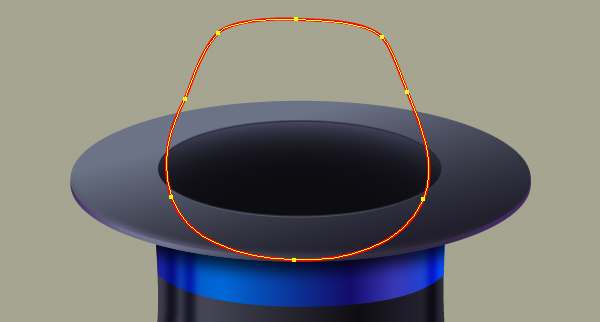
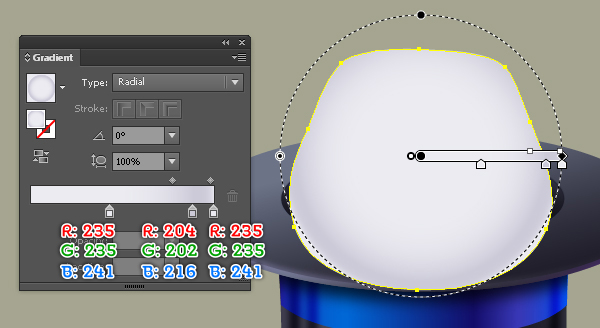
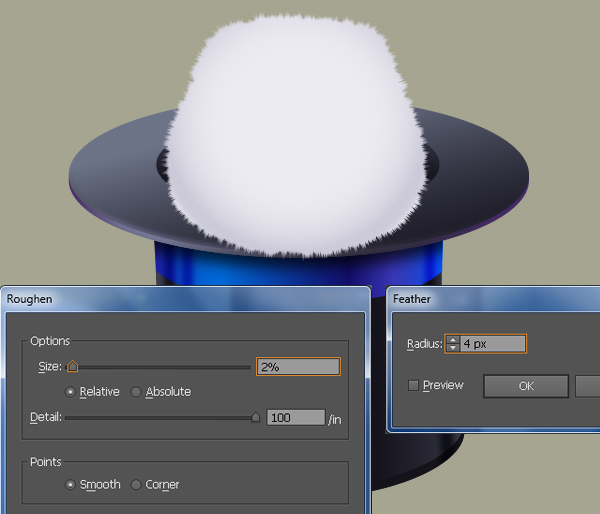
14. We will continue with the head of the rabbit. With the help of the Pen Tool (P) create an object like you see in the image below. Once your object is drawn, reselect it and remove its stroke, then fill this object with the radial gradient as shown in the second image. Make sure that the new shape is still selected and go to the Effect > Distort & Transform > Roughen… Follow the data as shown in the third image and click OK, then go to the Effect > Stylize > Feather… Enter a 4px Radius and click OK.
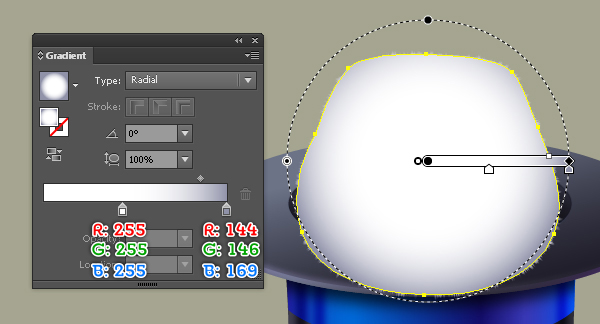
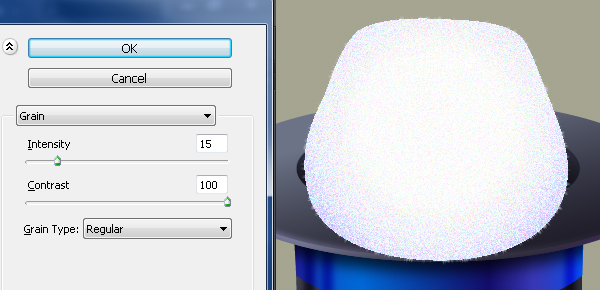
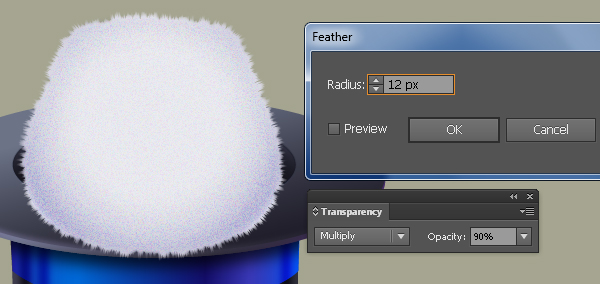
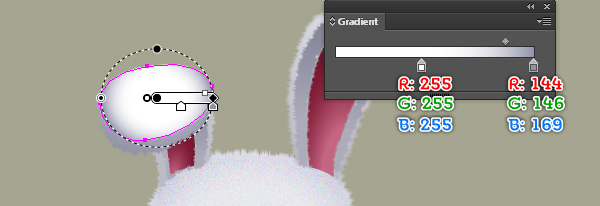
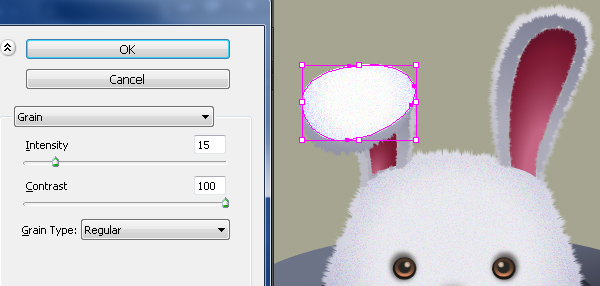
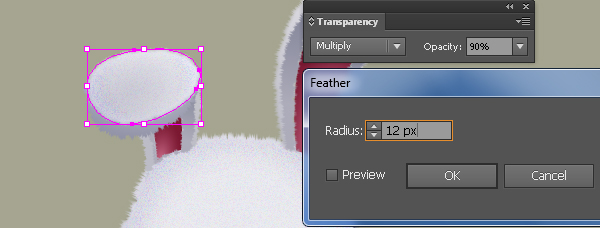
15. Select the shape created in the step 14 and make a copy (Ctrl +C, Ctrl +F) of it. Having this copy selected, open the Appearance palette (Window > Appearance) and remove all existing appearances. Keep the resulting shape selected and replace the existing color of it with new radial gradient as shown below. Make sure that this shape is still selected and go to the Effect > Texture > Grain… Follow the data like you see in the second image and click OK. Still having the resulting shape selected, apply a 12px Feather effect then set it to Blending Mode Multiply and reduce the Opacity to 90%.
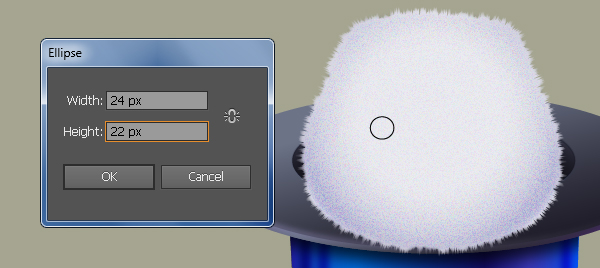
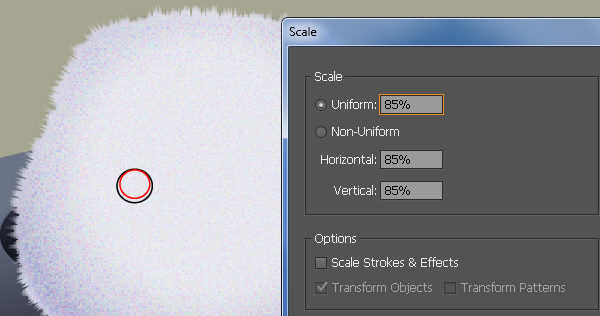
16. Let’s start by creating the eyes of the rabbit. With the Ellipse Tool (L) create a 24 by 22px ellipse, then place it to the position as shown below. Having the new ellipse selected and go to the Object > Tranform > Scale… Check the Uniform and enter a 85 in the Scale box, then click Copy. Replace the existing color of this copy with red and then move it 1px up. Continue with the Ellipse Tool (L) create two ellipses and then place them to the positions like you see in the last two images.
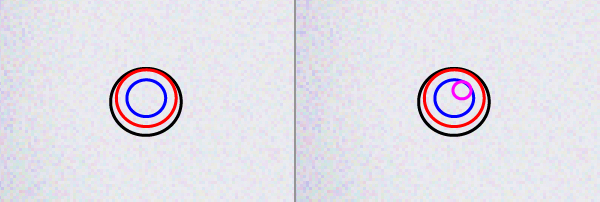
17. Select the black ellipse, remove its stroke and fill this ellipse with R=24, G=20, B=17. Next select the red ellipse, remove its stroke and fill this ellipse with the linear gradient as shown in the second image. Now select the two remaining ellipses and remove the strokes of them, then fill these ellipses like you see in the third image. Finally select four ellipses created in this step and apply a 2px Feather effect for them.


18. With the Ellipse Tool (L) create a red ellipe and place it to the position like you see in the first image. Still having the new ellipse selected, remove its stroke and fill this ellipse with the radial gradient as shown in the second image. Next apply a 2px Gaussian Blur effect for the resulting ellipse and hide it behind the biggest ellipse created in the step 17.
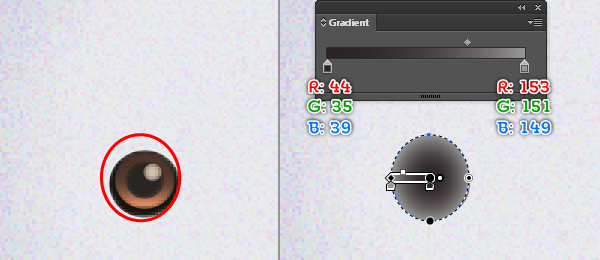

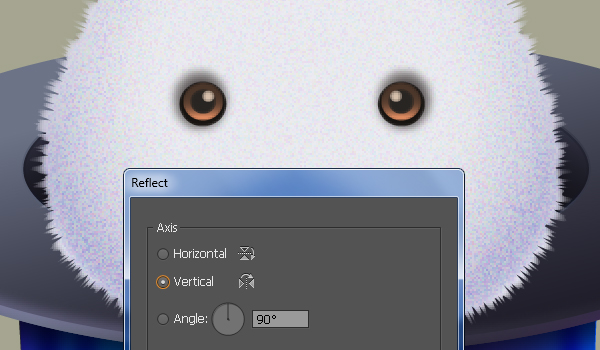
19. Select and group (Ctrl + G) all ellipses created from beginning step 16 to this time. Keep the newly created group selected and go to the Object > Transform > Reflect. Set the Axis to Vertical and then click Copy. Drag the copy we have just created to the right. Don’t forget to hold the Shift key on the keyboard for straight dragging.
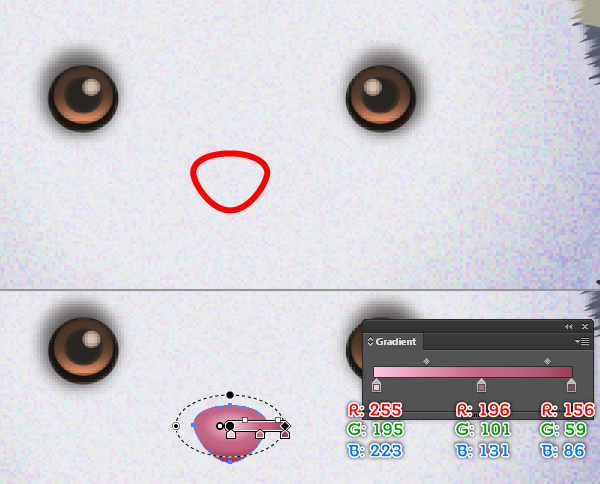
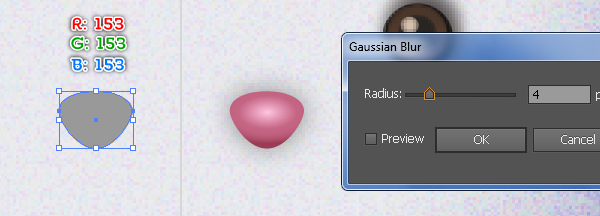
20. Next come the nose. Pick the Pen Tool (P) and create an object as shown below. Once your object is drawn, remove its stroke and then fill this object with the radial gradient like you see in the second image. Keep the resulting shape selected and make a copy (Ctrl +C, Ctrl +F) of it, then replace the existing color of the copy with R=153, G=153, B=153. Having the new shape selected, apply a 4px Gaussian Blur effect for it, then hide the resulting shape behind the first shape created in this step.
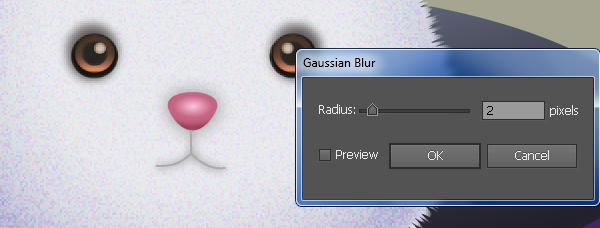
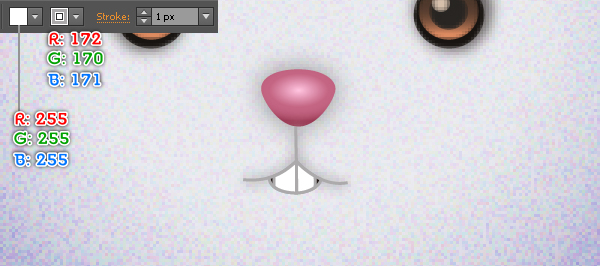
21. With the Pen Tool (P) create two paths like you see in the first and the second images below. Once your objects are drawn, reselect them and replace the existing color with R=172, G=170, B=171. Keep the resulting paths selected and make a copy (Ctrl +C, Ctrl +F) of them. Apply a 2px Gaussian Blur effect for the two newly created paths, then hide the resulting paths behind the two original paths created in this step.
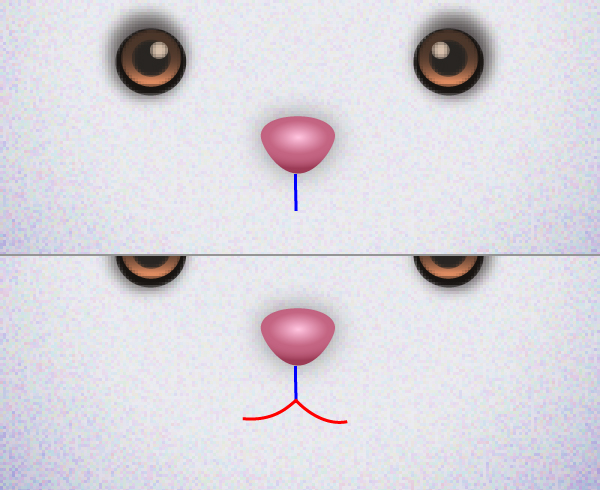
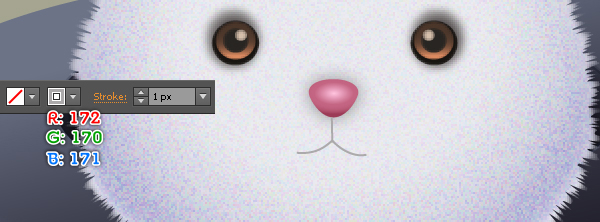
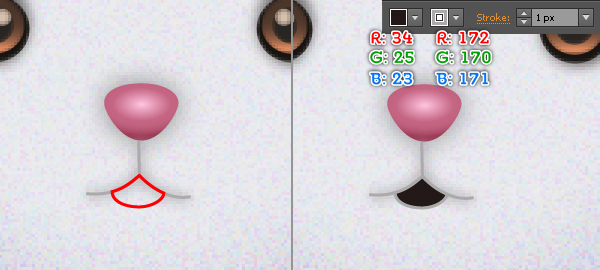
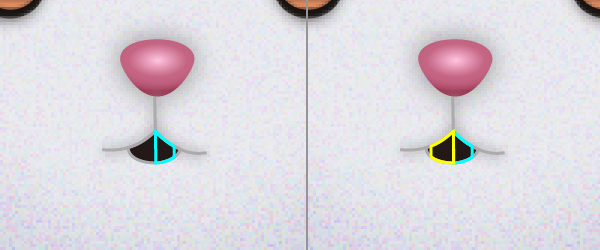
22. With the help of the Pen Tool (P), create an object like you see in the first image. Reselect this object and fill it with R=34, G=25, B=23, then replace the existing stroke color of the resulting shape with R=172, G=170, B=171. Keep working with the Pen Tool (P), create two objects as shown in the third and the fourth images. Once your objects are drawn, reselect them and fill them with R=255, G=255, B=255, then replace the existing stroke color of the resulting shapes with R=172, G=170, B=171.
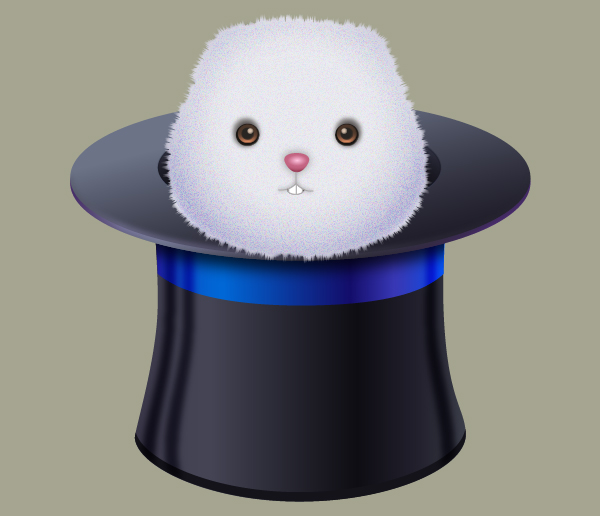
23. At this point your illustration should look like in the next image:
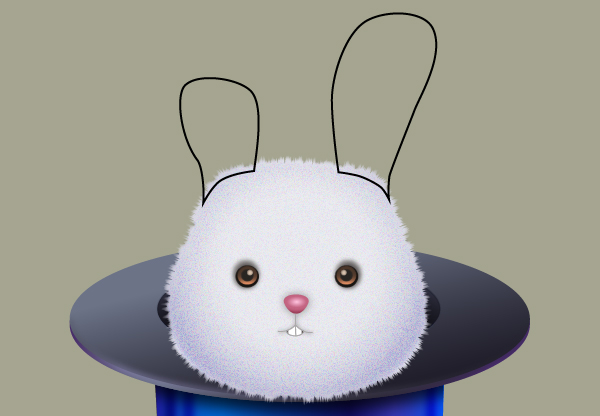
24. It’s time to draw the ears. With the help of the Pen Tool (P) create six objects like you see in the images below.
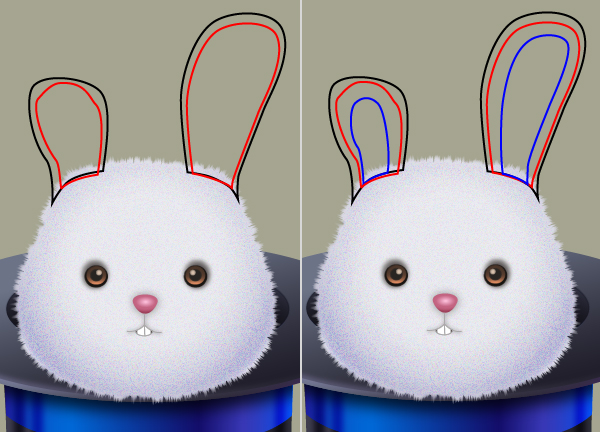
25. Focus on the right ear, select the red and the blue objects, then make a copy (Ctrl +C, Ctrl +F) of them. Keep these copies selected, open the Pathfinder palette (Window > Pathfinder) and click on the Minus Front button. Next select the red and the blue objects of the left ear, then make a copy of them. Still having the copies selected and click on the Minus Front button from the Pathfinder palette.
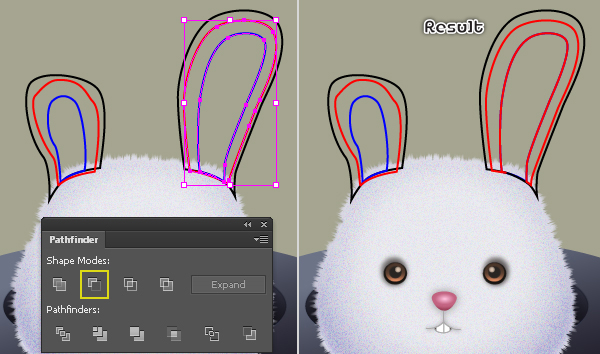
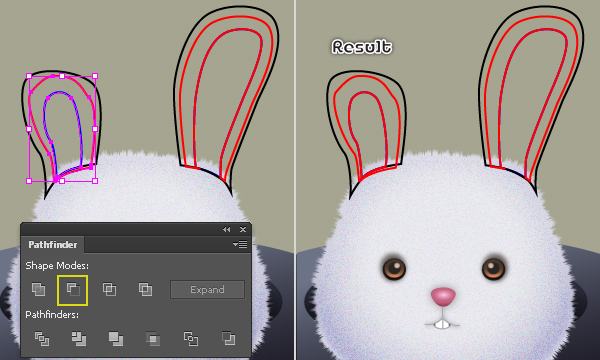
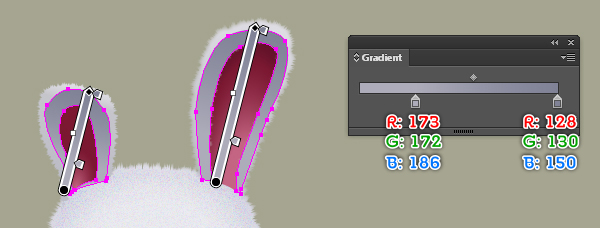
26. Select the black object of the right ear, remove its stroke and then fill this object with the linear gradient as shown below. Keep the resulting shape selected and go to the Effect > Distort & Transform > Roughen… Follow the data like you see in the second image and click OK. Finally apply a 5px Feather effect for the resulting shape.
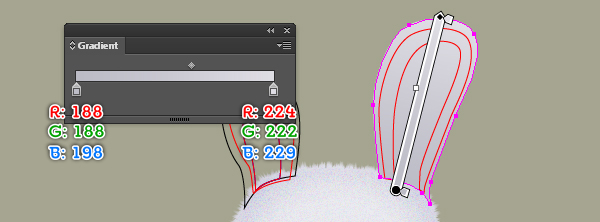
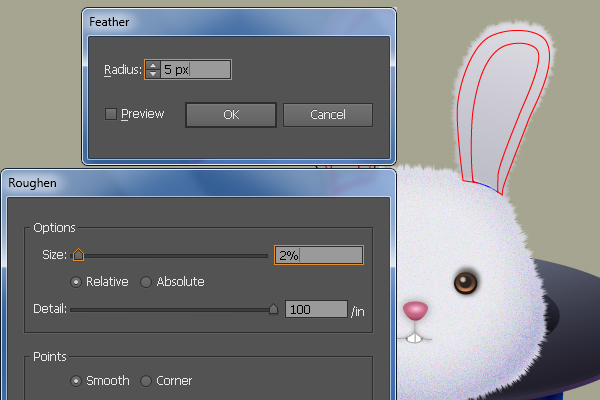
27. Select the black object of the left ear, remove its stroke and then fill this object with the linear gradient as shown below. Keep the resulting shape selected and go to the Effect > Distort & Transform > Roughen… Follow the data like you see in the second image and click OK. Finally apply a 2px Feather effect for the resulting shape.
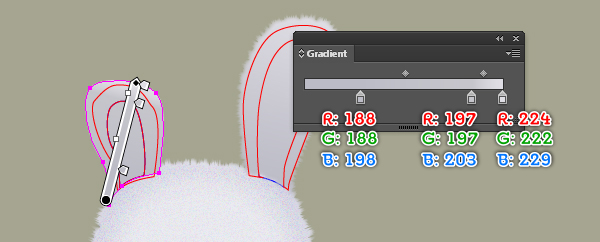
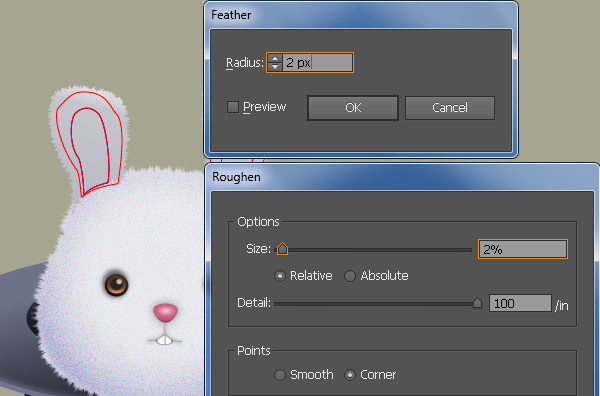
28. Select the blue object of the right ear, bring it to front (Ctrl +Shift +Right Square Bracket) and remove its stroke, then fill this object with the radial gradient as shown in the first image. Likewise, repeat the same techniques for the blue object of the left ear.
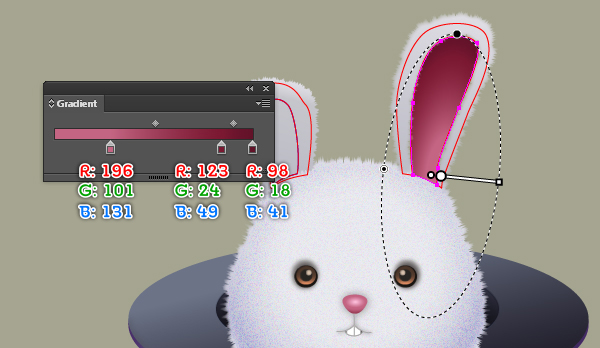
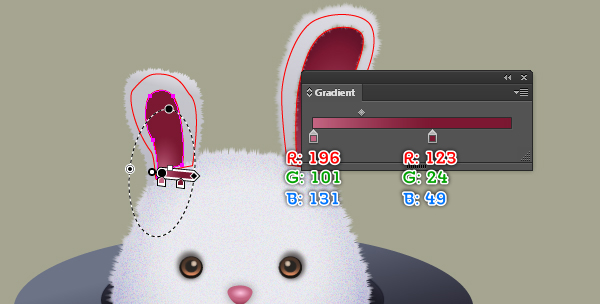
29. Select the two remaining red objects and remove their strokes, then fill these objects with the linear gradient as shown below. Next reselect the right shape created in this step and go to the Effect > Distort & Transform > Roughen… Follow the data like you see in the second image and click OK, then apply a 3px Feather effect for the resulting shape. Next reselect the remaining shape created in this step, pick the Eyedropper Tool (I) and click on the shape with roughen effect applied in this step. Keep the resulting shape selected, open the Appearance palette (Window > Appearance) and click on the Feather section. In the Feather dialog box, enter a 2px Radius and then click OK.
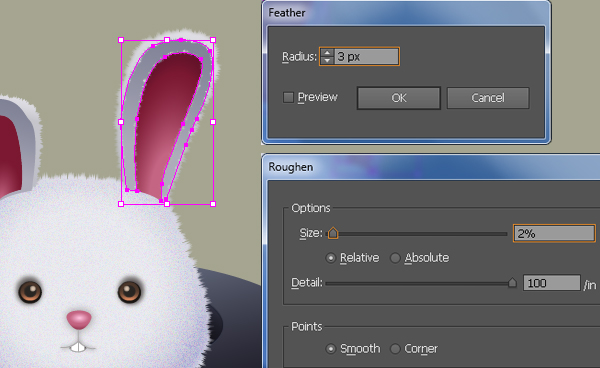
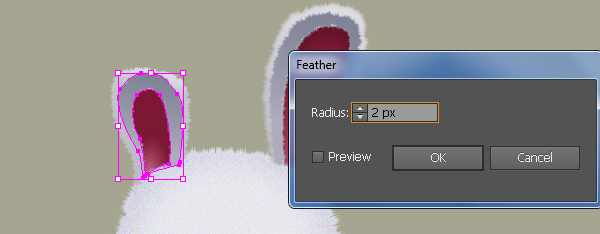
30. Pick the Pen Tool (P) and create two objects like you see in the first and the second images. Once your object is drawn, select the blue object and remove its stroke, then fill this object with the radial gradient like you see in the third image. Keep the new shape selected and go to the Effect > Distort & Transform > Roughen… Follow the data like you see in the fourth image and click OK. Finally apply a 2px Feather effect for the resulting shape.
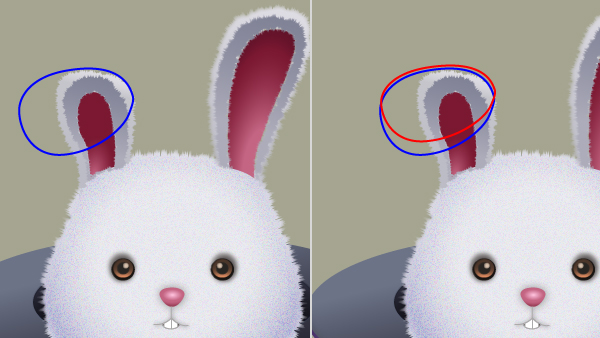
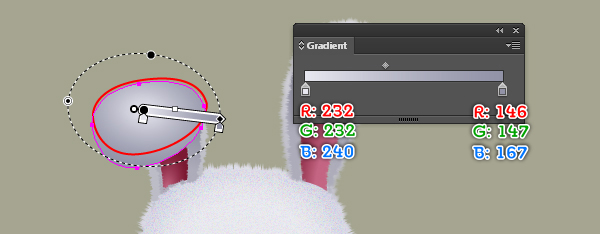
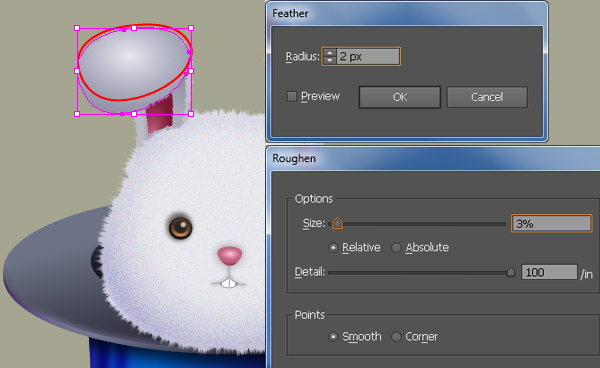
31. Select the red object and remove its stroke, then fill this object with the radial gradient like you see in the first image. Keep the new shape selected and go to the Effect > Distort & Transform > Roughen… Follow the data like you see in the second image and click OK, then apply a 5px Feather effect for the resulting shape. Make a copy (Ctrl +C, Ctrl +F) of the shape with feather effect applied in this step, then open the Appearance palette (Window > Appearance) and remove all existing appearances. Keep the resulting shape selected and replace the existing color of it with new radial gradient as shown in the third below. Make sure that this shape is still selected and go to the Effect > Texture > Grain… Follow the data like you see in the fourth image and click OK. Still having the resulting shape selected, apply a 12px Feather effect then set it to Blending Mode Multiply and reduce the Opacity to 90%.
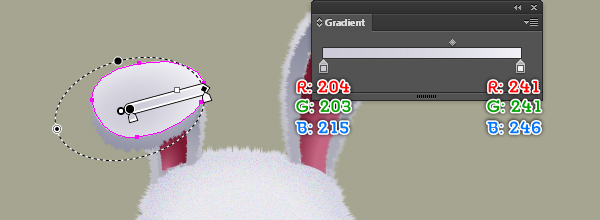
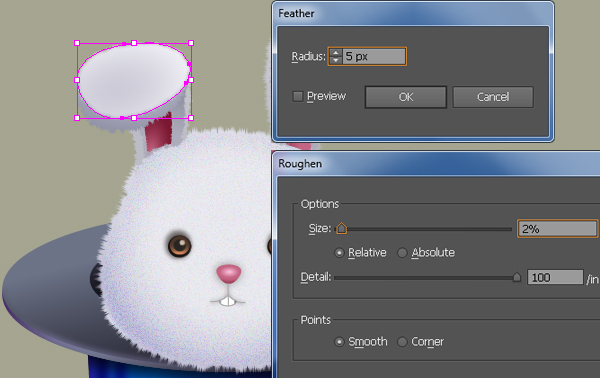
32. Pick the Pen Tool (P), create a curved path and give it a 4px stroke (R=118, G=119, B=145) for the moment. Then apply the Width Profile 5 and a 2px Gaussian Blur effect for this path.
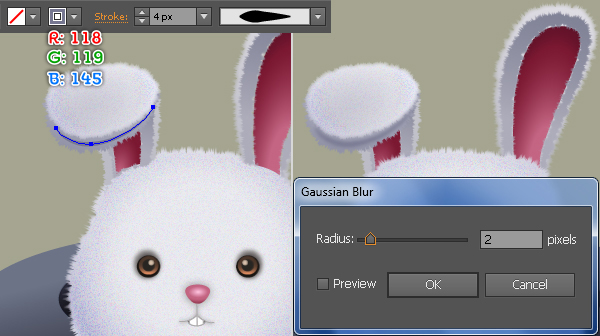
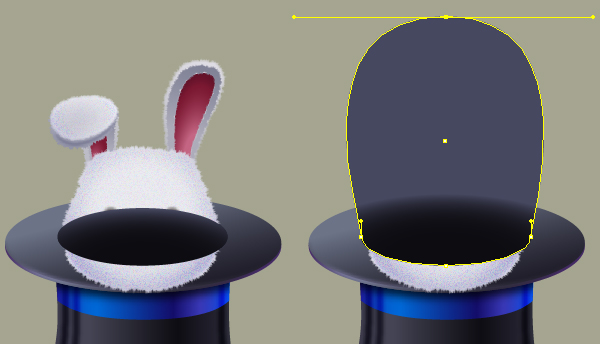
33. Before you continue, select and group (Ctrl + G) all objects created from beginning step 14 to this time. Now select the black ellipse created in the step 6 and make a copy (Ctrl +F, Ctrl +F) of it, then bring the copy to front (Ctrl +Shift +Right Square Bracket). Next select the top anchor point of the copy and move it up. With the Direct Selection Tool (A) along with the Shift, extend the handles of the anchor point you just moved. Now select the shape you just edited and the group created in this step, then go to the Object > Clipping Mask > Make (Ctrl +7).
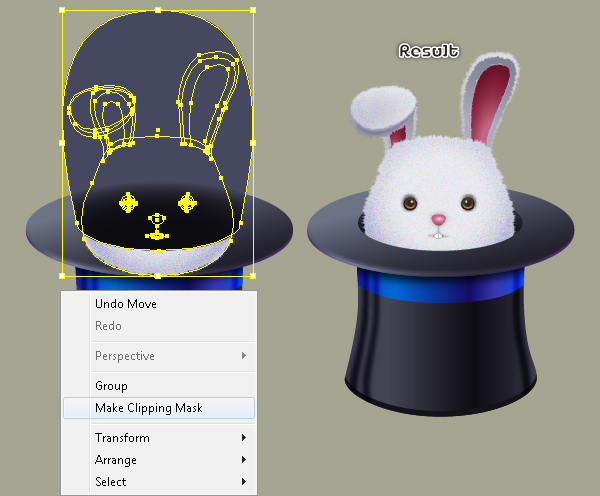
34. Now select and group (Ctrl +G) all objects created from beginning step 2 to this time, then name this group “Hat_Rabbit”. At this point your illustration should look like in the next image:

Create the Background
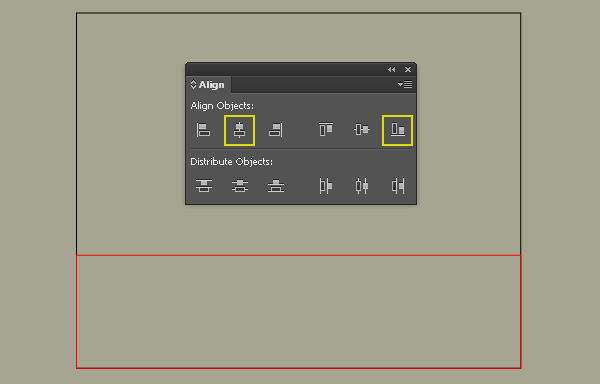
35. We are going to create the background. Pick the Rectangle Tool (M) and create two rectangles with dimensions: 1332 by 1066px and 1332 by 340px. Reselect the two newly created rectangles, open the Align palette (Window > Align) and click on the Horizontal Align Center button, then click on the Vertical Align Bottom button.
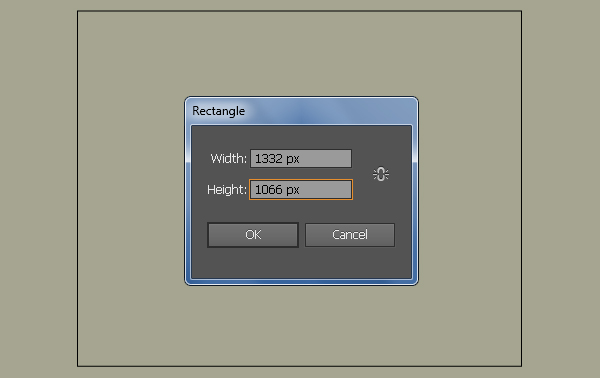
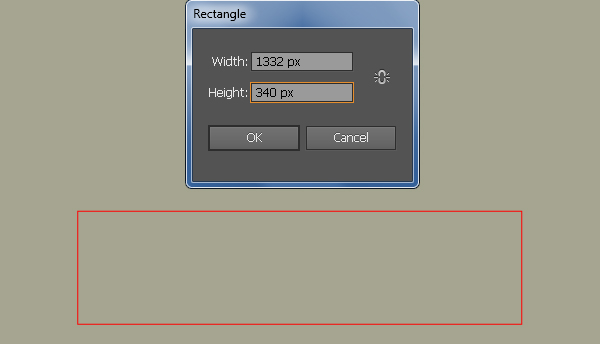
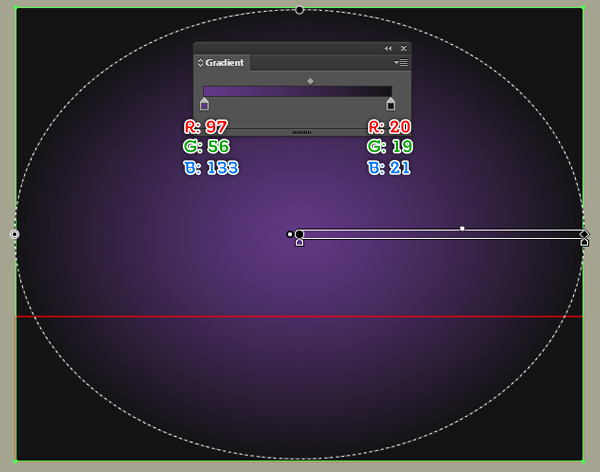
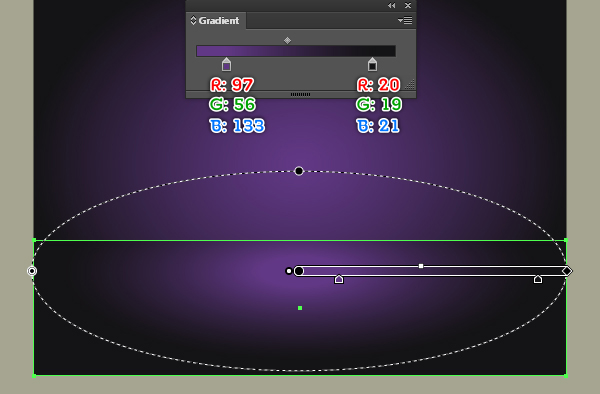
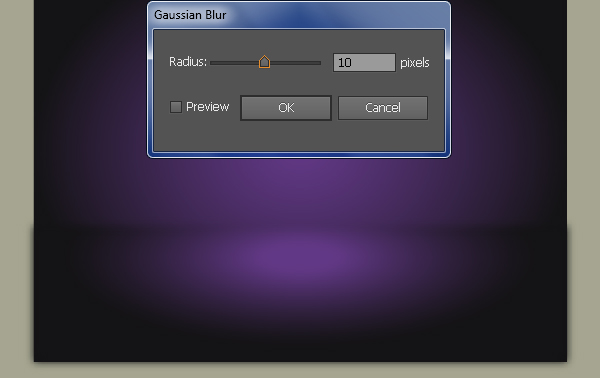
36. Select the bigger rectangle created in the step 35, remove its stroke and fill this rectangle with the radial gradient as shown below. Next select the remaining rectangle and remove its stroke, then fill this rectangle with the radial gradient like you see in the second image. Keep the resulting rectangle selected and apply a 10px Gaussian Blur effect for it.
37. Select the group “Hat_Rabbit” and place it into the newly created background.

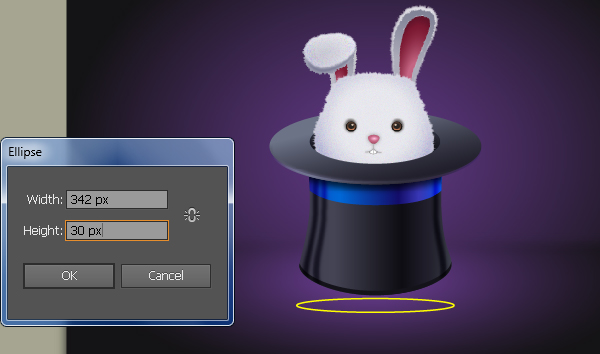
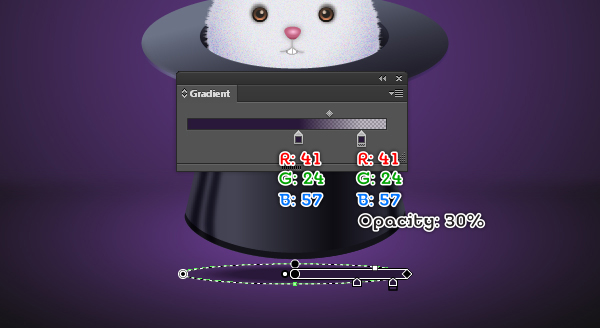
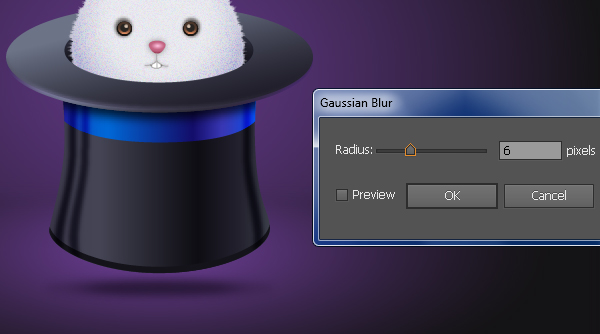
38. To give a more realistic look I’m going to be adding the shadow for the group “Hat_Rabbit”. With the Ellipse Tool (L) and create a 342 by 30px ellipse, then place it to the position as shown below. Make sure that the newly created ellipse is still selected, remove its stroke and fill this ellipse with the radial gradient as shown in the second image. Finally apply a 6px Gaussian Blur effect for the resulting ellipse and then hide it behind the group “Hat_Rabbit”.
Create the Magic Light
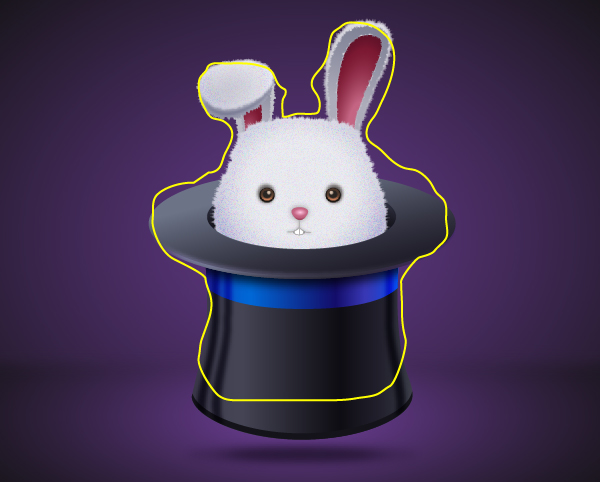
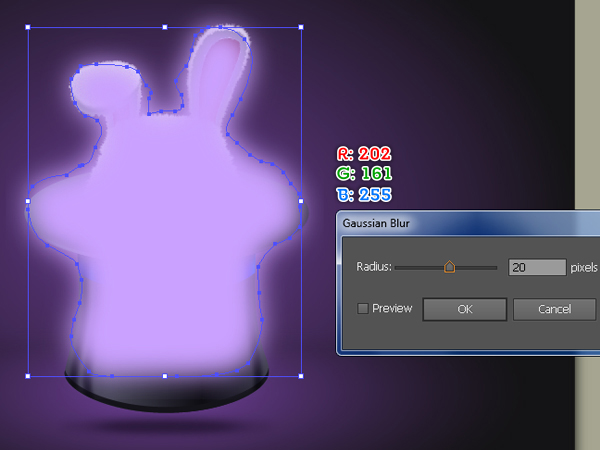
39. Pick the Pencil Tool (N) and create an object like you see in the first image. Once your object is drawn, reselect it and remove its stroke, then fill this object with R=202, G=161, B=255. Finally apply a 20px Gaussian Blur effect for the resulting shape and then hide it behind the group “Hat_Rabbit”.

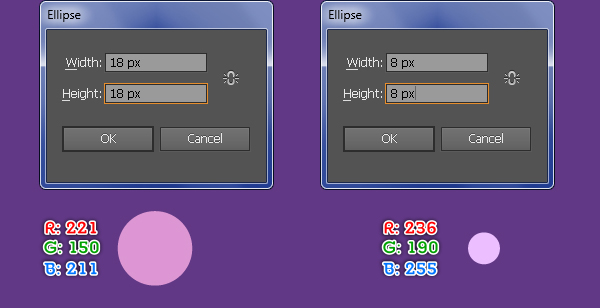
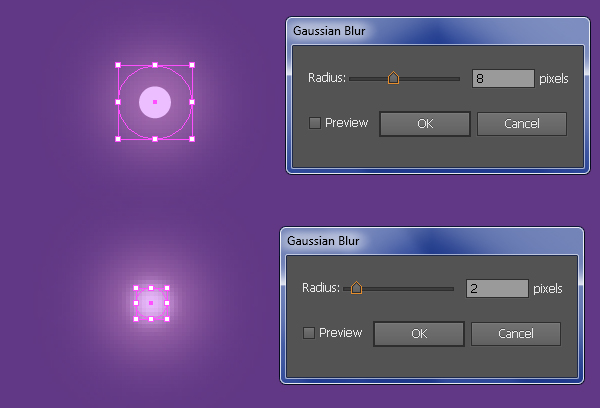
40. Pick the Ellipse Tool (L) and create two pink ellipses with dimensions: 18 by 18px and 8 by 8px. Reselect the two newly created ellipses, open the Align palette (Window > Align) and click on the Horizontal Align Center button, then click on the Vertical Align Center button. Now select the bigger ellipse created in this step and apply a 8px Gaussian Blur effect for it. Next select the remaining ellipse and apply a 2px Gaussian Blur effect for it. Finally select and group (Ctrl +G) two ellipses created in this step, then name this group “Light_01”.

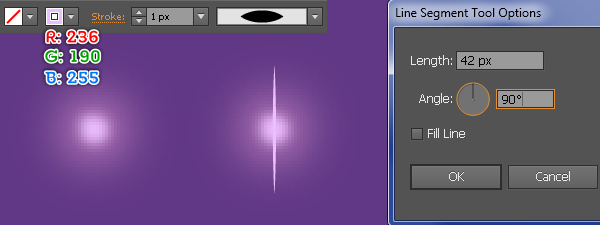
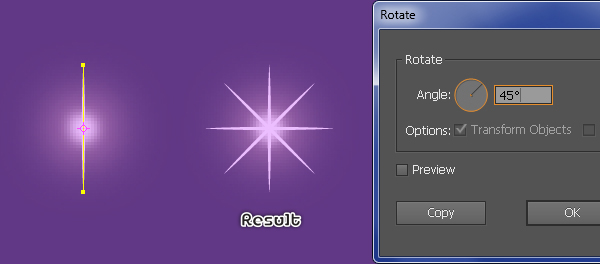
41. Select the group “Light_01” created in the step 40 and make a copy (Ctrl +C, Ctrl +F), then place the copy to another position. Using the Line Segment Tool (\) create a vertical line of length 42px, with a 1px stroke (R=236, G=190, B=255) and no fill. Apply the Width Profile 1 for the newly created line and then place it to the position like you see in the second image. Keep this vertical line selected and double click on the Rotate icon from Tool palette. In the Rotate dialog box, enter a 45 in the Angle box and click Copy, then press (Ctrl +D) twice times to get the results like you see in the fourth image. Now select all four lines created in this step and apply a 1.5px Feather effect for them. Finally select and group (Ctrl +G) all objects created in this step, then name this group “Light_02”.

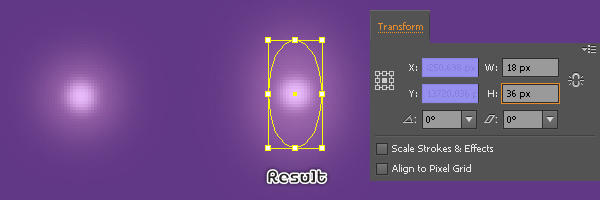
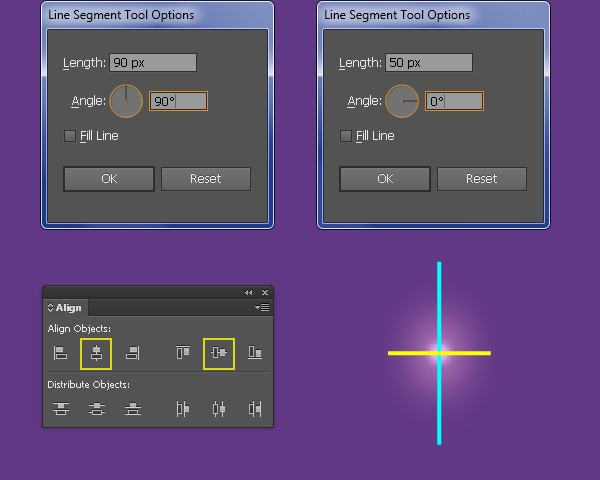
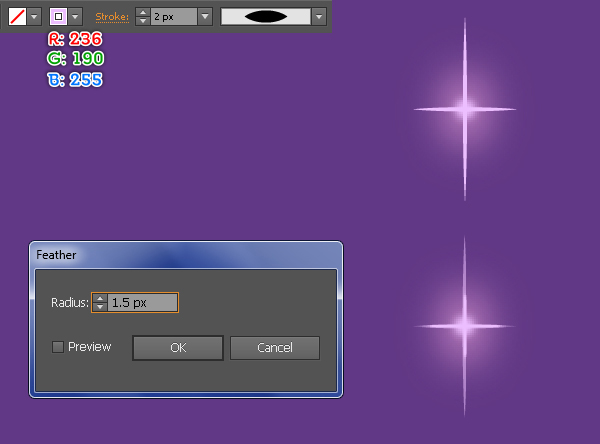
42. Select the group “Light_01” created in the step 40 and make a copy (Ctrl +C, Ctrl +F), then place the copy to another position. Still having the newly created group selected, press (Ctrl +Shift +G) to ungroup it. Select the bigger ellipse and open the Transform palette (Window > Transform), then enter a 36px in the H box. Next using the Line Segment Tool (\) create a vertical line of length 90px, with a 2px turquoise stroke and no fill. Keep working with the Line Segment Tool (\), create a horizontal line of length 50px, with a 2px yellow stroke and no fill. Now select two lines created in this step, hold down the Shift and click on the ellipse you just edited the size, release the Shift and click on this ellipse again (to fixed its position). Open the Align palette (Window > Align) and click on the Horizontal Align Center button, then click on the Vertical Align Center button. Reselect two lines created in this sep and replace the existing stroke color of them with R=236, G=190, B=255. Next apply the Width Profile 1 and 1.5px Feather effect for the two resulting lines. Finally select and group (Ctrl +G) all objects created in this step, then name this group “Light_03”.
43. Select three groups (“Light_01”, “Light_02” and “Light_03”) and make some copies of them. Next place these groups to the positions like you see in the image below.

And We’re Done!


