Hi guys! After a long period of no tutorials, here is another great Adobe Illustrator tutorial on how to create a Compass Icon from one of our best authors, Andrei Stefan. So grab a coffee, launch Adobe Illustrator and have fun!
Welcome back to another Illustrator based tutorial, in which we’re going take a quick look behind the process of creating a Compass Icon, using nothing more than a couple of basic geometric shapes, that we’re going to adjust here and there.
So, assuming you already have the software up and running, let’s jump straight into it!
Program: Adobe Illustrator CS6 – CC 2020
Difficulty: Beginner
Estimated Completion Time: 20 Minutes
Step 1
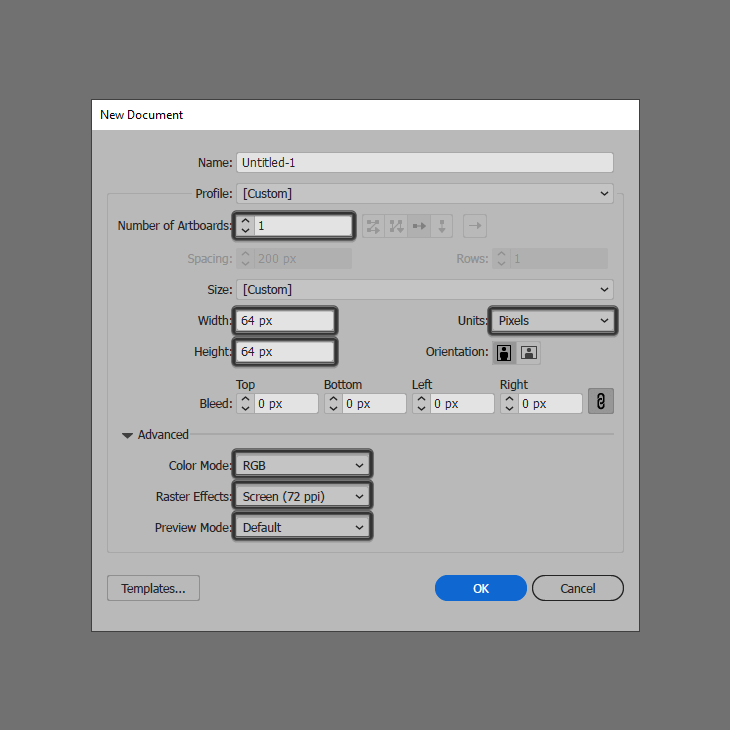
We’re going to kick off the project, by setting up a New Document, by heading over to File > New (or by using the Control-N keyboard shortcut), which we will then adjust as follows:
Profile: Web
Number of Artboards: 1
Width: 64 px
Height: 64 px
Units: Pixels
Step 2
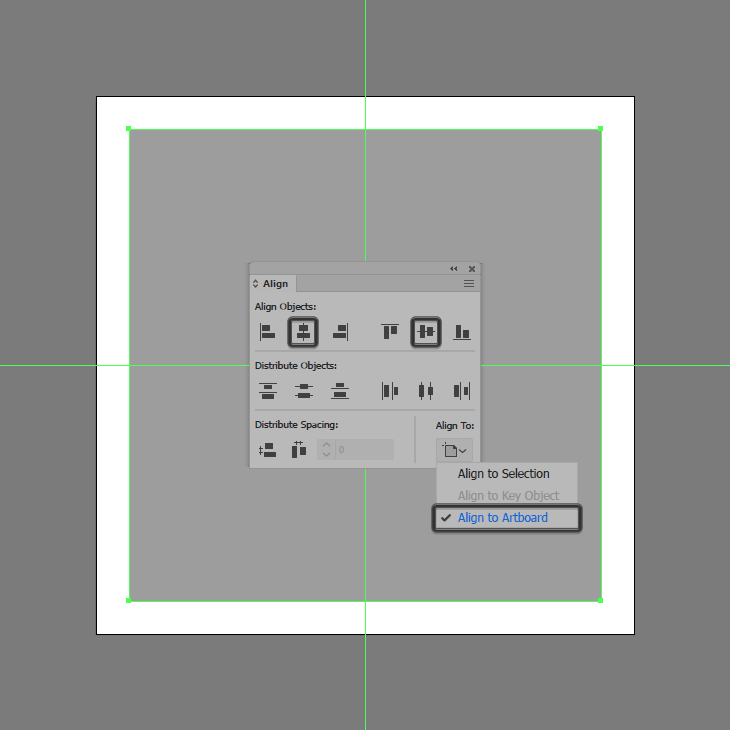
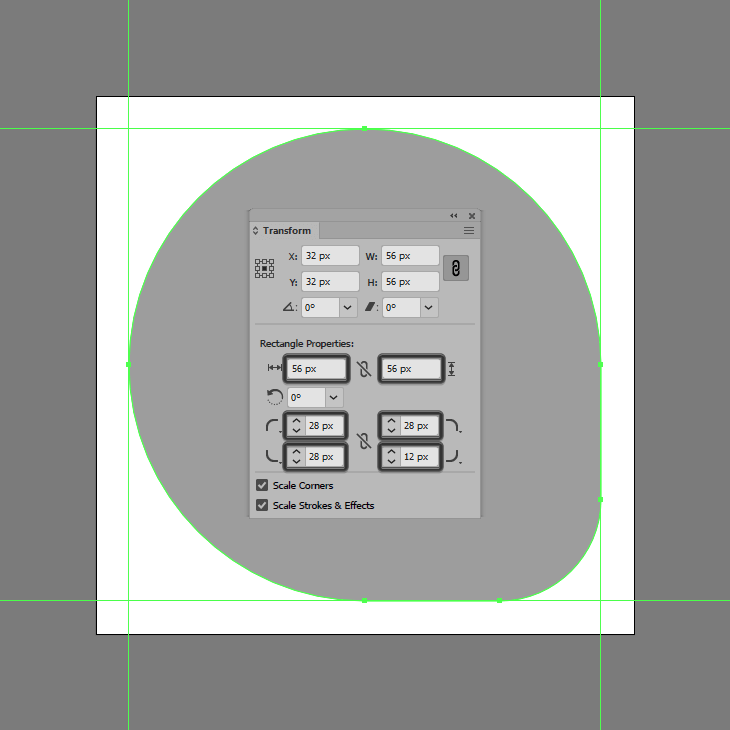
Start working on the actual icon by creating a 56 x 56 px square, which we will color using #9e9e9e and then center align to the underlying Artboard using the Align panel’s Horizontal and Vertical Align Center options.
Step 3
Adjust the shape that we’ve just created, by opening up the Transform panel, and then setting the Radius of its bottom-right corner to 12 px, and its remaining ones to 28 px.
Step 4
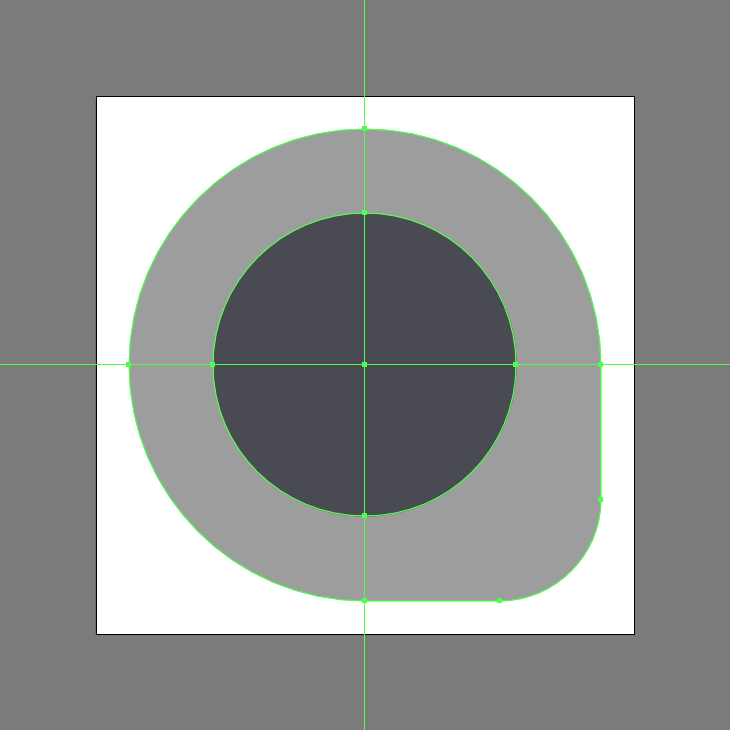
Add the inner section of the compass using a 36 x 36 px circle, which we will color using #494951 and then center align to the shape that we’ve just adjusted.
Step 5
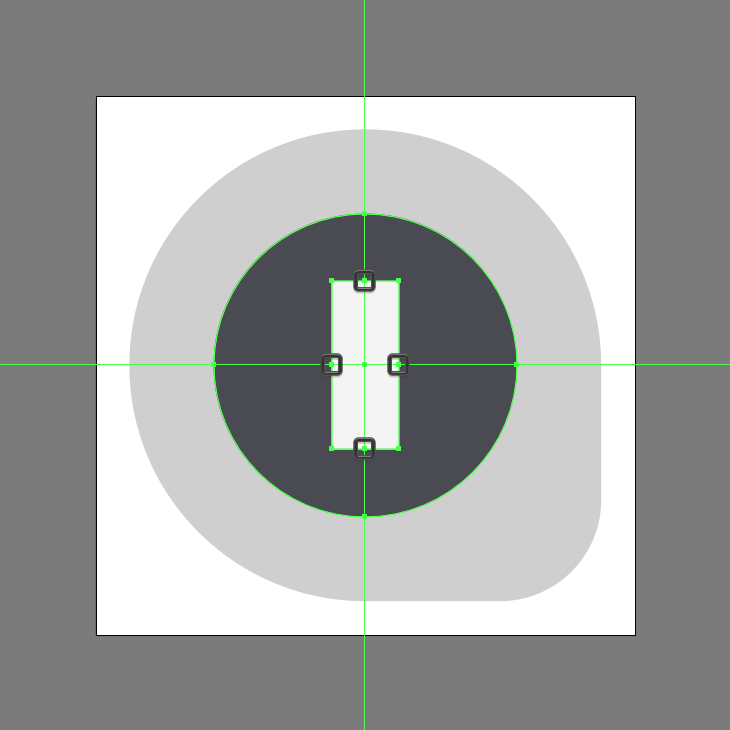
Create the main shape for the needle using an 8 x 20 px rectangle (#FFFFFF), which we will center align to the circle, and then adjust by adding a new anchor point to the center of each of its edges using the Add Anchor Point Tool (+). Take your time and once you’re done, move on to the next step.
Step 6
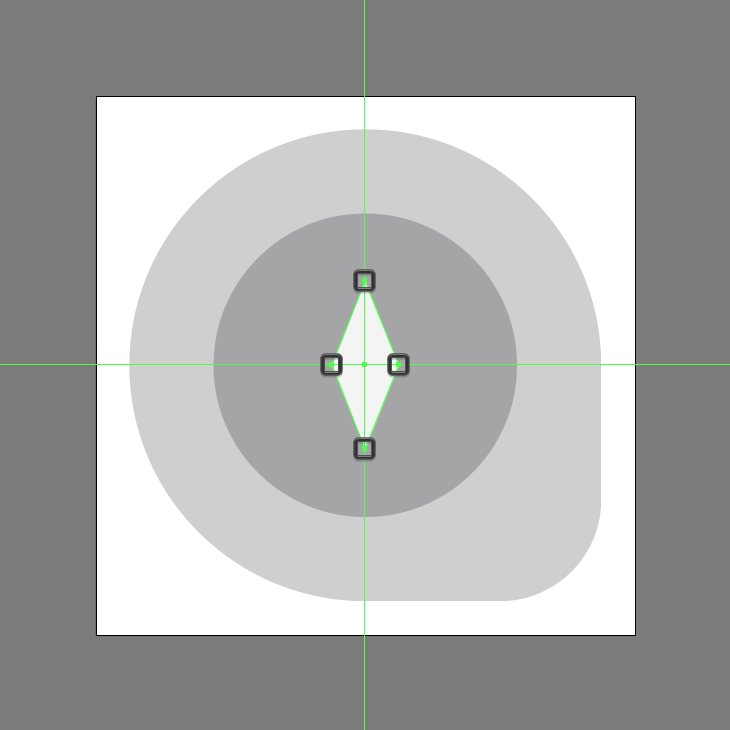
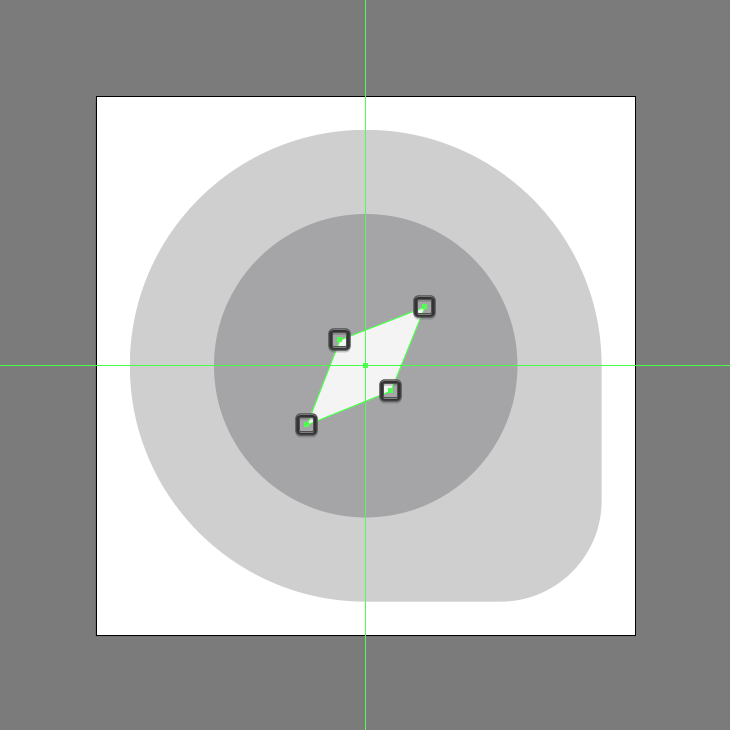
Continue adjusting the shape by removing its outer anchor points using the Delete Anchor Point Tool (–), by simply clicking on them.
Step 7
Rotate the resulting shape clockwise by right clicking and then heading over to Transform > Rotate and then setting the Angle to -45°, making sure to snap the anchor points back into place by first turning on the Pixel Preview mode (Alt-Control-Y) and then individually re-positioning them to the nearest gridline intersection using the Direct Selection Tool (A). Take your time, and once you’re done, turn off the Pixel Preview mode using the Alt-Control-Y keyboard shortcut.
Step 8
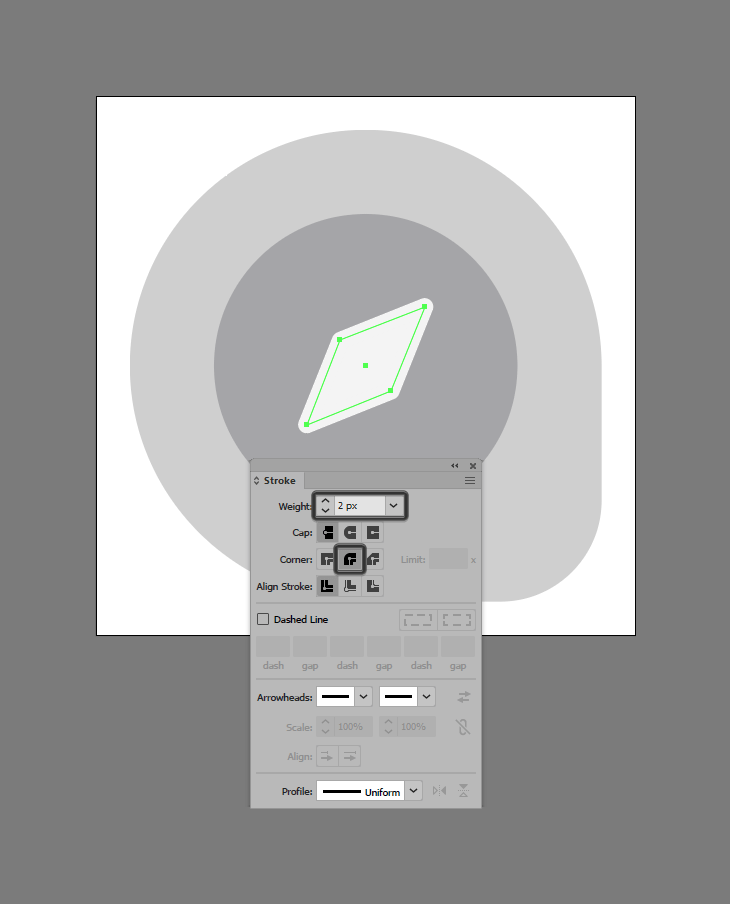
Adjust the roundness of the resulting shape’s tips, by creating a copy of it (Control-C), which we will paste in front (Control-F) and then adjust by flipping its Fill with its Stroke using the Shift-X keyboard shortcut, and then opening up the Stroke panel and setting its Weight to 2 px and its Corner to Round Join. Once you’re done, select and group the two shapes together using the Control-G keyboard shortcut.
Step 9
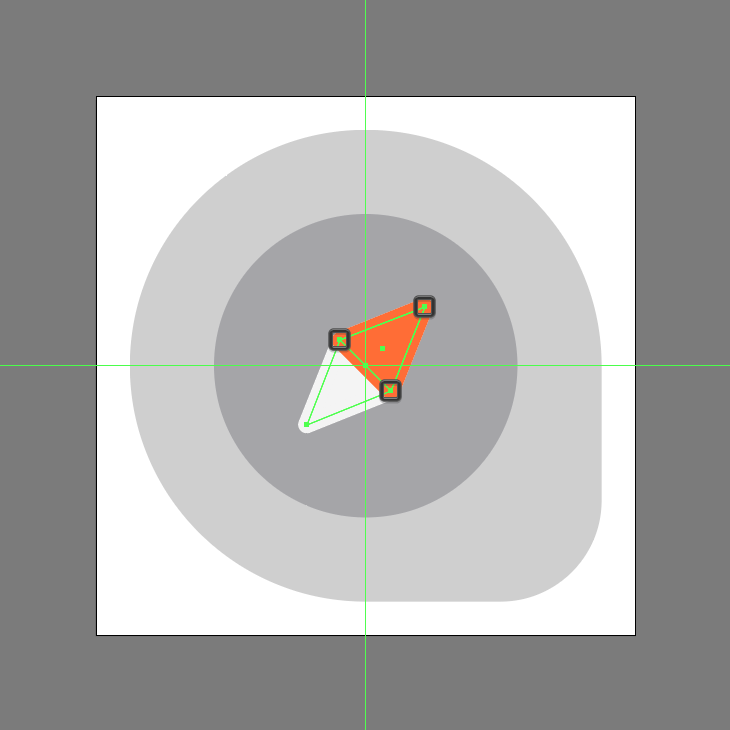
Add the needle’s red end using a copy (Control-C) of its fill shape, which we will paste in front (Control-F), and then adjust by first changing its color to #ff6d33 and then removing its bottom-left anchor point using the Delete Anchor Point Tool (–). Give the resulting shape a 2 px outline (#ff6d33) with a Round Join, making sure to select and group (Control-G) them together, doing the same for the entire needle afterward.
Step 10
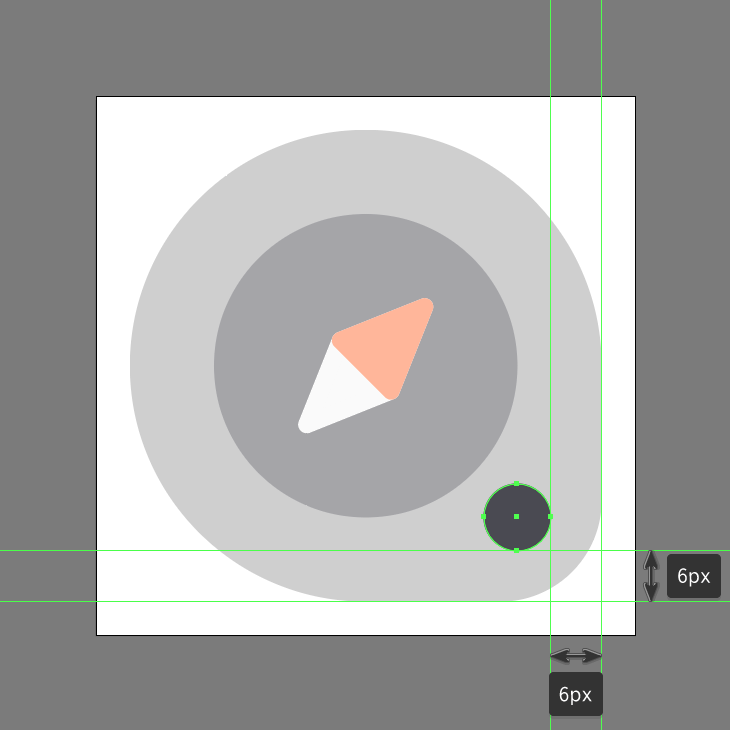
Finish off the icon and with it the project itself, by adding the little keychain hole using an 8 x 8 px circle (#494951), which we will position onto the larger body’s bottom-right corner, as seen in the reference image. Once you’re done, don’t forget to select and group (Control-G) all of the icon’s composing shapes before finally hitting that save button.
Awesome Work!
As always, I hope you had fun working on the project, and most importantly managed to learn something new and useful during the process.
That being said, if you have any questions, feel free to post them within the comments section and I’ll get back to you as soon as I can!
