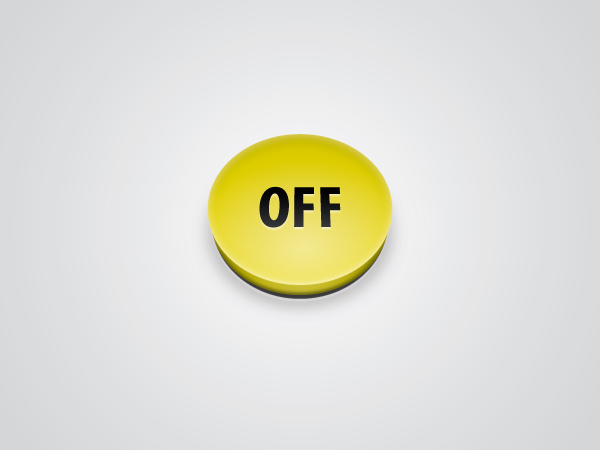
In the following Adobe Illustrator tutorial you will learn to Create a simple 3D Vector Button using ellipses and 3D effects. We will also learn how to add multiple fills and also how to combine multiple Blending Modes in order to create some interesting effects.
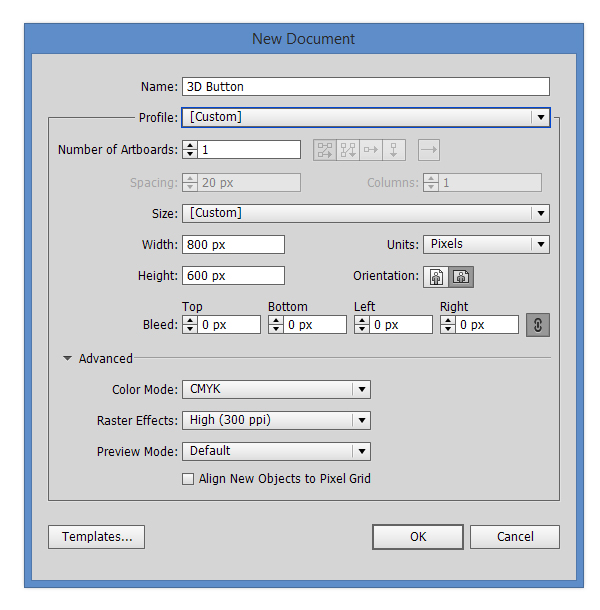
1. Open Adobe Illustrator and create a new 800 x 600px document (Ctrl + N). Select CMYK Color Mode, 300 PPI Raster Effects and make sure that Align New Objects to Pixel Grid is unchecked.
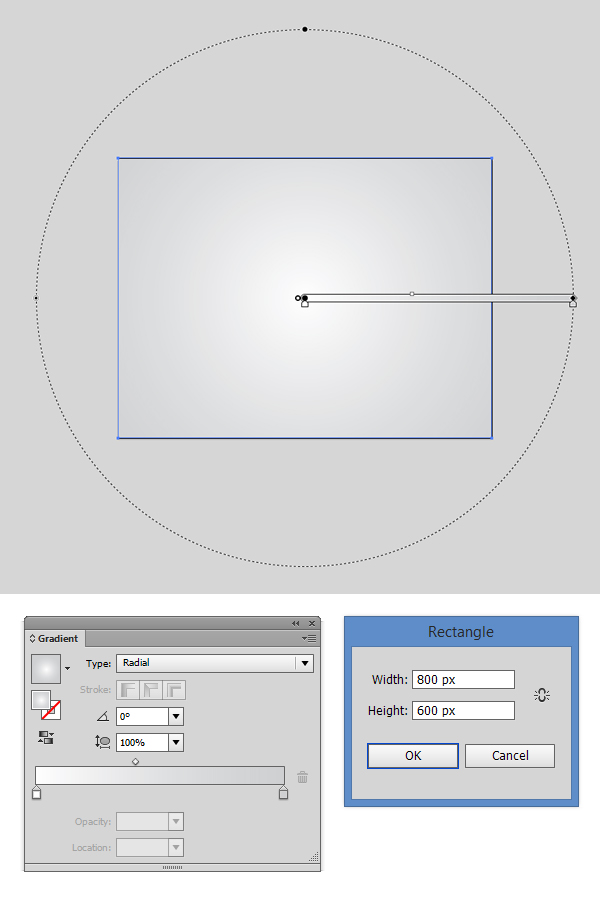
2. Using the Rectangle Tool (M) create a 800 x 600 px rectangle. Fill it with a white to gray radial gradient. From the Appearance Panel hide the background shape (Click on the eye).
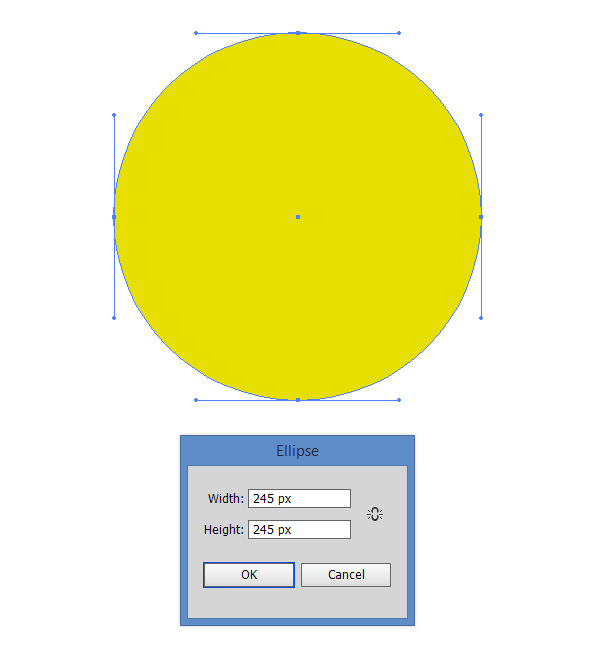
3. Pick the Elipse Tool (L) and create a 245 x 245 px elipse.
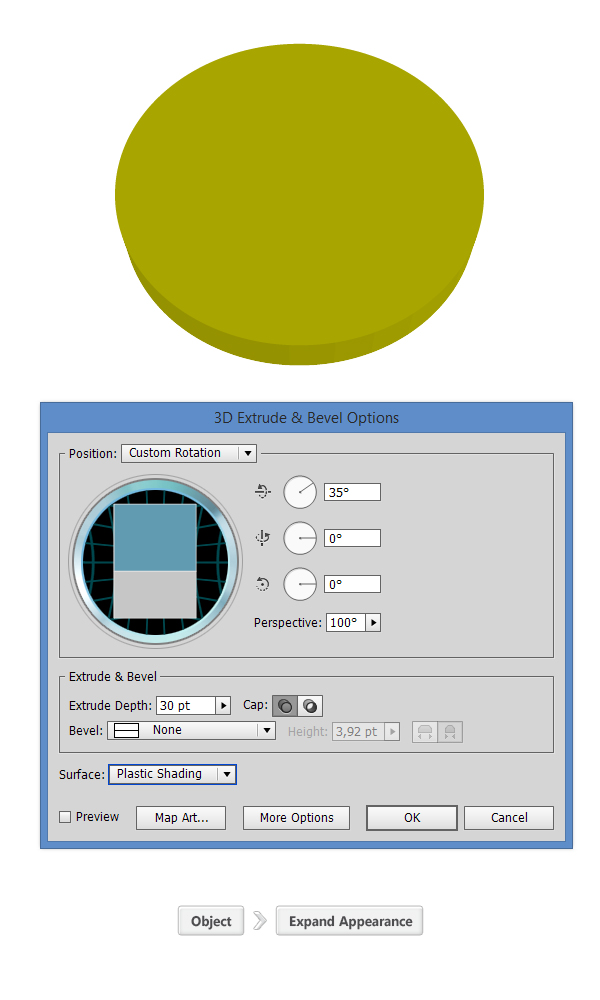
4. Select the elipse and apply a 3D Effect to it (Effect > 3D > Extrude & Bevel). Enter the same values as in the screenshot below, then expand the 3D Effect by going to Object > Expand Appearance.
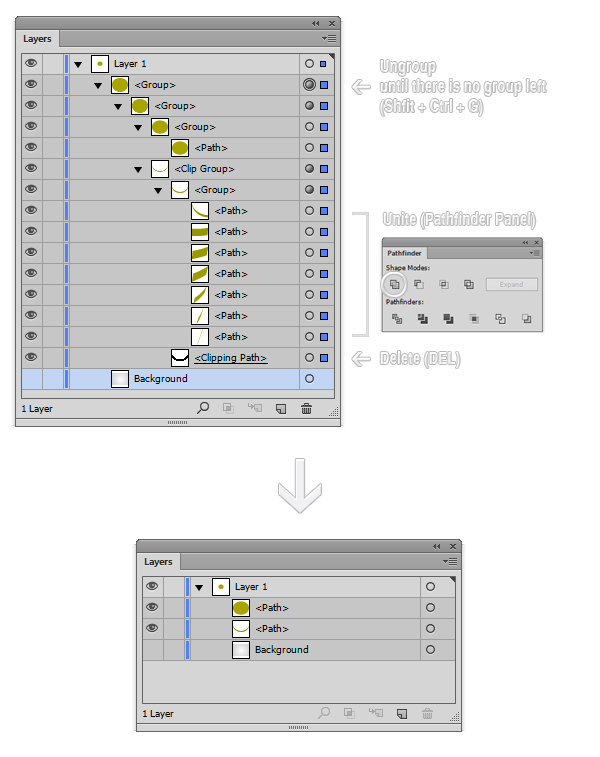
5. After expanding the 3D effect, focus on the Appearance Panel. In the end we need to have two distinct shapes. First of all, select those 7 small shapes and Unite them using the Pathfinder Panel, then delete (DEL) the useless clipping path. After we’ve managed to obtain two shapes, ungroup until there is no group left (Shift + Ctrl + G).
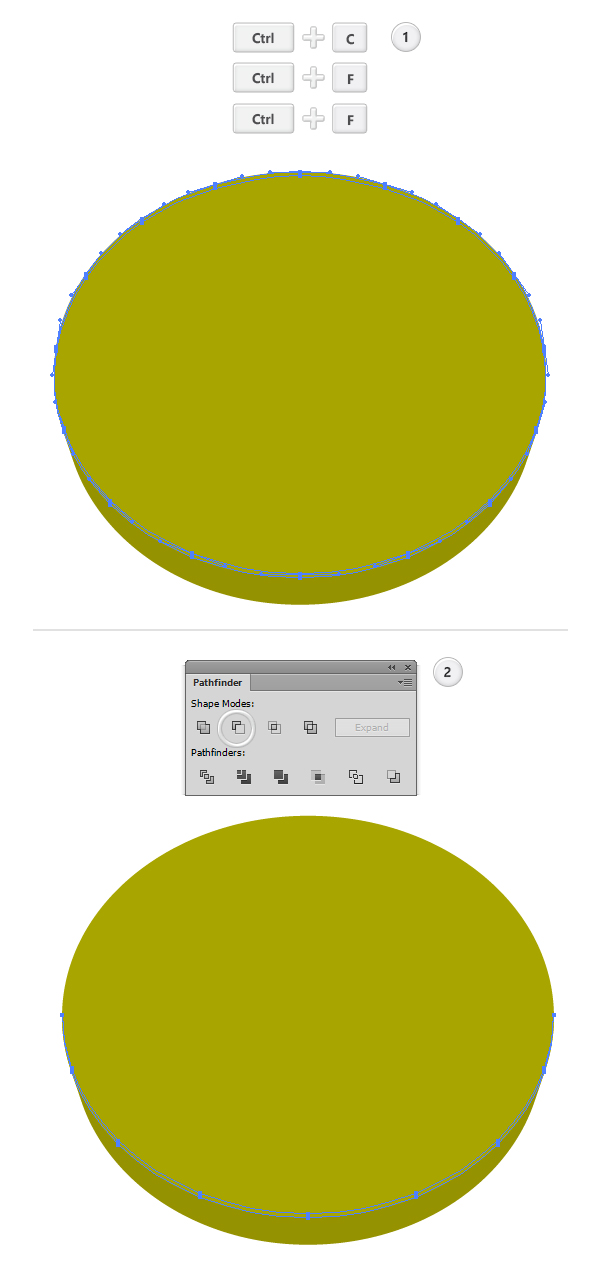
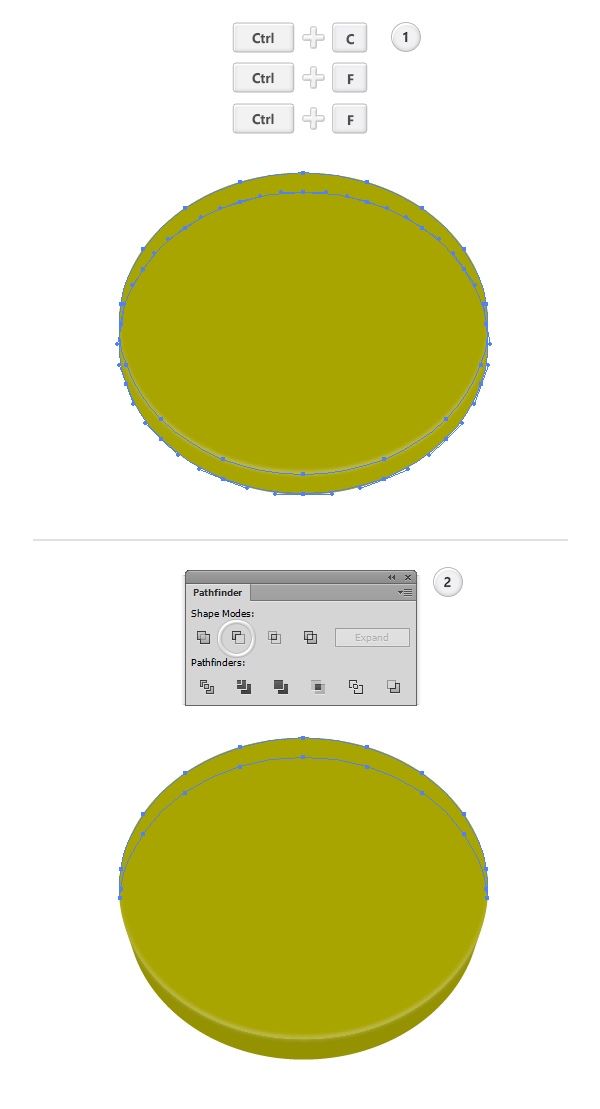
6. Select the big elipse, make two copies in front of it (Ctrl + C > Ctrl + F > Ctrl + F), then move 2 px up the top copy. Select both copies and from the Pathfinder Panel hit the Minus Front button.
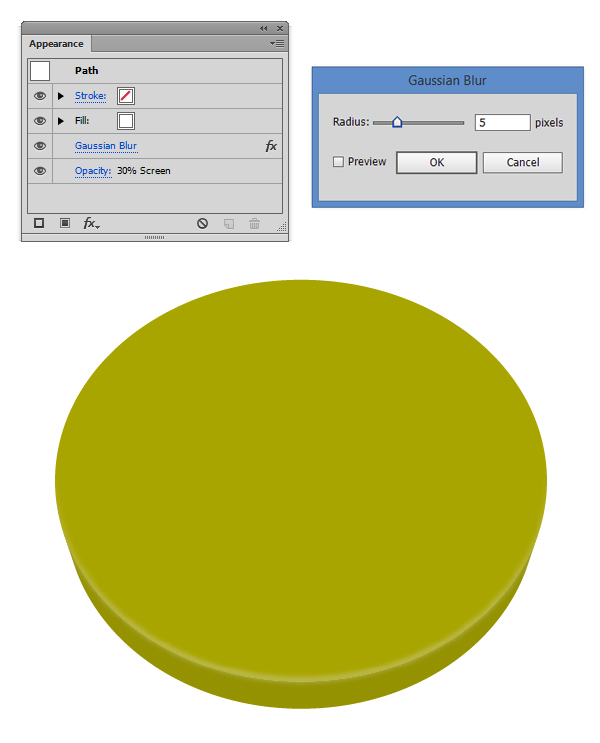
7. Fill the resulting shape with white, lower it’s opacity to 30%, then set the Blending Mode to Screen. Go to Effect > Blur > Gaussian Blur and apply a 5px blur.
8. Select the big elipse, make two copies in front of it (Ctrl + C > Ctrl + F > Ctrl + F), then move 12 px down the top copy. Select both copies and from the Pathfinder Panel hit the Minus Front button.
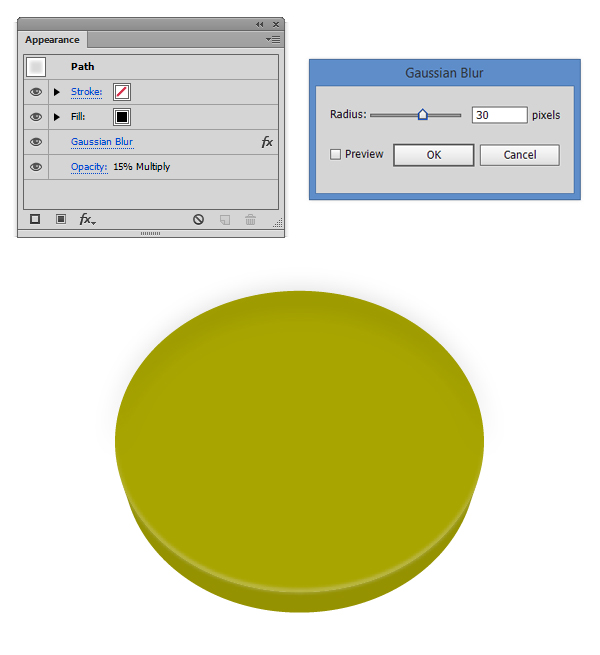
9. Fill the resulting shape with black, lower it’s opacity to 15%, then set the Blending Mode to Multiply. Go to Effect > Blur > Gaussian Blur and apply a 30px blur.
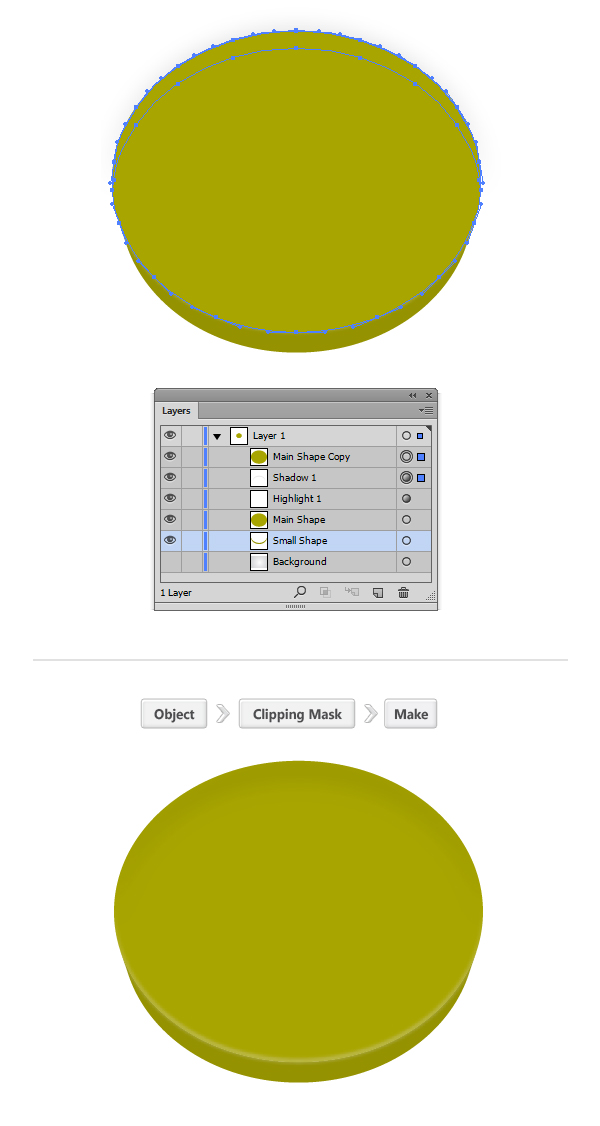
10. Select the Main Shape, make a copy in front of it (Ctrl + C > Ctrl + F). From the Layers Panel move it on front of all the other shapes (Shift + Ctrl + ]), then select both the copy and the previous shadow shape and create a Clipping Mask (Object > Clipping Mask > Make).
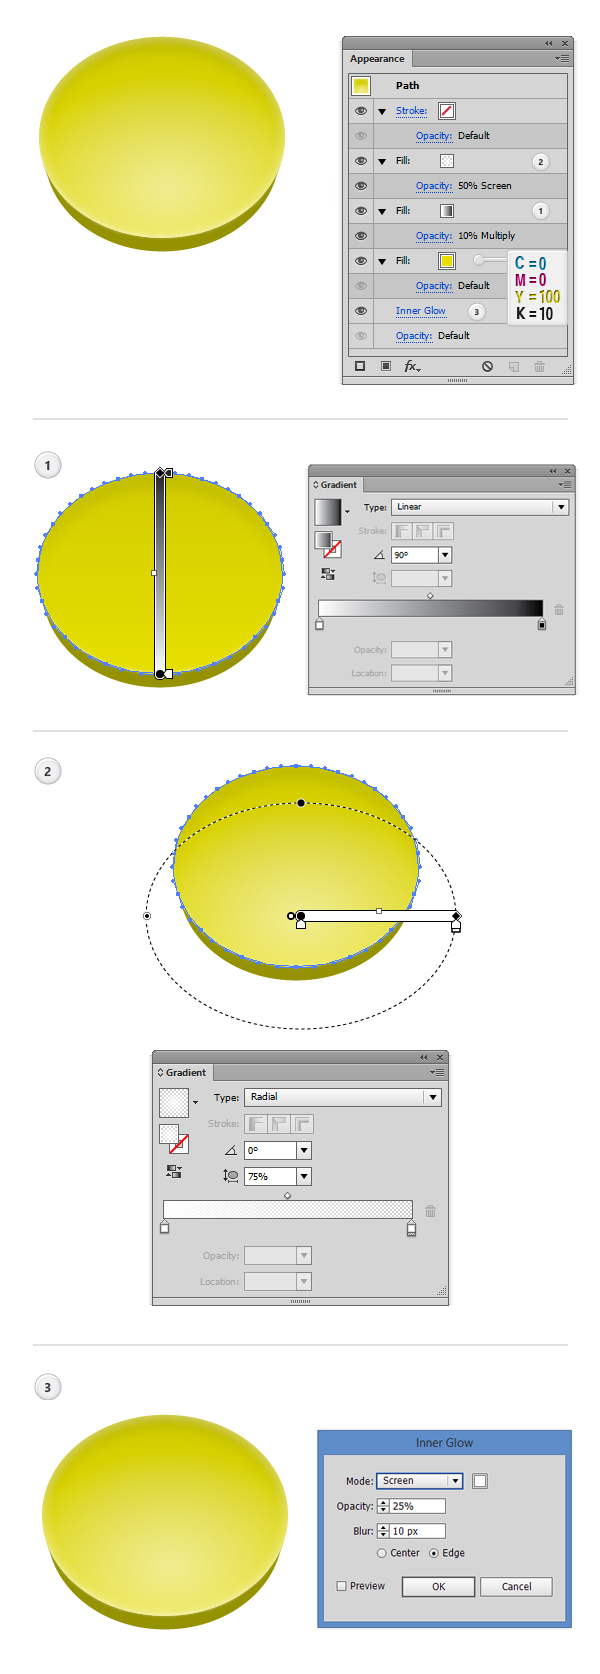
11. Now let’s focus on applying effects on the Main Shape. First of all fill it with C=0 M=0 Y=100 K=10. Add a second fill, this time a linear gradient fill (Step 1), lower the fill opacity to 10%, then set the Blending Mode to Multiply. Add a third fill, this time a radial gradient fill (Step 2), lower the fill opacity to 50%, then set the Blending Mode to Screen. Reselect the whole shape and apply a 10px Inner Glow (Step 3) by going to Effect > Stylize > Inner Glow.
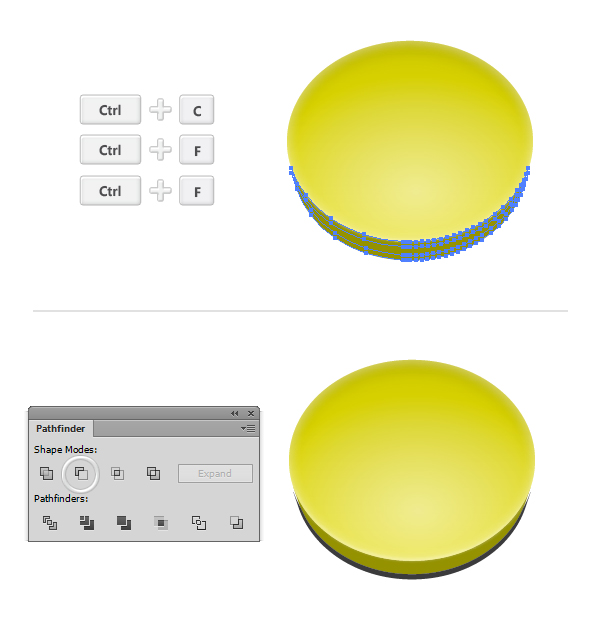
12. Select the small shape, make two copies in front of it (Ctrl + C > Ctrl + F > Ctrl + F), then move 5 px down the first copy. Select both copies and from the Pathfinder Panel hit the Minus Front button.
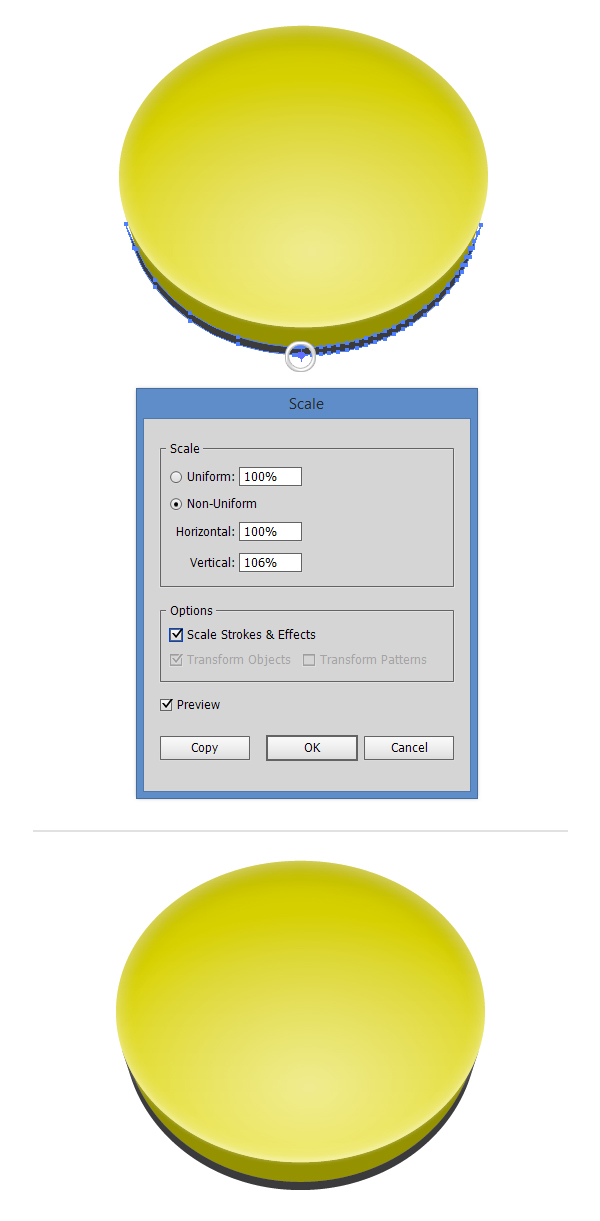
13. Select the resulted shape, then pick the Scale Tool (S) and while holding the ALT button, select the same reference point as in the image below. In the dialog box, select the Non-Uniform option, then enter a value of 106% for Vertical.
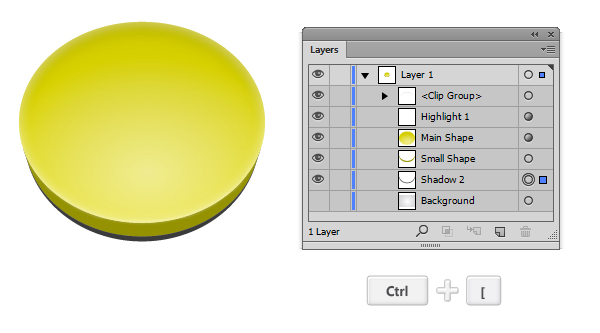
14. Focus on the Layers Panel and move the previous shape (Shadow 2) below the Small Shape (Ctrl + [ ).
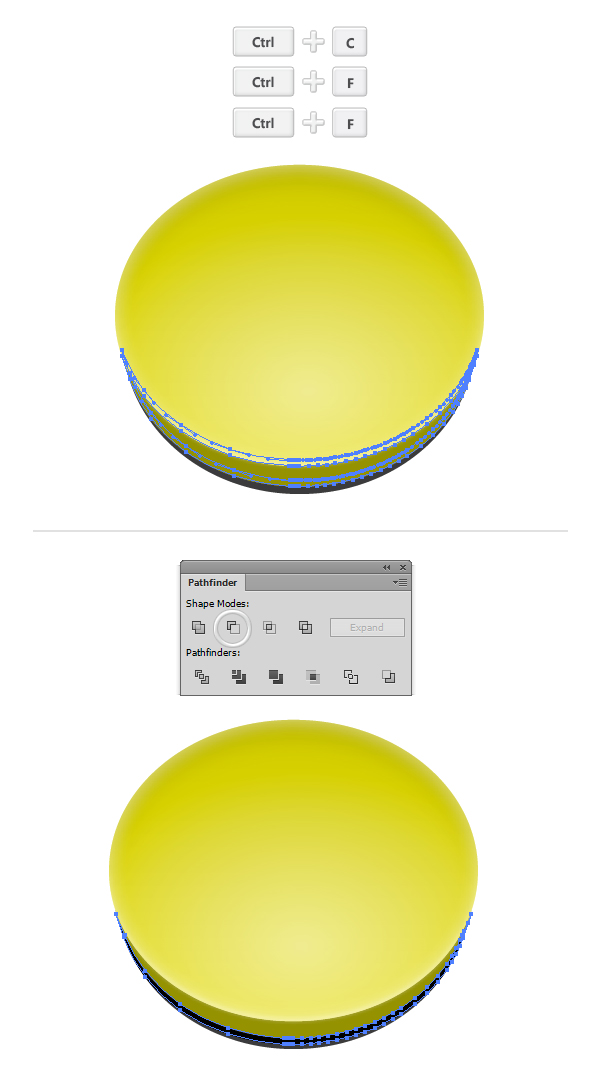
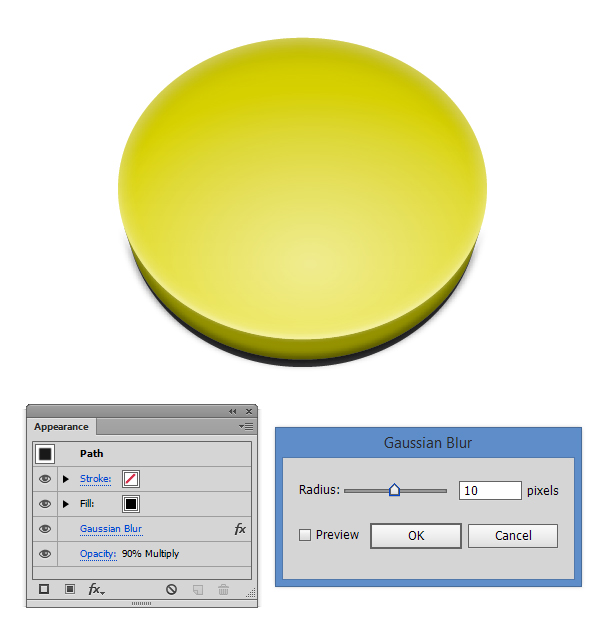
15. Select the small shape, make two copies in front of it (Ctrl + C > Ctrl + F > Ctrl + F), then move 4 px up the top copy. Select both copies and from the Pathfinder Panel hit the Minus Front button.
16. Fill the resulted shape with black, lower the opacity to 90%, then set the Blending Mode to Multiply. Go to Effect > Blur > Gaussian Blur and apply a 10px blur, then move the shape 2px down.
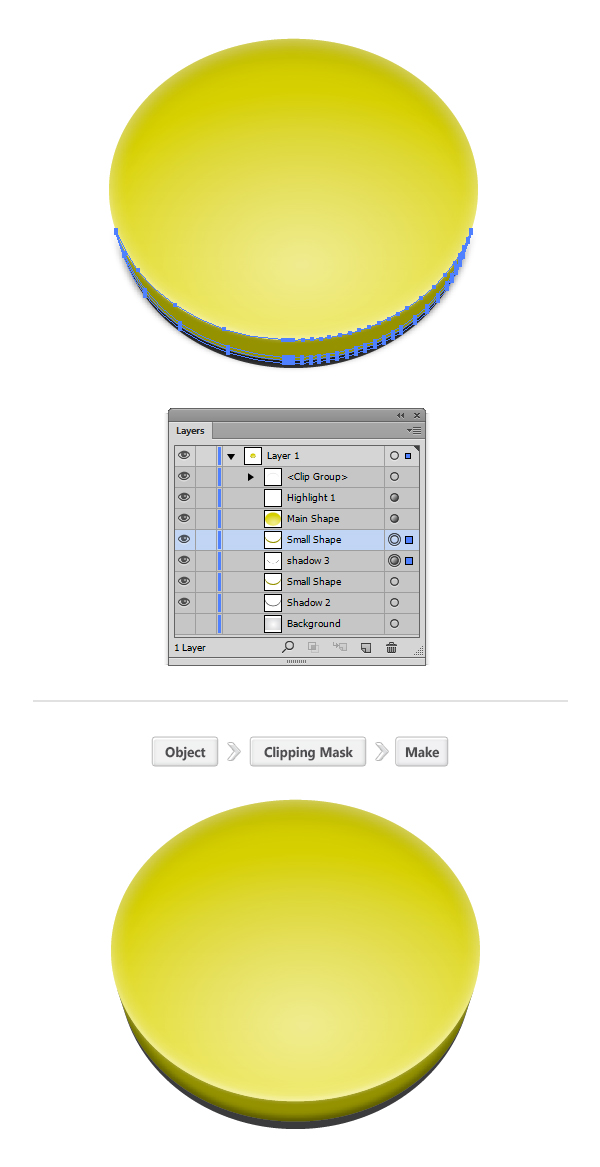
17. Select the Small Shape, make a copy in front of it (Ctrl + C > Ctrl + F). From the Layers Panel move it on front of the previous shape (Shadow 3), then select both the copy and the previous shadow shape and create a Clipping Mask (Object > Clipping Mask > Make).
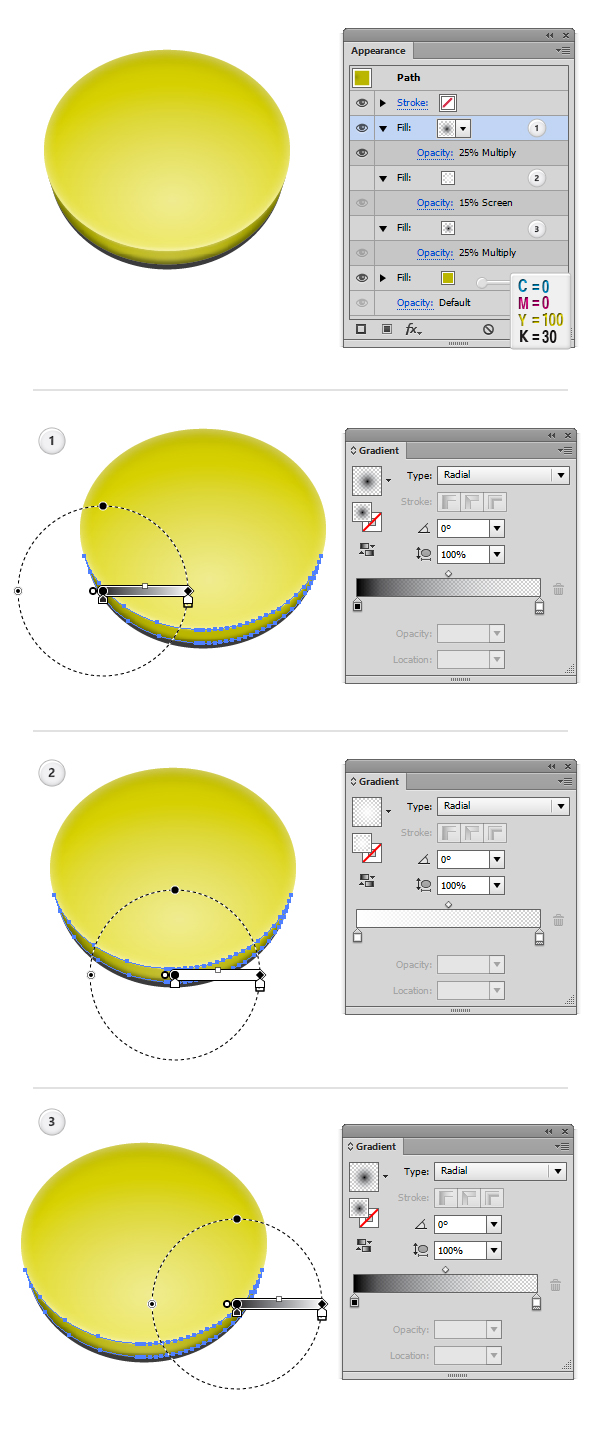
18. Now let’s focus on applying effects on the Small Shape. First of all fill it with C=0 M=0 Y=100 K=30. Add second fill, this time a radial gradient fill (Step 1), lower the fill opacity to 25%, then set the Blending Mode to Multiply. Add a third fill, again a radial gradient fill (Step 2), lower the fill opacity to 15%, then set the Blending Mode to Screen. Add the last fill, again a radial gradient fill (Step 3), lower the fill opacity to 25%, then set the Blending Mode to Multiply.
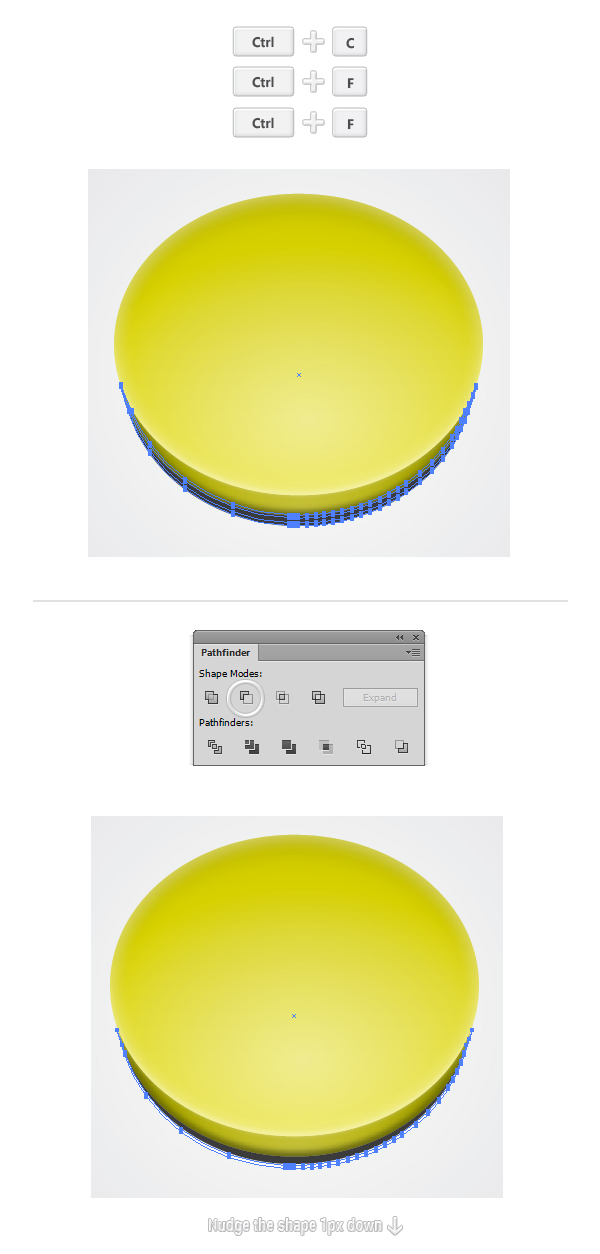
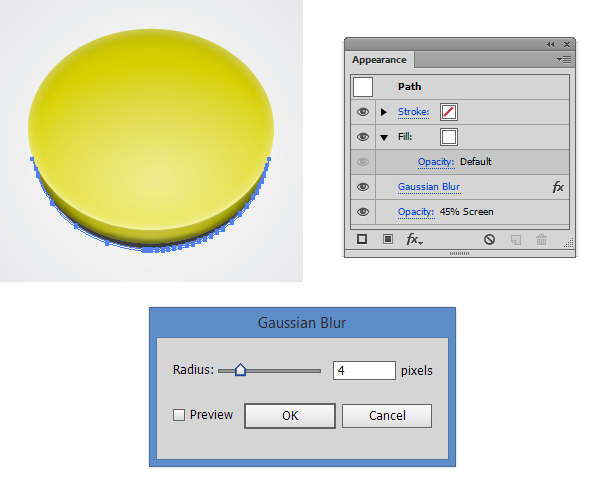
19. Select the Shadow 2 shape (created in Step 12), make two copies in front of it (Ctrl + C > Ctrl + F > Ctrl + F), then move 2 px down the first copy. Select both copies and from the Pathfinder Panel hit the Minus Front button. Nudge the resulted shape 1px down.
20. Fill the previous shape with white, lower the opacity to 45%, then set the Blending Mode to Screen. Go to Effect > Blur > Gaussian Blur and apply a 4px blur.
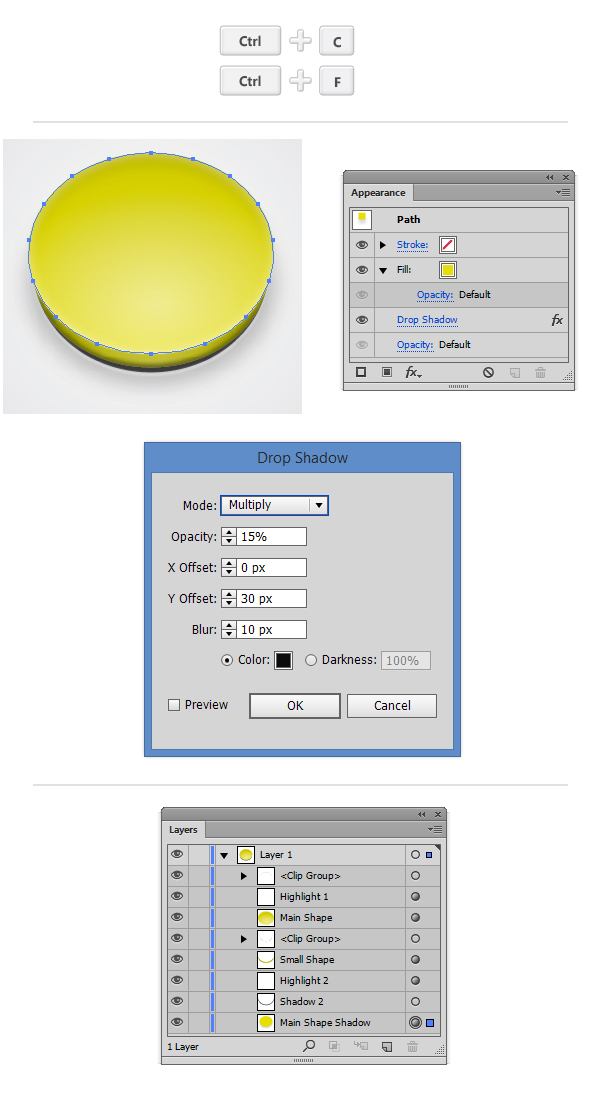
21. Reselect the Main Shape, make a copy of it (Ctrl + C > Ctrl + F), then from the Layers Panel, move it below all the other shapes. From the Appearance Panel delete all the fills and effects as it reallt doesn’t matter what fill colour it has. Apply a Drop Shadow effect to it (Effect > Stylize > Drop Shadow), then in the dialog box enter the same values as below.
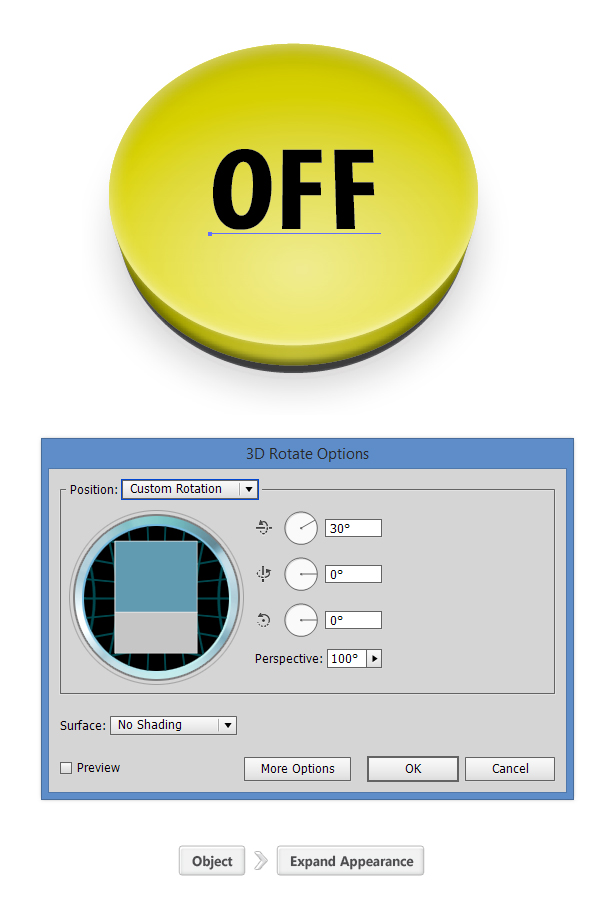
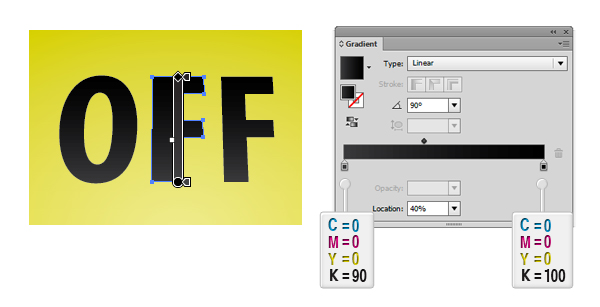
22. Using the Type Tool (T), write the word “OFF”. I’ve used Myriad Pro font, Condensed Bold style. Apply to it a rotate effect (Effect > 3D > Rotate), then expand it by going to Object > Expand Appearance.
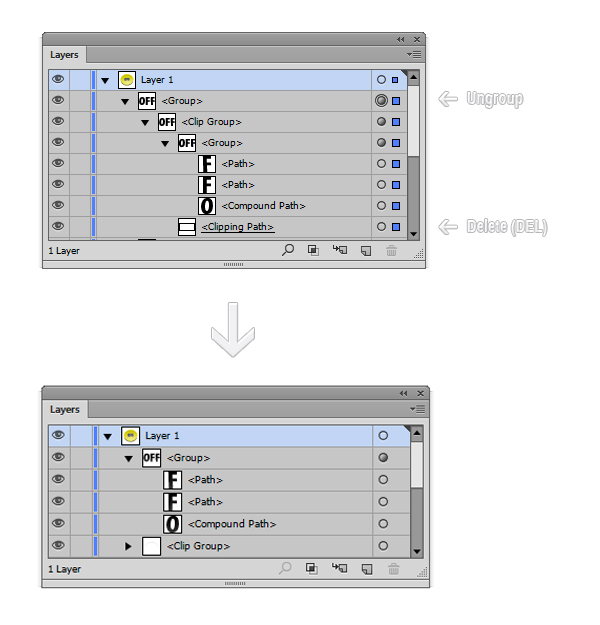
23. From the Layers Panel, delete the useless Clipping Path (DEL), then ungroup (Shift + Ctrl + G) until we have only one group containing all three letters.
24. Fill each letter with a linear gradient fill.
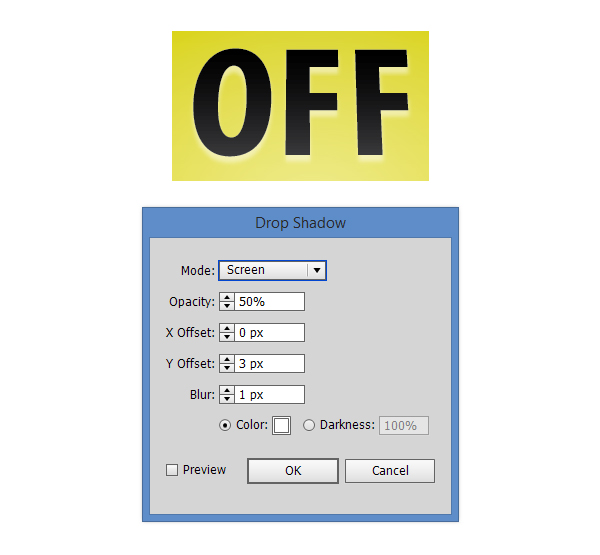
25. Select all three letter and apply a Drop Shadow effect (Effect > Stylize > Drop Shadow).
Here the final image of our 3D Vector Button!

