In the following steps you will learn how to create a beer text effect in Adobe Illustrator. For start you will use a free font to create the main text shape. Next, using the Pen tool and some effects along with the Transparency palette, you will learn how to add shading, highlights and subtle textures. The masking techniques also plays an important role in this tutorial along with a bunch of blending techniques. So let’s start!
Create a New Document
1. Launch Illustrator and then press (Ctrl + N) to create a New document. Select Pixels from the Units drop-down menu, enter 700 in the width box and 400 in the height box then click on the Advanced button. Select RGB, Screen (72ppi) and make sure that the Align New Objects to Pixel Grid box is unchecked before you click OK.
Prepare the Text
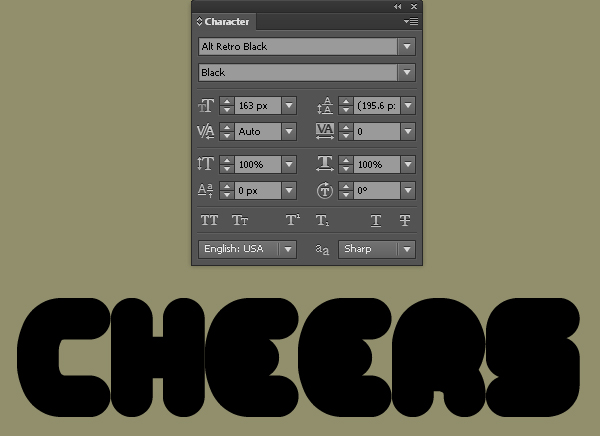
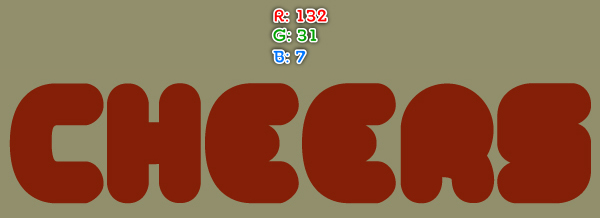
2. Pick the Type Tool (T), open the Character palette (Window > Type > Character) and set the data as shown below. Next simply click on your artboard and add the text like you see in the image below. Now reselect the text and go to the Object > Expand, then Ungroup (Shift +Control +G). Finally replace the existing color of all newly created letters with R=132, G=31, B=7.
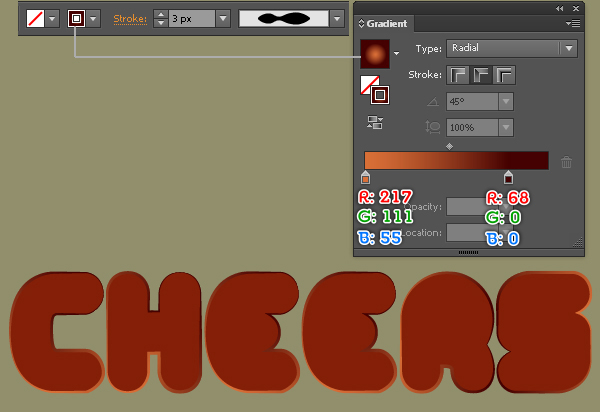
3. Select the all newly created letters and duplicate (Ctrl +C, Ctrl +F) them once. Next remove the fill of the copies and add a 3px stroke (apply the radial gradient along stroke), then apply the Width Profile 2 for the resulting objects.
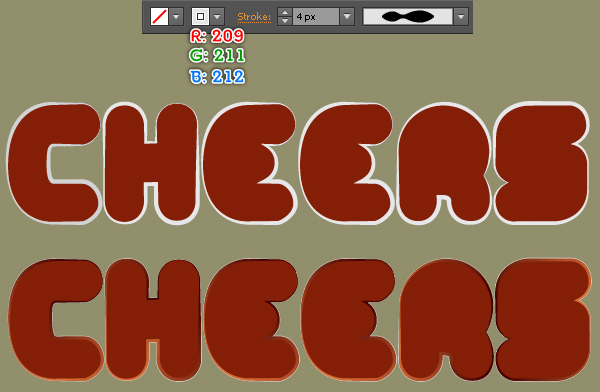
4. Make a copy (Ctrl +C, Ctrl +F) of six new objects created in the step 3, replace the existing stroke color of the copies with R=209, G=211, B=212 and change the stroke weight the resulting objects to 4px, then send them to back (Ctrl +Shift +Left Square Bracket).
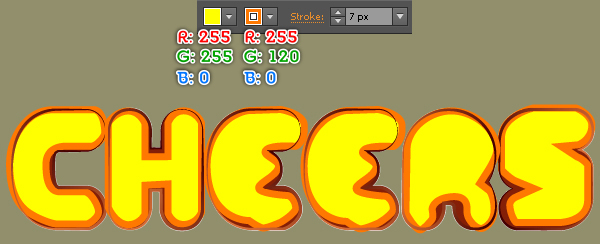
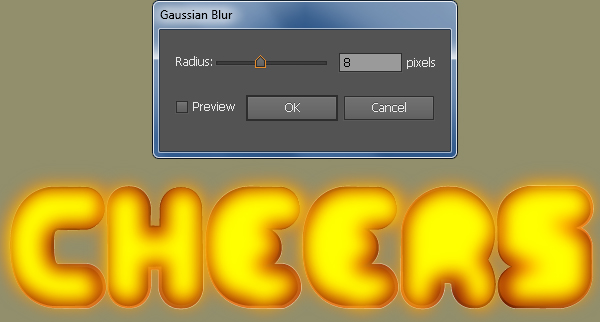
5. With the help of the Pen Tool (P) create six objects as shown below. Once your objects are drawn, fill them with R=255, G=255, B=0 and then add a 7px stroke (R=255, G=120, B=0). Reselect all six shapes created in this step and go to the Effect > Blur > Gaussian Blur… Enter a 8px Radius and click OK.

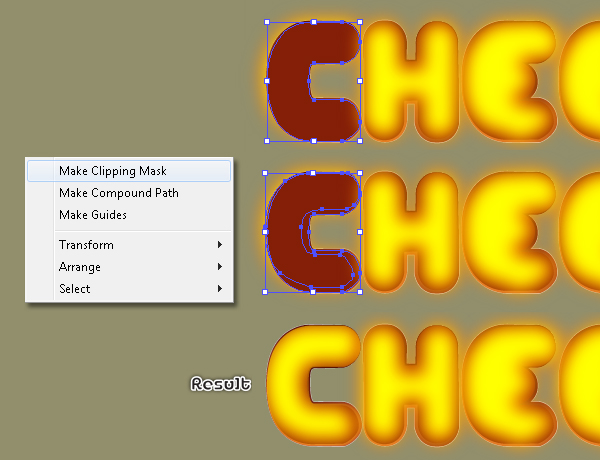
6. Focus on the letter “C”. Select the shape created in the step 2 of the letter “C”, duplicate it once and bring the copy to front (Ctrl +Shift +Right Square Bracket). Keep the new shape selected, hold down the Shift and click on the the shape with blur effect applied in the step 5 of the letter “C”, then go to the Object > Clipping Mask > Make (Ctrl +7).
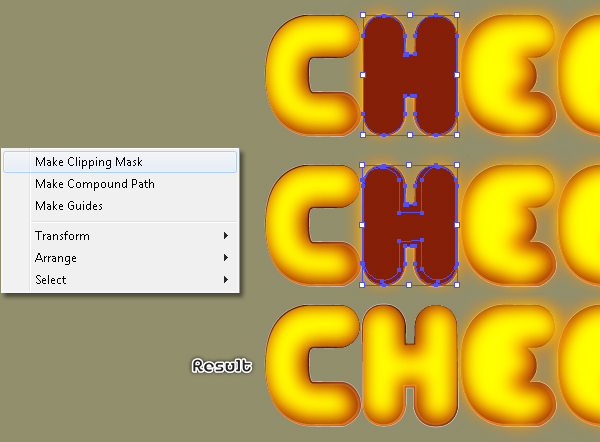
7. Next come the letter “H”. Select the shape created in the step 2 of the letter “H”, duplicate it once and bring the copy to front (Ctrl +Shift +Right Square Bracket). Keep the new shape selected, hold down the Shift and click on the the shape with blur effect applied in the step 5 of the letter “H”, then go to the Object > Clipping Mask > Make (Ctrl +7).
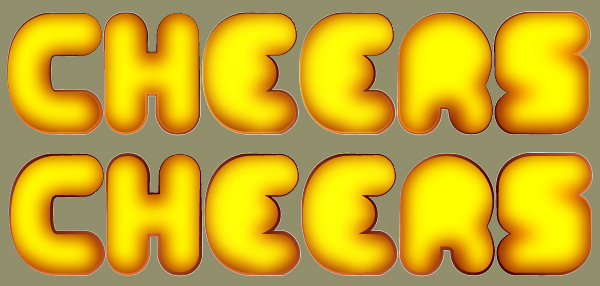
8. Repeat the same techniques for the remaining four letters. In the end your artwork should look like the image shown. Finally select all six objects created in the step 3 and bring them to front like you see in the second image below.
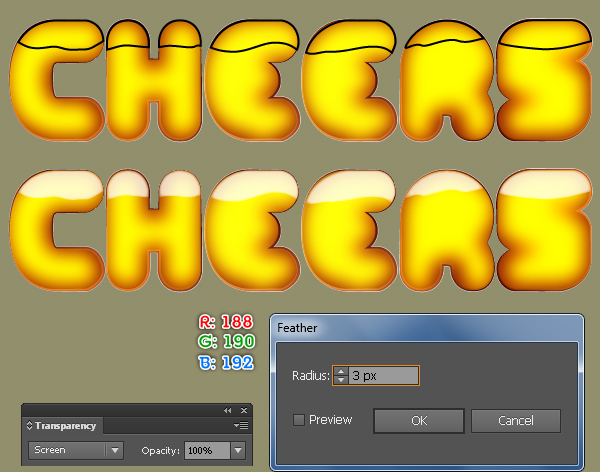
9. Using the Pen Tool (P) create seven objects as shown below. Once your objects are drawn, remove the stroke color and fill them with R=188, G=190, B=192. Make sure that the resulting shapes are still selected and go to the Effect > Stylize > Feather… Enter a 3px Radius and click OK, then set the Blending Mode of the resulting shapes to Screen.
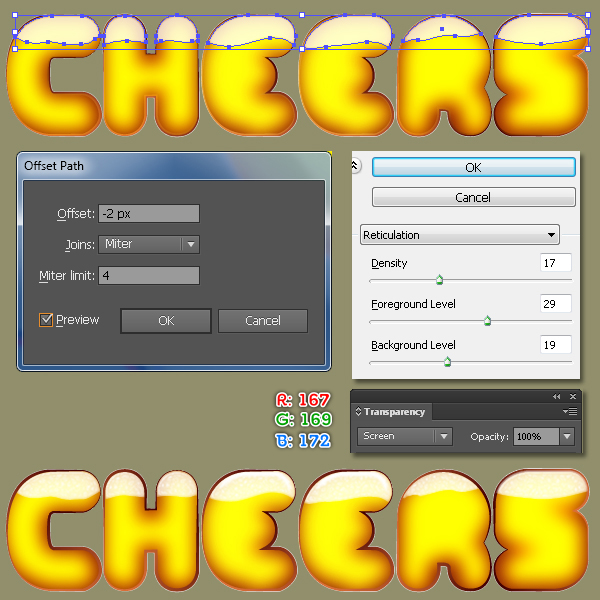
10. Reselect all seven shapes created in the step 9 and go to the Object > Path > Offset Path… Enter a -2px Offset and click OK, then replace the existing color of the new shapes with R=167, G=169, B=172. Keep the resulting shapes selected and go to the Effect > Sketch > Reticulation… Follow the data as shown below and click OK.
Creating the Bubbles
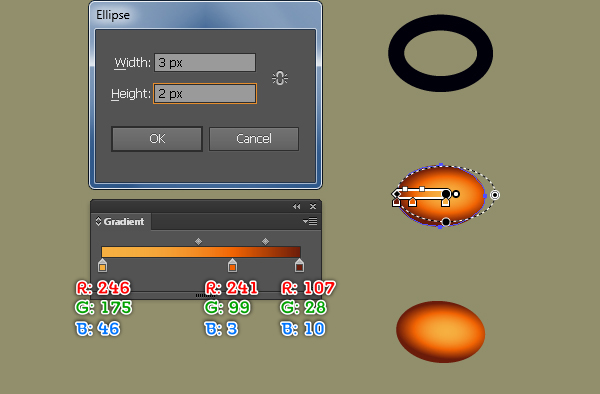
11. Now we’re going to make the bubbles. Start with drawing a 3 by 2px ellipse using the Ellipse Tool (L). Next fill this ellipse with the radial gradient as shown below and then rotate the resulting ellipse an angle of about -5 degrees. Make a copy of the new ellipe and then move the copy 80px to the right. Reselect two new ellipses and go to the Object > Blend > Blend Options… Follow the data as shown in the fourth image and click OK, then go to the Object > Blend > Make (Ctrl +Alt +B).
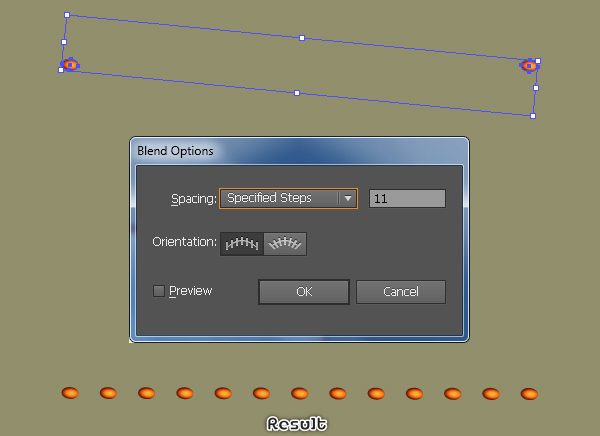
12. Using the Pencil Tool (N) create a path as shown in the first image below. Once your path is drawn, reselect it and the bledded object created in the step 11, then go to the Object > Blend > Replace Spine.
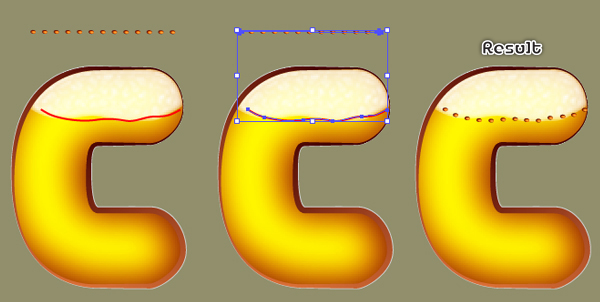
13. Make a copy (Ctrl +C, Ctrl +F) of the blended object created in the step 12, then move the copy 1px down and move it 2px to the left. Next adjust the shape of the spine of the new blended object. To adjust the shape of the spine, drag the anchor points and path segments on the spine with the Direct Selection Tool (A).
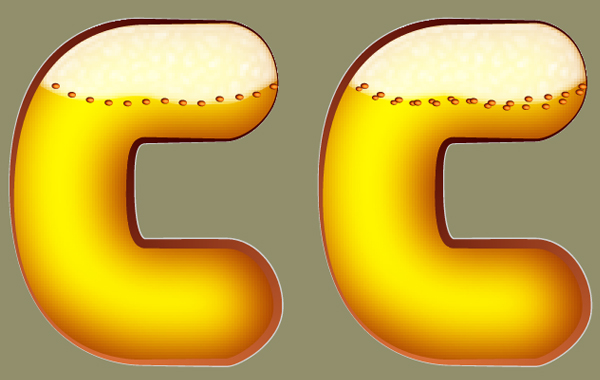
14. Repeat the same process as the previous steps to create another blended object as shown in the first image. Next reduce the Opacity of the blended objects to 20 or 30%.
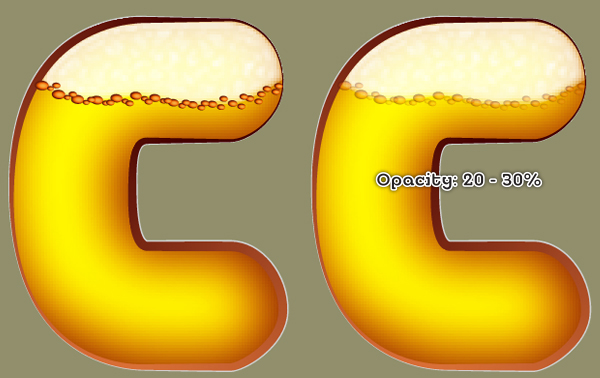
15. Repeat the same techniques for the remaining five letters. In the end your artwork should look like the image shown.

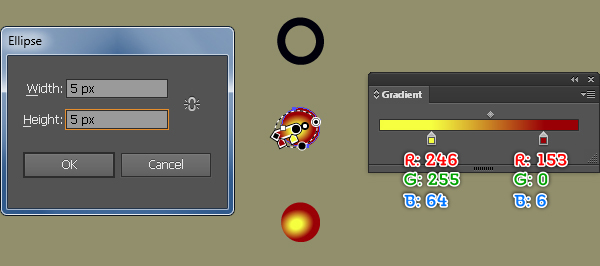
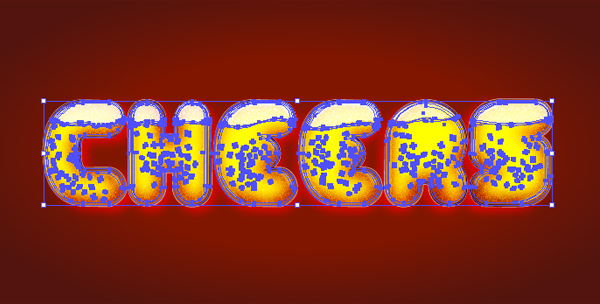
16. Pick the Ellipse Tool (L) and create a 5 by 5px ellispe, then fill it with the radial gradient as shown below. Continue to draw more bubbles until you have something like you see in the final image below.
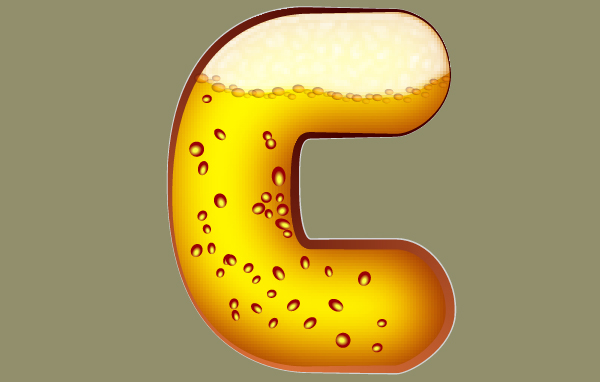
17. Select all “bubble” shapes created in the step 16 and go to the Effect > Stylize > Feather… Enter a 2px Radius and click OK, then reduce the Opacity of the resulting shapes to 60%.
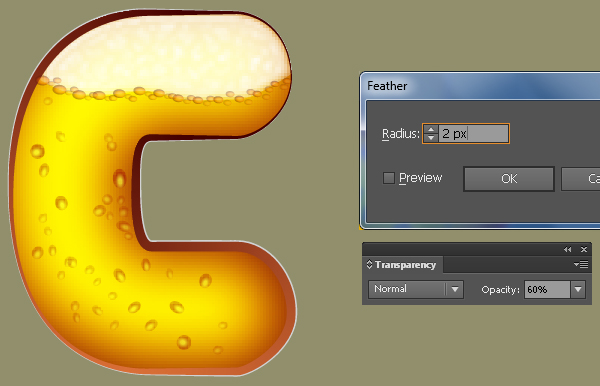
18. Likewise, repeat the same process as the previous steps for the remaining five letters. In the end your artwork should look like the image below.

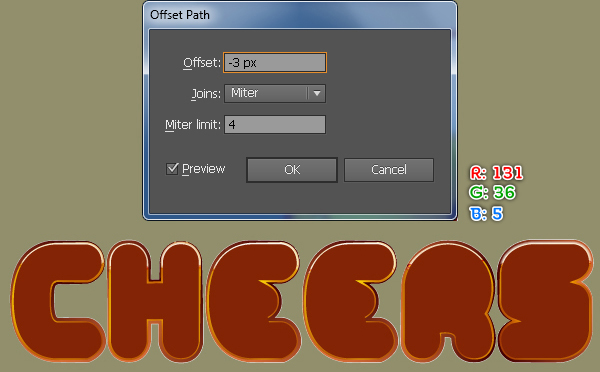
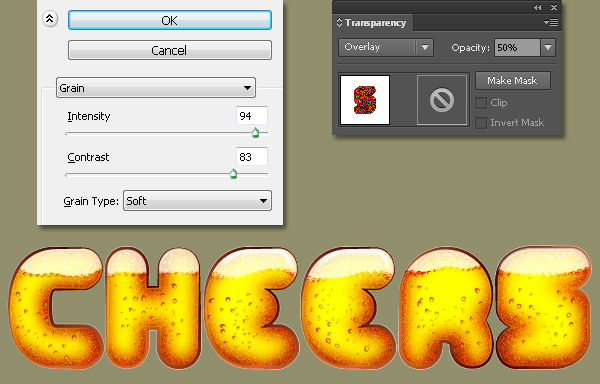
19. Select all six shapes created in the step 2 and go to the Object > Path > Offset Path… Enter a -3px Offset and click OK, then bring the new shapes to front. Keep these shapes selected and replace the existing color of them with R=131, G=36, B=5. Make sure that the all resulting shapes are selected and go to the Effect > Texture > Grain… Follow the data as shown in the second image and click OK. Finally set the Blending Mode of the resulting shapes to Overlay and reduce their Opaticy to 50%.
Adding the Highlights
20. We are going to start making highlights on the letters to give them more of a 3D look. First with the help of the Pen Tool (P) create curved paths like you see in the images below.
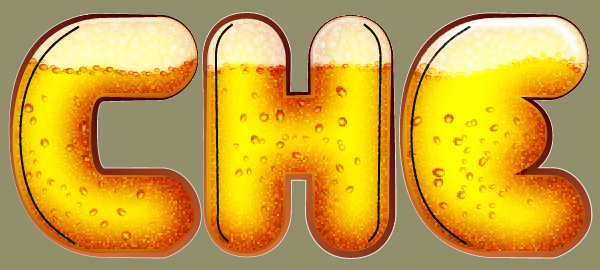
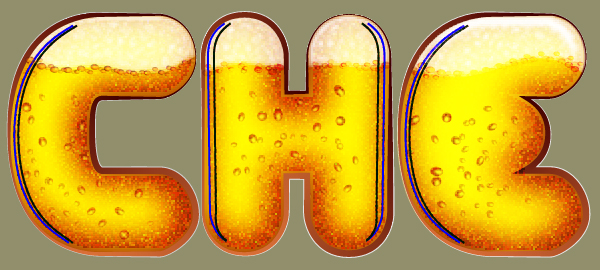
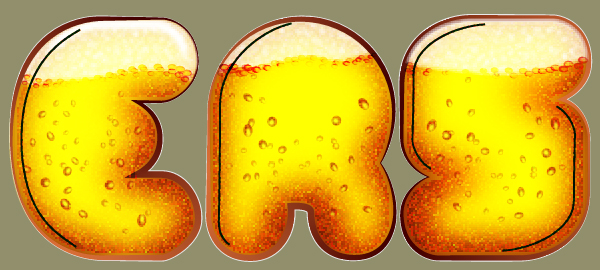
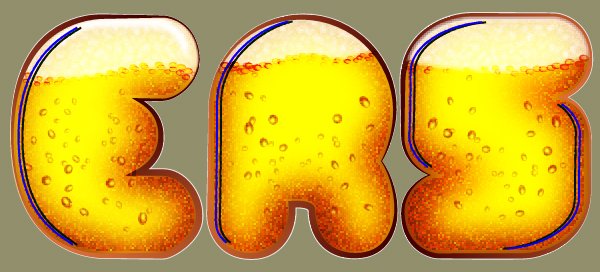
21. Once your paths are drawn, select all black paths and replace the existing stroke color of them with the linear gradient within stroke, then change the stroke weight to 4px. Next set the Blending Mode of the resulting paths to Overlay and then apply the Width Profile 3 for them.
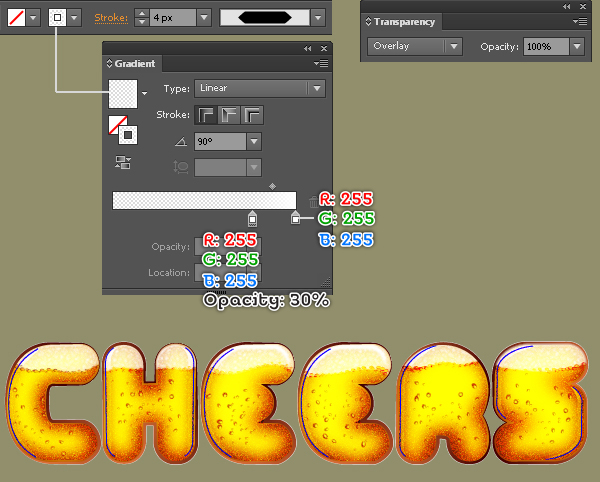
22. Select all blue paths and change their stroke weight to 2px, then replace the existing stroke color of these paths with the linear gradient within stroke as shown below.
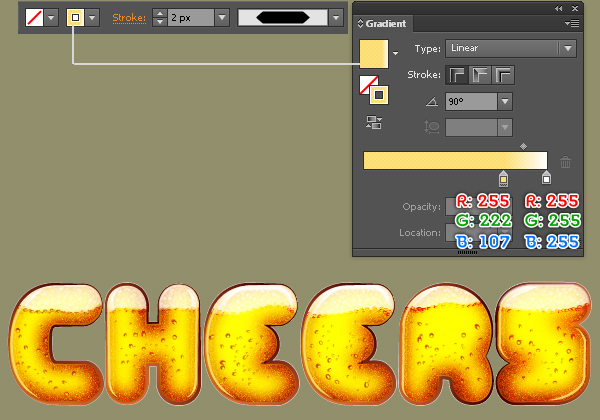
23. Keep working with the Pen Tool (P) create some green curved paths like you see in the image below. Once your paths are drawn, replace the existing stroke color of them with R=255, G=255, B=125 and change their stroke weight to 2px. Next apply the Width Profile 5 and a 2px Gaussian Blur effect for the resulting paths.
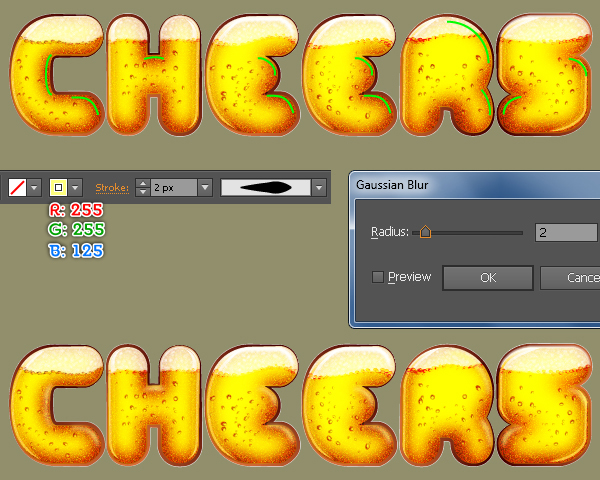
24. Reselect all shapes created in the step 19 and bring them to front (Ctrl +Shift +Right Square Bracket).
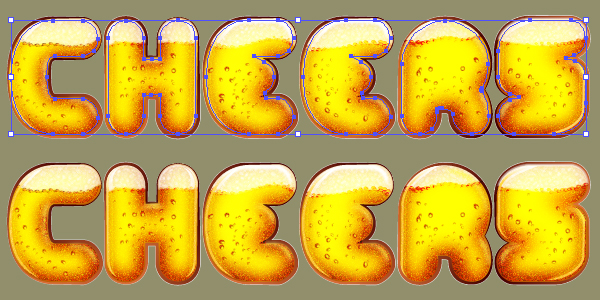
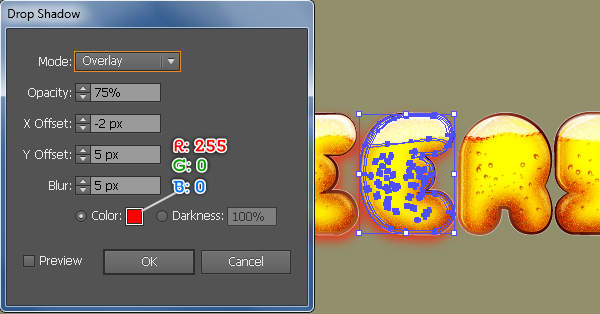
25. Select and group (Ctrl +G) all objects of the letter “C”, then go to the Effect > Stylize > Drop Shadow… Follow the data as shown below and click OK.
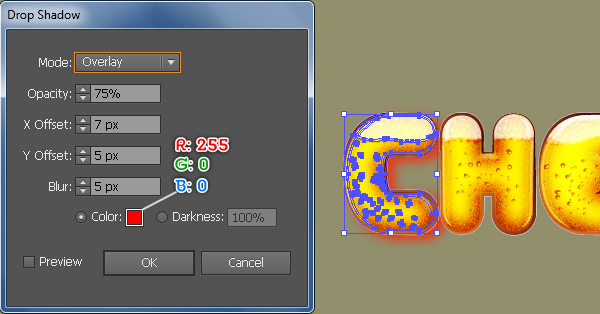
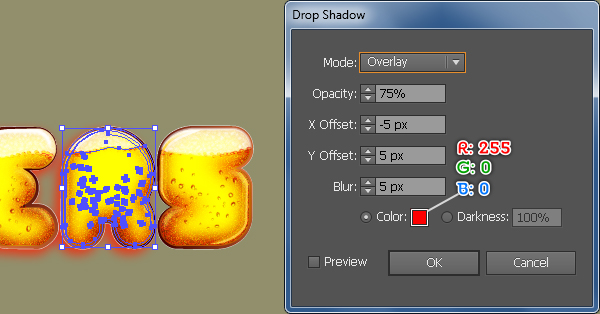
26. Next come the letter “H”. Select and group (Ctrl +G) all objects of the letter “H”, then go to the Effect > Stylize > Drop Shadow… Follow the data as shown below and click OK.
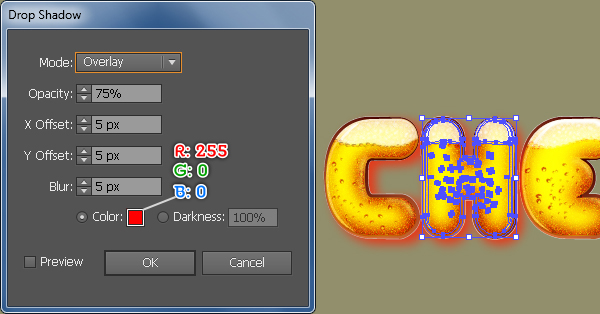
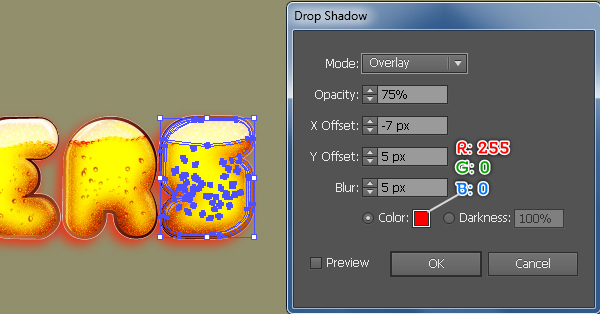
27. Likewise, follow the sequence of images and repeat the same process as the previous steps for the remaining four letters.
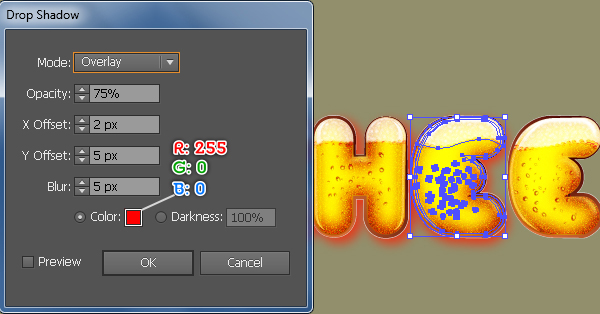
28. At this point your text should look like in the next image:

Create the Background
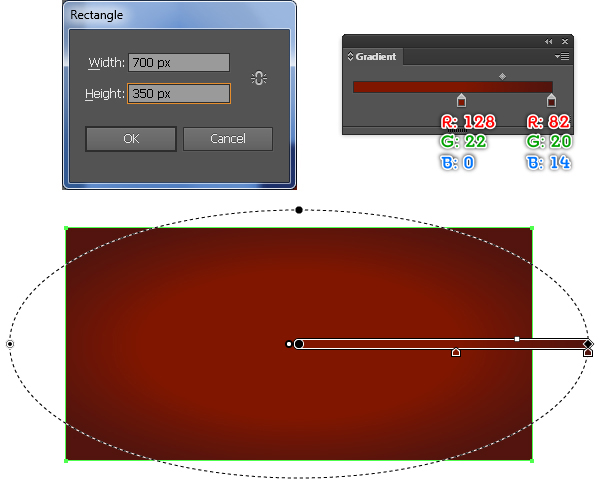
29. The last thing to do is create a nice background for your text. Pick the Rectangle Tool (M) and create a 700 by 350px rectangle, then fill it with the radial gradient as shown below. Finally place the letters to the positions like you see in the second image.
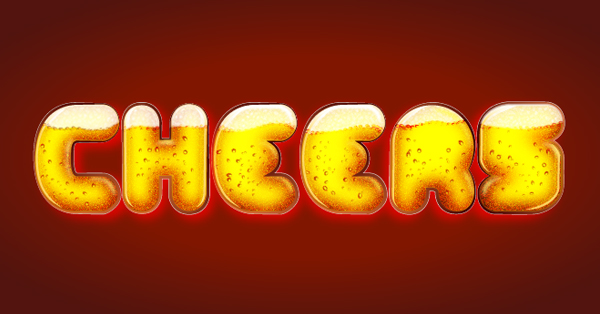
And We’re Done!
We’re working on many more useful and interesing tutorials, but suggestions are always welcome. Request a Tutorial Here


