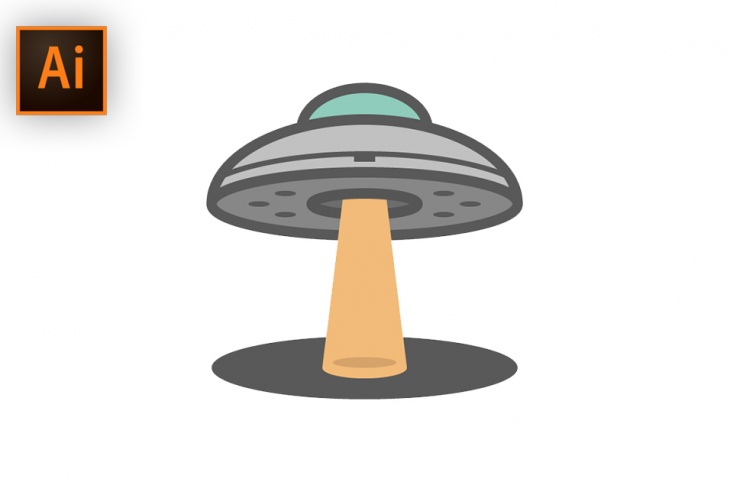
In today’s tutorial, we’re going to put our tin foil hats on, and examine the process of creating a UFO Icon, using some of Adobe Illustrator ’s basic geometric shapes and tools.
That being said, make sure you fill up that coffee mug and let’s get started!
Program: Adobe Illustrator CS6 – CC 2017
Difficulty: Beginner
Estimated Completion Time: 20 Minutes
Creating the body of the UFO
Step 1
Before we kick off the project, let’s make sure we setup a New Document by going over to File > New (or using the Control-N keyboard shortcut), which we will adjust as follows:
Number of Artboards: 1
Width: 128 px
Height: 128 px
Units: Pixels
And from the Advanced tab:
Color Mode: RGB
Raster Effects: Screen (72ppi)
Preview Mode: Default
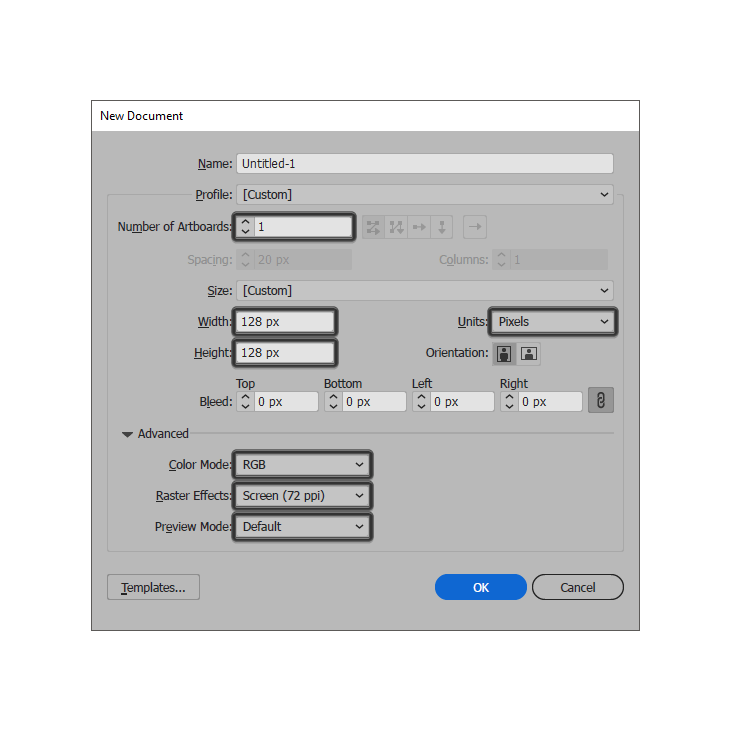
Quick tip: most of the indicated settings can be automatically triggered if you set the document’s Profile to Web, the only one that you’ll have to manually adjust being the Artboard’s Size (Width and Height).
Step 2
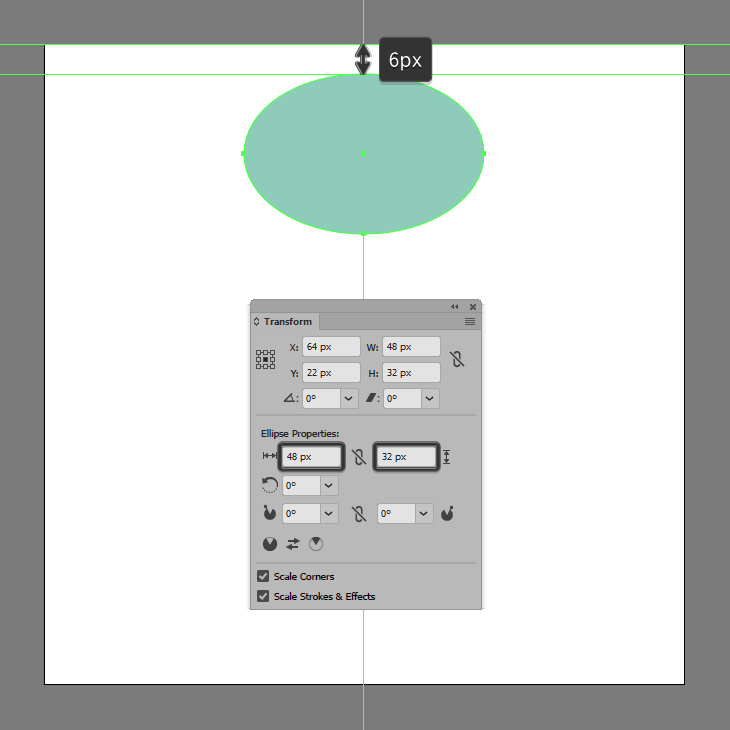
Start working on the flying saucer, by creating the main shape for its cockpit using a 48 x 32 px ellipse, which we will color using #8FCCBC, and then center align to the underlying Artboard’s top edge, positioning it at a distance of just 6 px.
Step 3
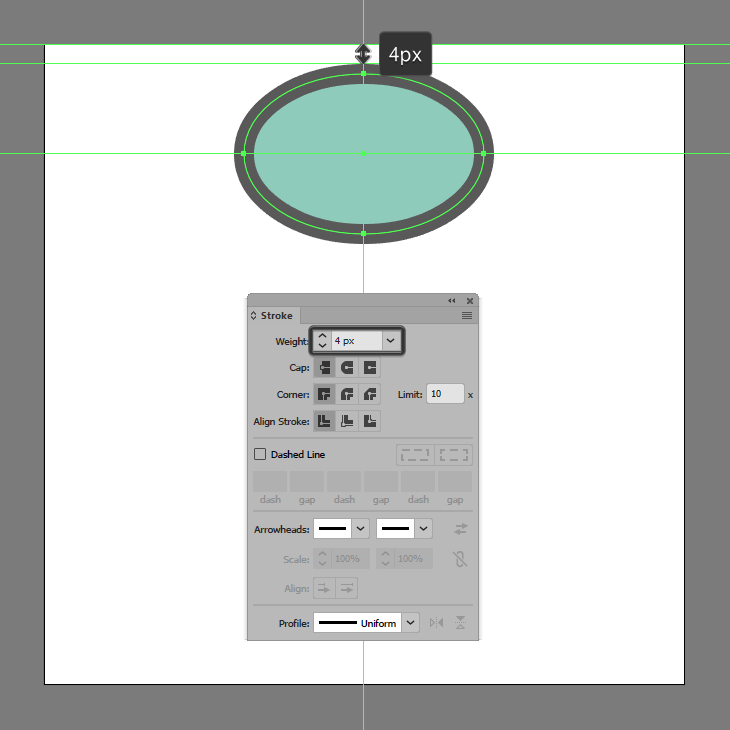
Give the shape that we’ve just created an outline using the Stroke method, by creating a copy of it (Control-C) which we will paste in front (Control-F) and then adjust by first changing its color to #595959, and then flipping its Fill with its Stroke (Shift-X) making sure to set its Weight to 4 px. Once you’re done, select both shapes and group them together using the Control-G keyboard shortcut.
Step 4
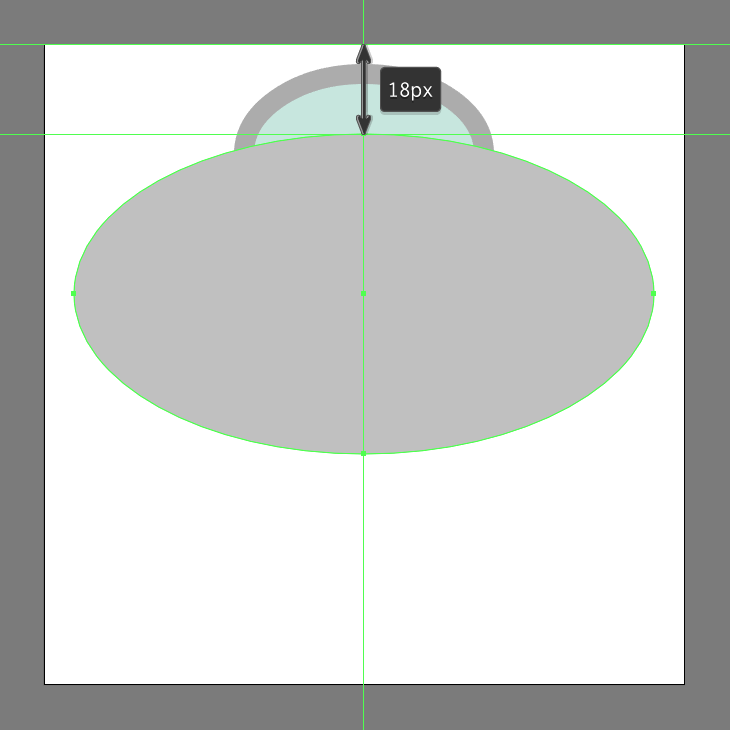
Create the upper section of the ship’s main body using a 116 x 64 px ellipse, which we will color using #C1C1C1 and then center align to the underlying Artboard, positioning it at a distance of 18 px from its top edge.
Step 5
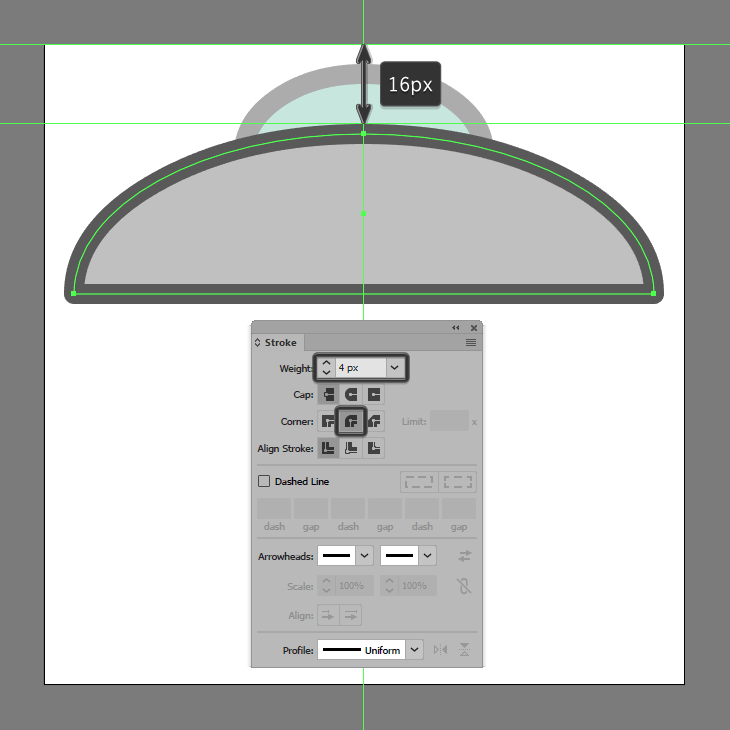
Remove the shape’s bottom half by first selecting it and then left clicking on its bottom anchor point using the Delete Anchor Point Tool (-). Give the resulting shape a 4 px thick outline (#595959), making sure to set its Corners to Round Join from within the Stroke panel.
Step 6
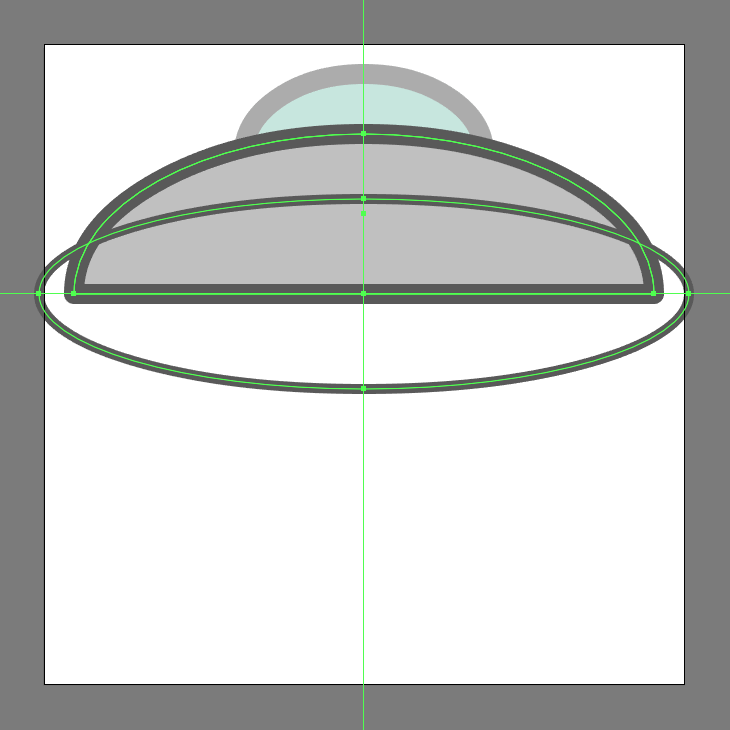
Create the saucer’s horizontal detail ring using a 130 x 38 px ellipse with a 2 px thick Stroke (#595959), which we will center align to the current section’s bottom edge, as seen in the reference image.
Step 7
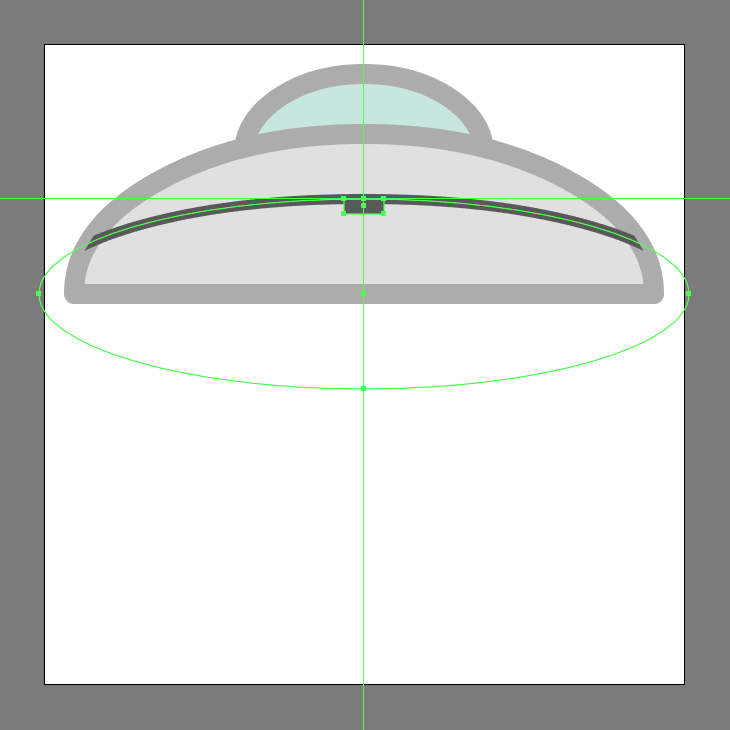
Mask the shape that we’ve just created, by making a copy (Control-C) of the upper body’s fill shape, which we will paste in front (Control-F), and then simply select the two and right click > Make Clipping Mask.
Step 8
Add the front detail shape using an 8 x 3 px rectangle, which we will color using #595959, and then center align to the ring’s top edge. Once you’re done, select and group (Control-G) all of the upper body’s composing shapes together before moving on to the next step.
Step 9
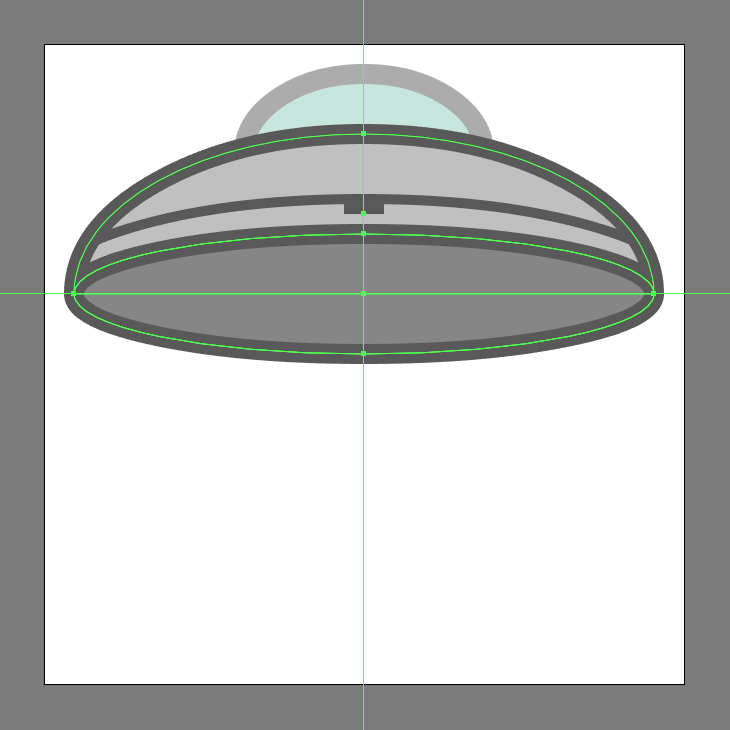
Create the UFO’s lower body using a 116 x 24 px ellipse (#878787) with a 4 px thick outline (#595959), which we will group (Control-G), and then position onto the previous section as seen in the reference image.
Step 10
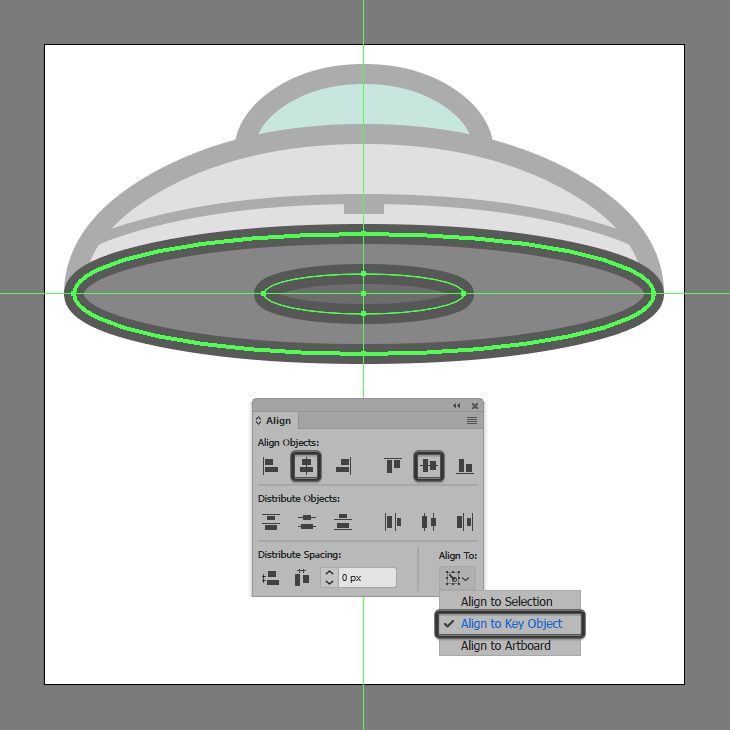
Add the cargo hold entrance using a 40 x 8 px ellipse (#6D6D6D) with a 4 px thick outline (#565656), which we will group (Control-G), and then center align to the saucer’s lower body.
Step 11
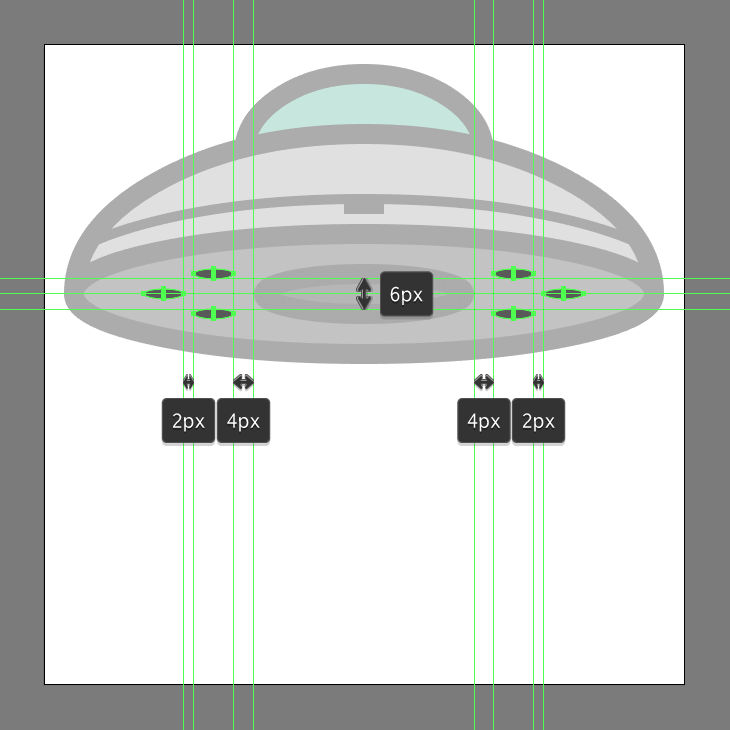
Create the motors using two groups of three 8 x 2 px ellipses (#595959), which we will position as seen in the reference image. Once you’re done, select and group (Control-G) all of the lower body’s composing shapes together, doing the same for the entire saucer afterwards.
Step 12
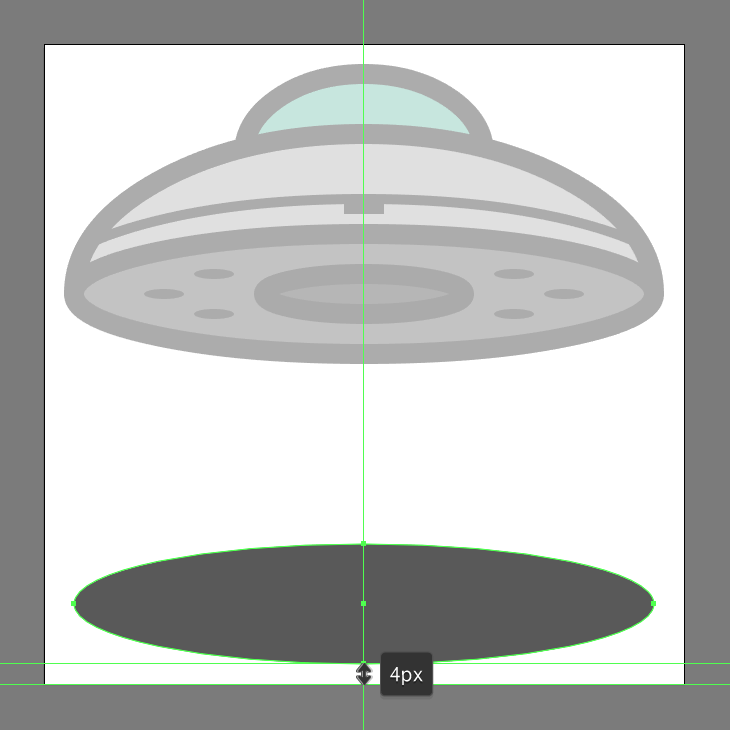
Add the shadow casted by the UFO using a 116 x 24 px ellipse, which we will color using #595959, and then center align to the underlying Artboard’s bottom edge, positioning it at a distance of just 4 px.
Adding the light ray
Step 13
Start working on the tractor beam, by creating its main body using a 16 x 66 px rectangle, which we will color using #F2BB79, then position onto the upper half of the shadow as seen in the reference image.
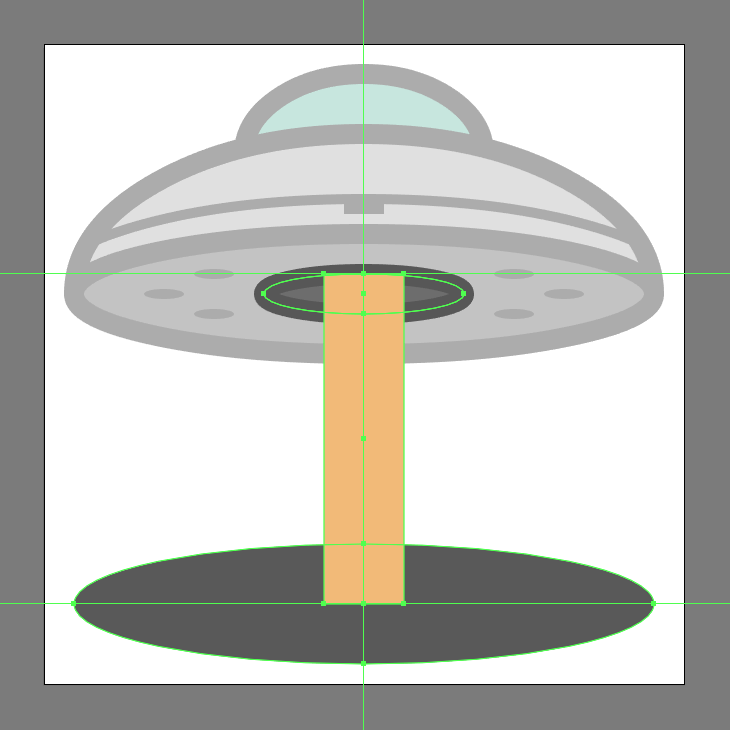
Step 14
Adjust the shape that we’ve just created, by individually selecting its bottom anchor points using the Direct Selection Tool (A) and then pushing them to the outside by a distance of 8 px using the Move tool (right click > Transform > Move > Horizontal > + / – 8 px depending on which side you start with).
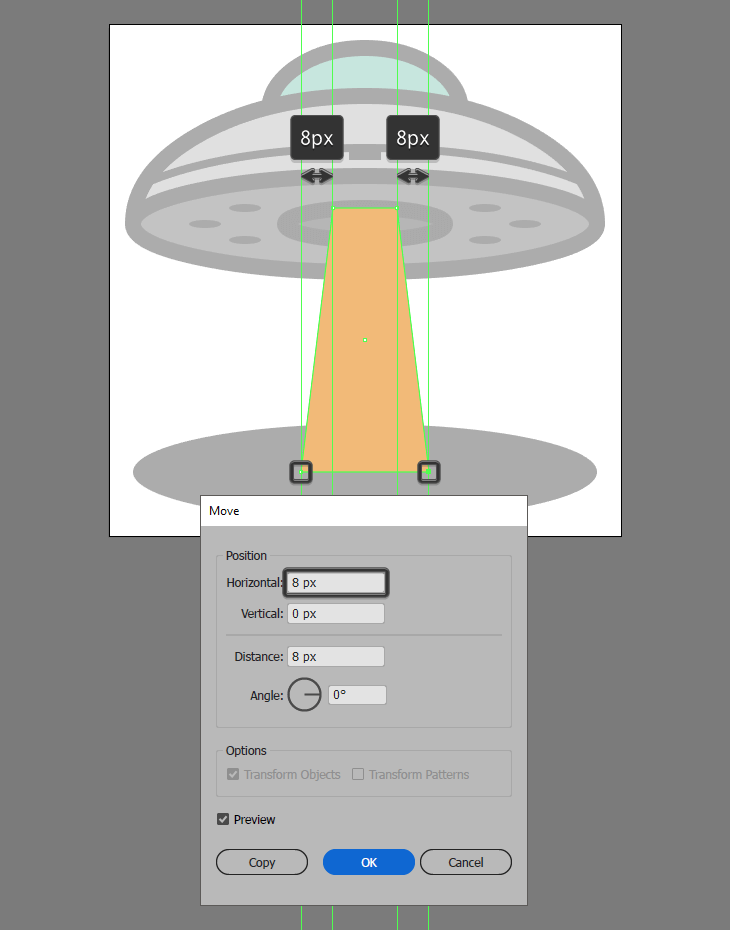
Step 15
Create the lower end of the beam using a 32 x 8 px ellipse, which we will color using #F2BB79, and then center align to the larger shape’s bottom edge.
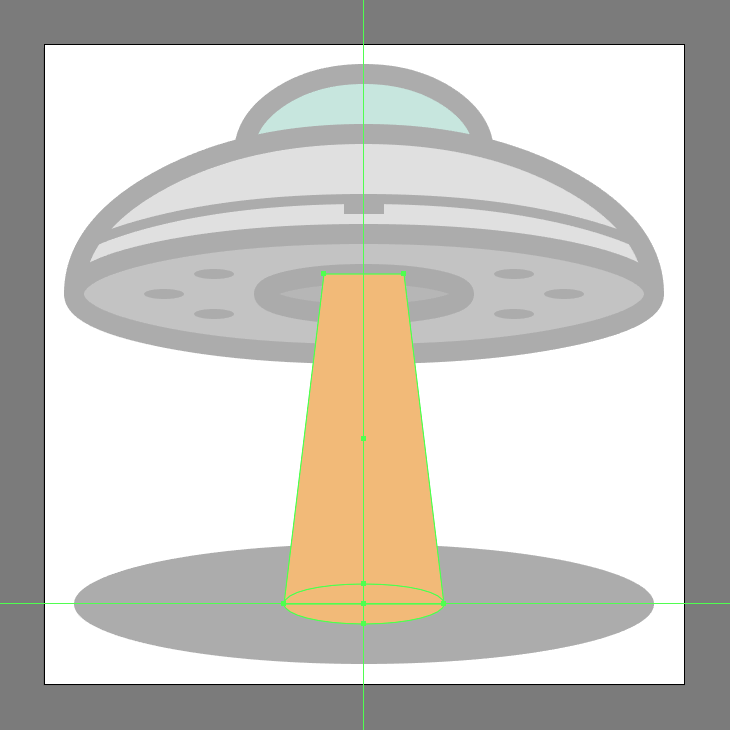
Step 16
Add the inner darker section of the beam using a 24 x 4 px ellipse (#D6A36B), which we will center align to the top edge of the shape that we’ve just created in the previous step.
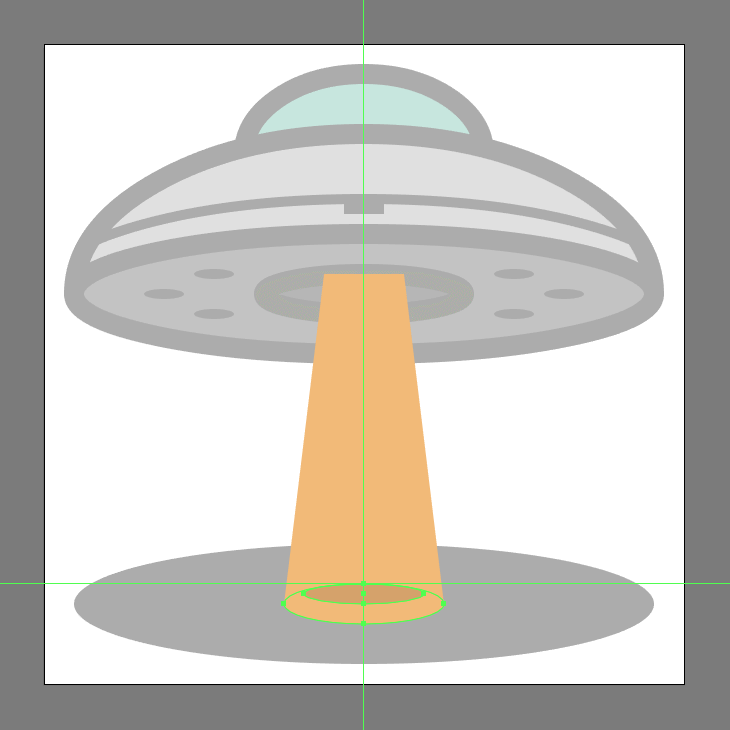
Step 17
Finish off the icon, by masking the upper section of the beam using a copy (Control-C) of the entrance’s outline, which we will paste in front (Control-F) and then adjust by selecting its bottom anchor point using the Direct Selection Tool (A), and then deleting it by pressing Delete. Set the resulting path’s Cap to Round, and then select and group (Control-G) all of the current section’s composing shapes, doing the same for the entire icon afterwards.
![]() Great Job!
Great Job!
There you have it fellow conspiracy lovers, a nice little UFO icon created using some of the most basic shapes and tools that Illustrator has to offer. I hove you’ve managed to follow each and every step, and most importantly learned something new and useful along the way.
