In today’s tutorial we’re going to celebrate the spirit of Christmas by learning how to create a cute little candle icon, using some basic geometric shapes and tools found within Illustrator.
That being said, make sure you get a hot cup of that cinnamon hot cocoa and let’s get started!
Program: Adobe Illustrator CS6 – CC 2017
Difficulty: Beginner
Estimated Completion Time: 20 Minutes
Step 1
As we do with each and every new project, we’ll want to make sure that we setup a New Document by going over to File > New (or using the Control-N keyboard shortcut), which we will adjust as follows:
Number of Artboards: 1
Width: 128 px
Height: 128 px
Units: Pixels
And from the Advanced tab:
Color Mode: RGB
Raster Effects: Screen (72ppi)
Preview Mode: Default
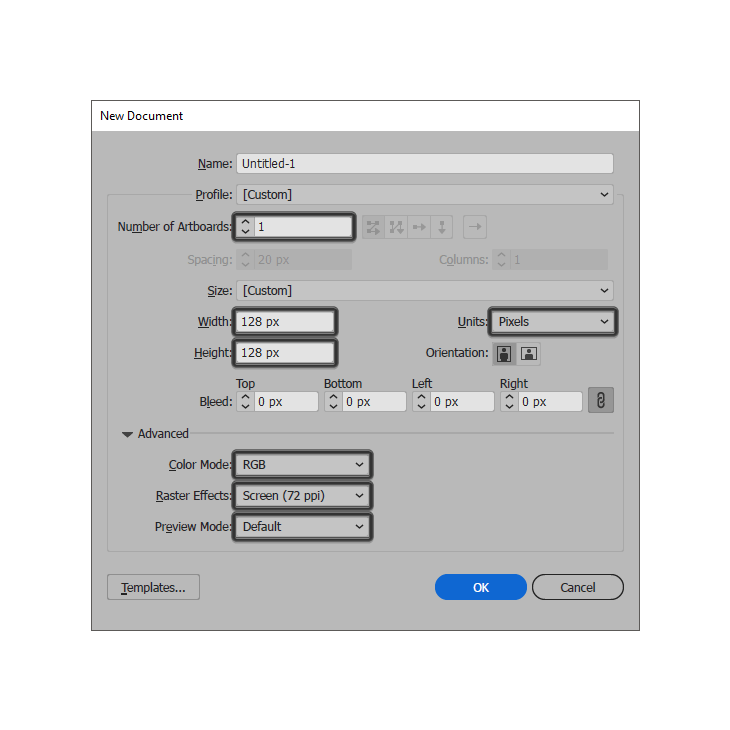
Quick tip: most of the indicated settings can be automatically triggered if you set the document’s Profile to Web, the only one that you’ll have to manually adjust being the Artboard’s Size (Width and Height).
Step 2
Kick things off by creating the background using a 120 x 120 px circle which we will color using #FF8257, and then center align to the underlying Artboard.
![]()
Step 3
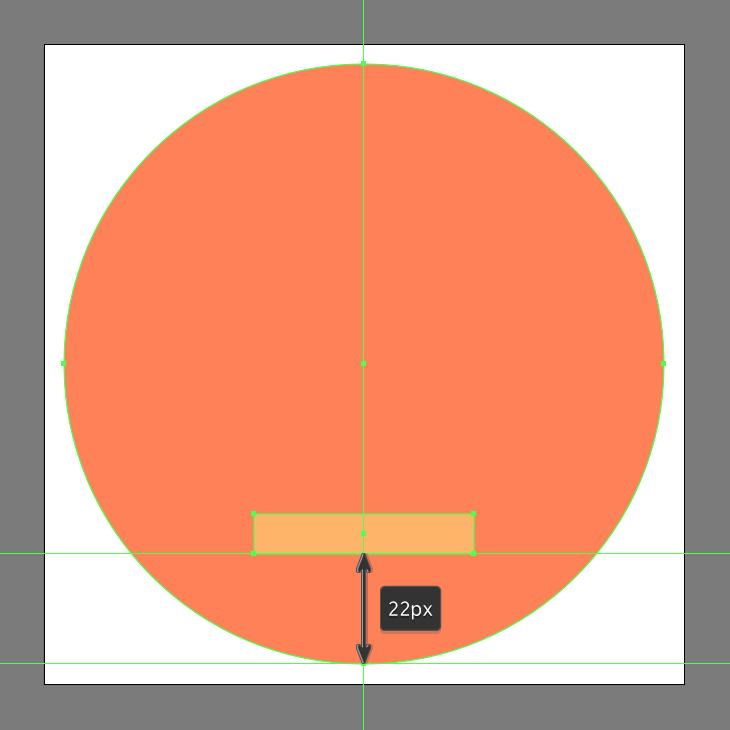
Start working on the candle support by creating a 44 x 8 px rectangle, which we will color using #FFB769 and then position at a distance of 22 px from the circle’s bottom edge.
Step 4
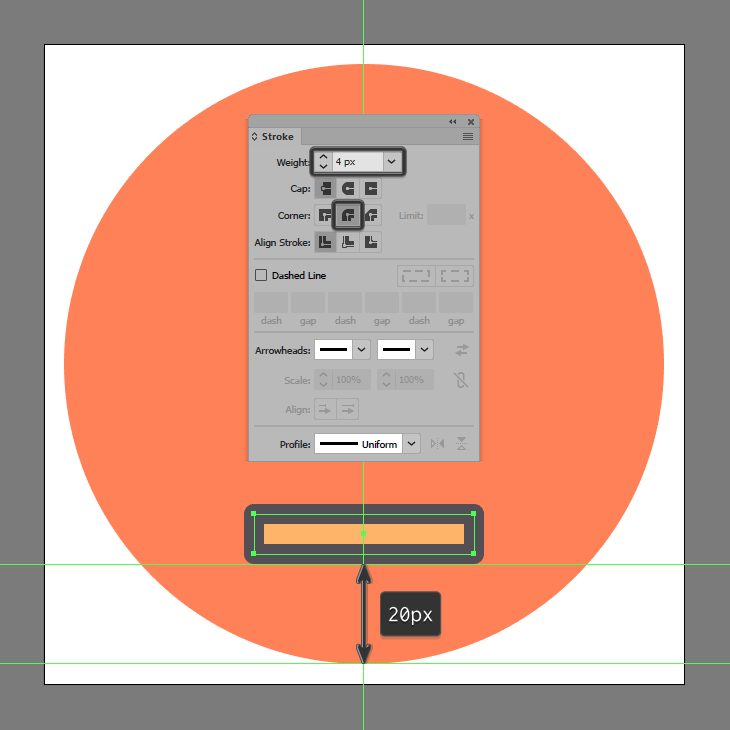
Give the shape that we’ve just created an outline using the Stroke method, by creating a copy of it (Control-C) which we will paste in front (Control-F). Adjust by first changing its color to #534D54. Flip its Fill with its Stroke (Shift-X) making sure to set its Weight to 4 px and its Corner to Round Join. Once you’re done, select both shapes and group them together using the Control-G keyboard shortcut.
Step 5
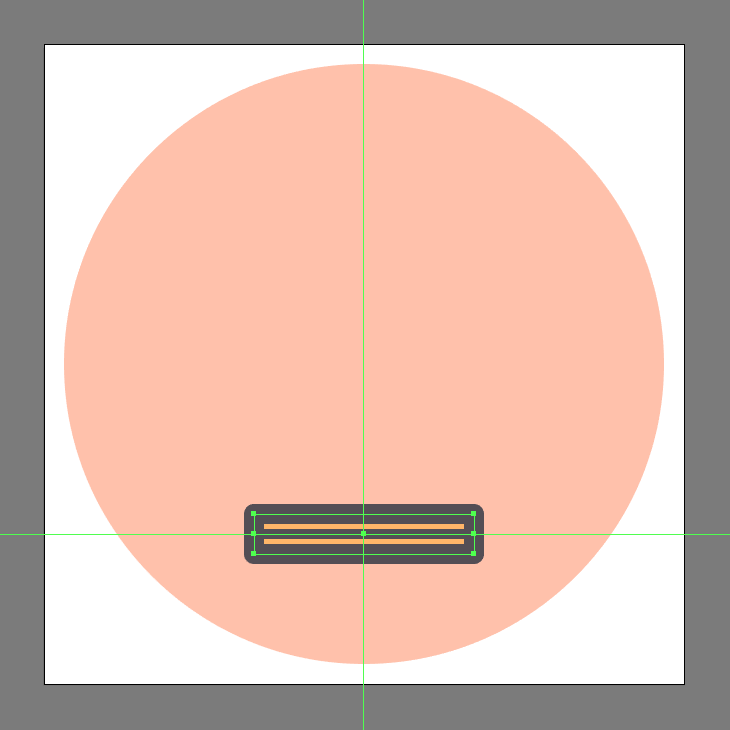
Add the horizontal detail line using a 44 px wide 2 px thick Stroke (#534D54), which we will center align to the two shapes that we’ve just grouped.
Step 6
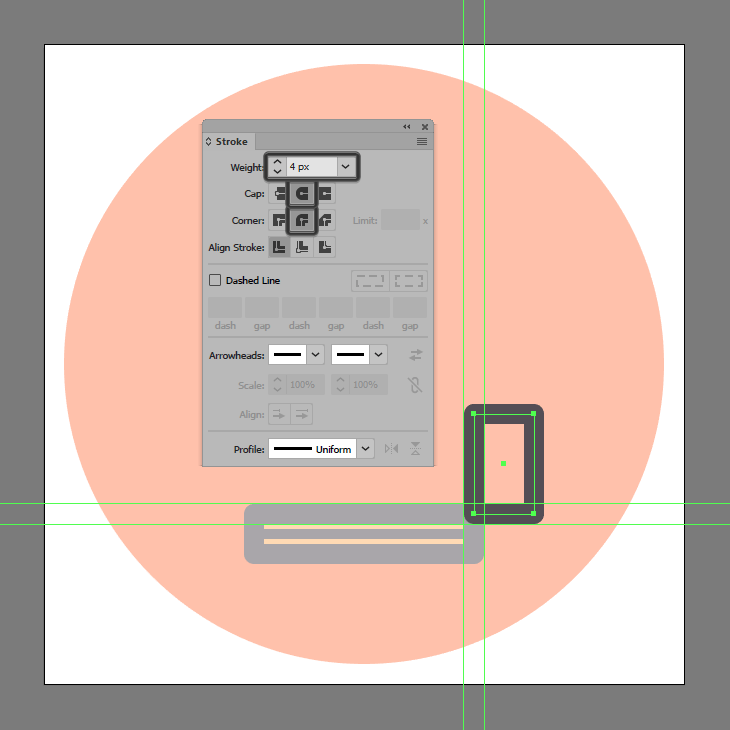
Create the main shape for the right-sided handle using a 12 x 20 x rectangle with a 4 px thick Stroke (#534D54) with a Round Cap and Join, which we will position as seen in the reference image.
Step 7
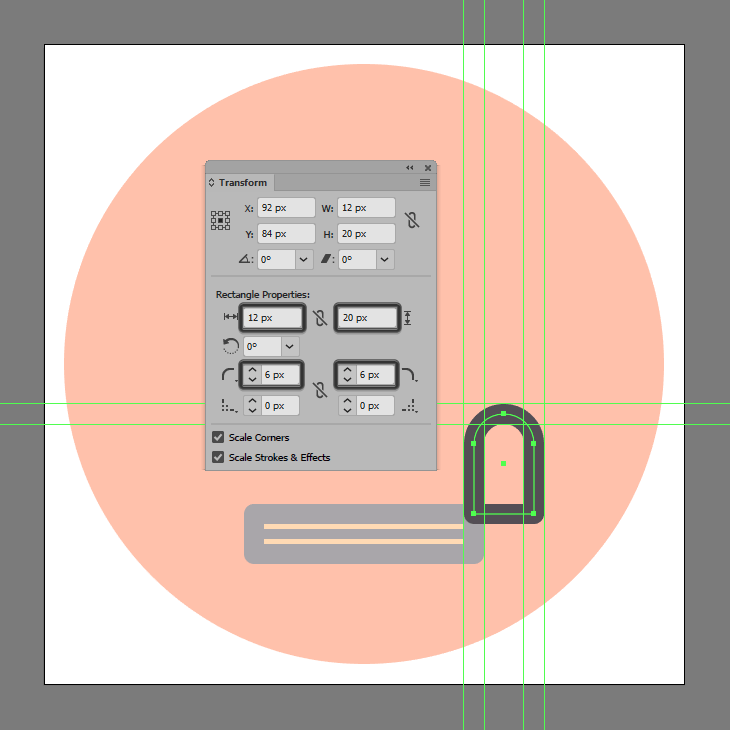
Adjust the shape that we’ve just created by setting the Radius of its top corners to 6 px from within the Transform panel’s Rectangle Properties.
Step 8
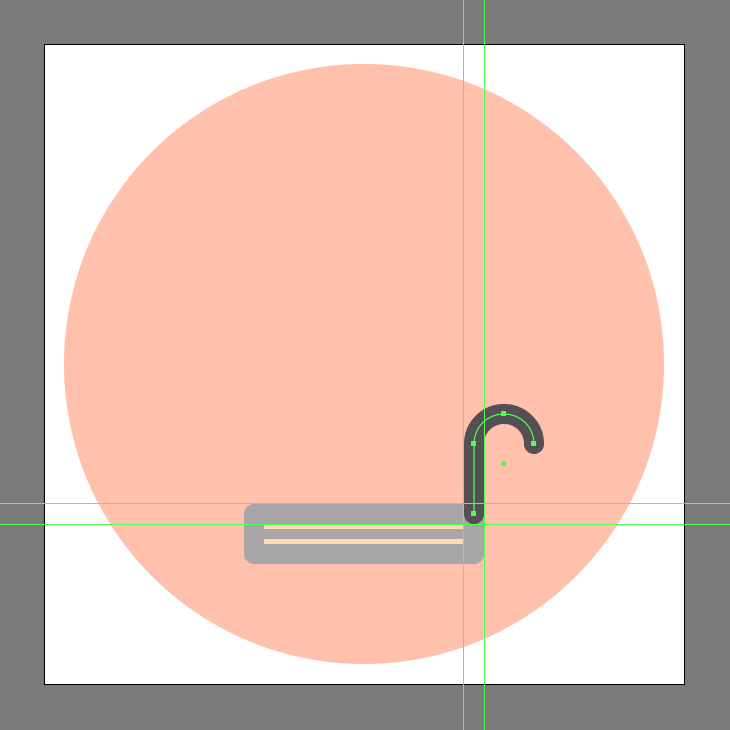
Open up the resulting shape’s path, by selecting its bottom-right anchor point using the Direct Selection Tool (A) and then removing it by pressing Delete. Once you’re done, select and group all of the support’s composing shapes together using the Control-G keyboard shortcut.
Step 9
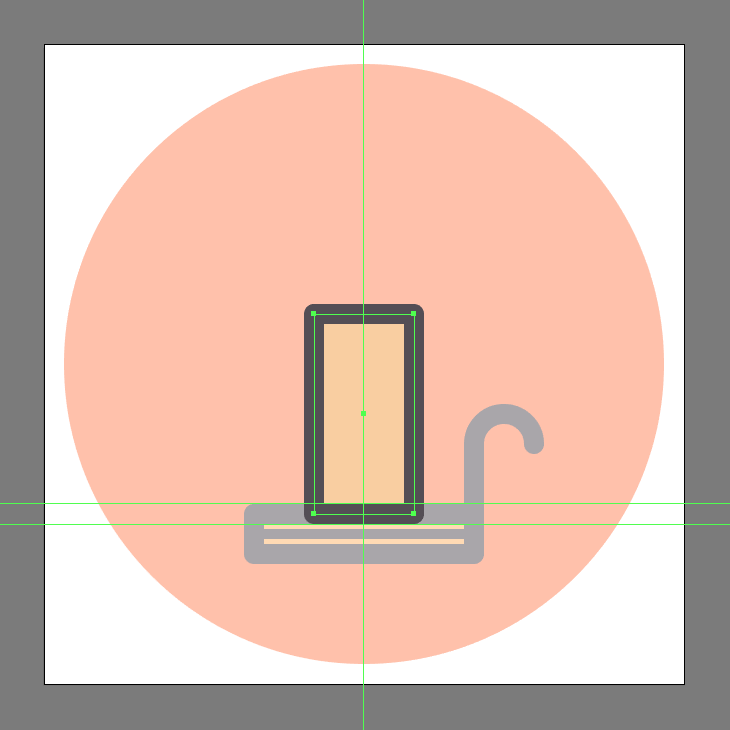
Start working on the candle stick by creating a 20 x 40 px rectangle (#F9CFA2) with a 4 px thick outline (#534D54), which we will group (Control-G) and then position on top of the support.
Step 10
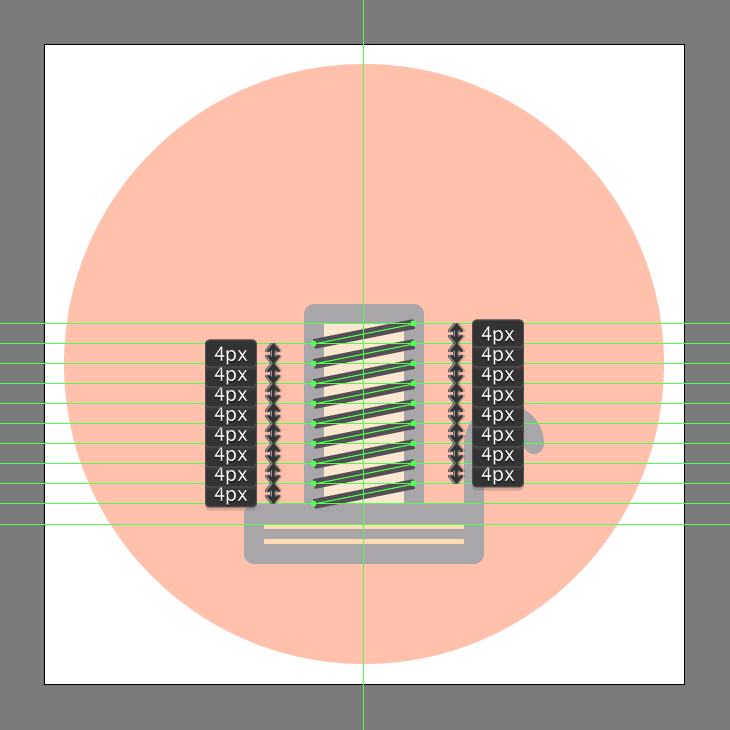
Add the diagonal detail lines using nine 20 px wide 2 px thick Strokes (#534D54), which we will vertically stack at a distance of 2 px from one another, and then adjust by selecting and pushing their right anchor points to the top by a distance of 4 px using the Move tool (right click > Transform > Move > Vertical > -4 px). Once you have the shapes in place select and group (Control-G) them all together, doing the same for the current section afterwards.
Step 11
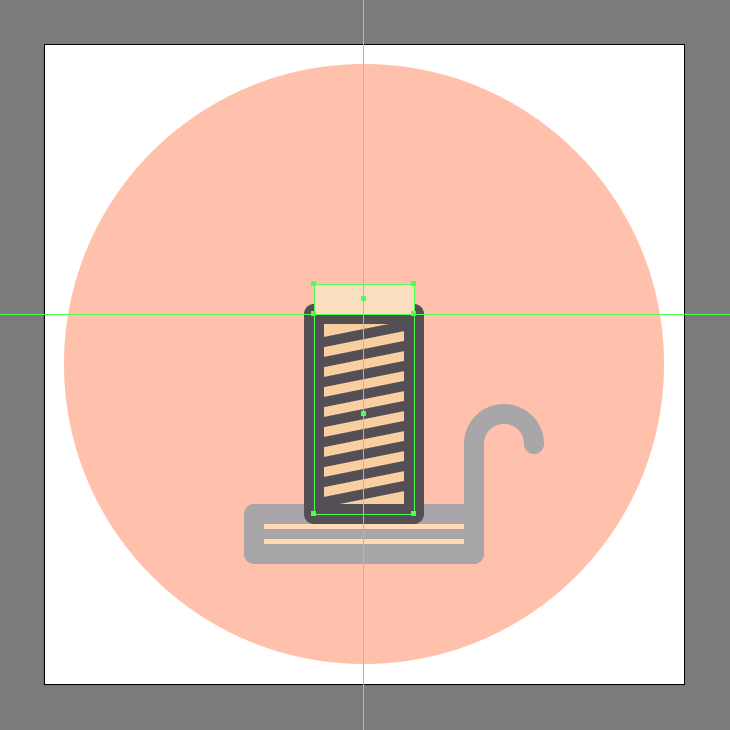
Start working on the upper section of the candle stick by creating a 20 x 6 px rectangle, which we will color using #F9E0C0 and then position on top of the shapes that we’ve just grouped.
Step 12
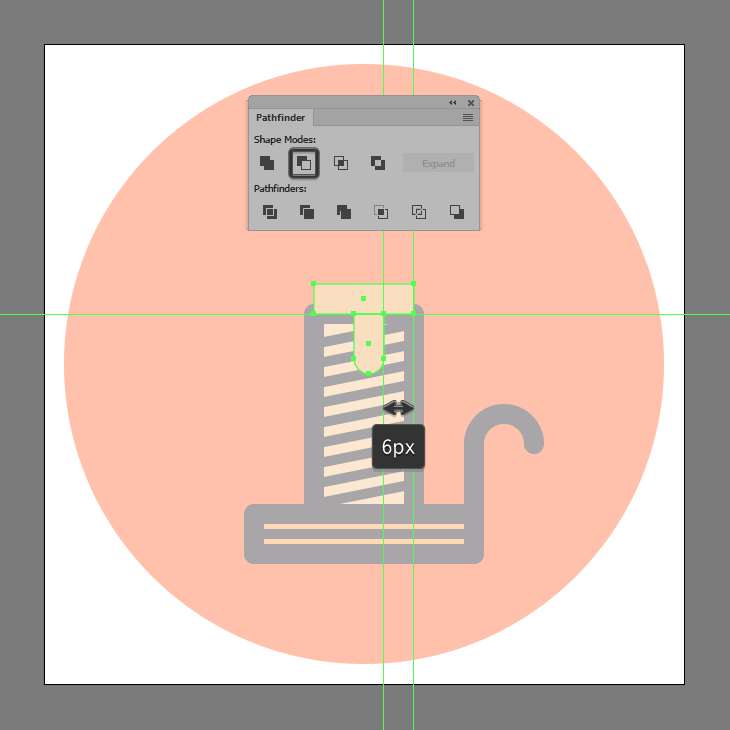
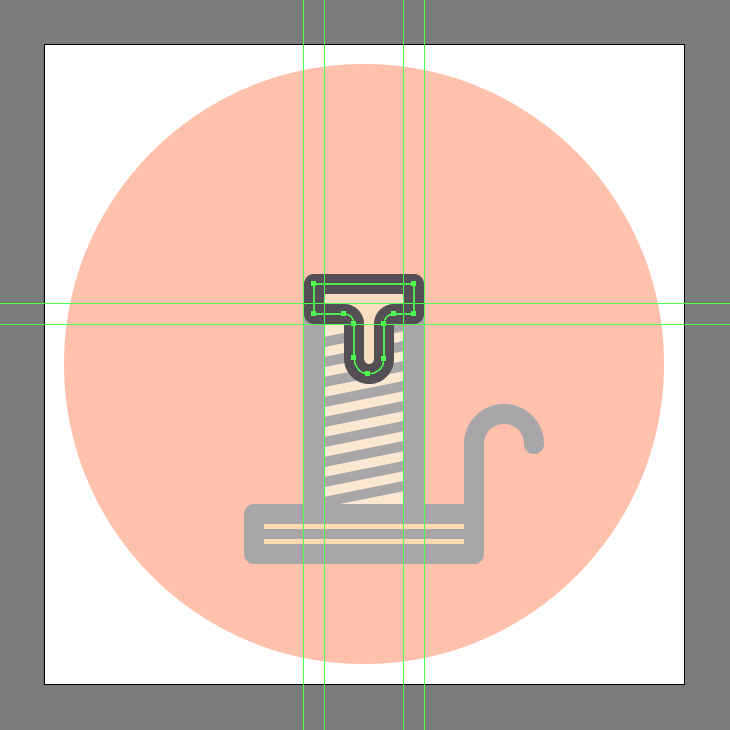
Add the vertical section using a 6 x 12 px rectangle (#F9E0C0) with a 3 px bottom-corner Radius, which we will position as seen in the reference image, uniting the two into a single larger shape using Pathfinder’s Unite Shape Mode.
Step 13
Adjust the resulting shape by setting the Radius of its inner facing corners to 2 px using the Live Corners tool, giving it a 4 px thick outline (#534D54) afterwards. Once you’re done select and group (Control-G) the two together, doing the same for the entire candle afterwards.
Step 14
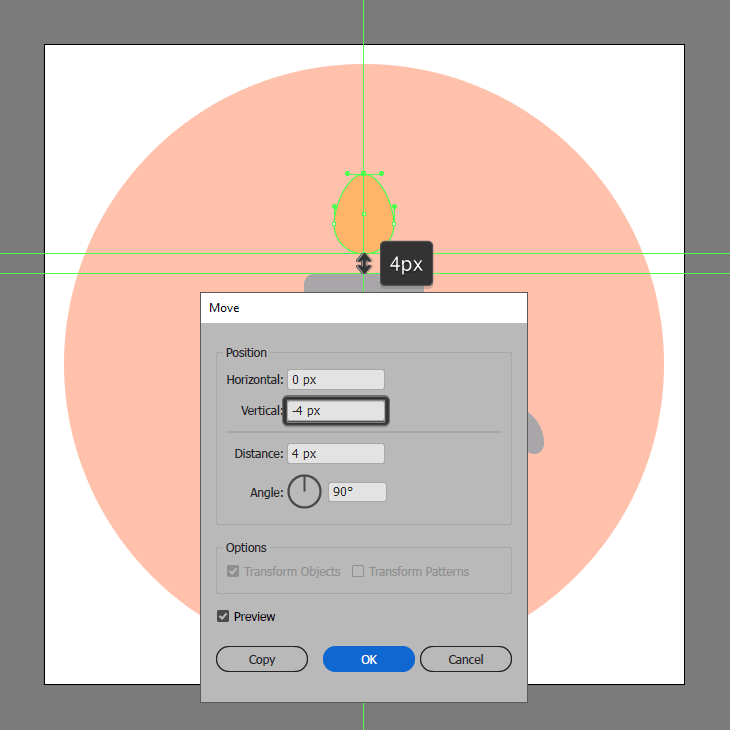
Start working on the flame, by creating a 12 x 12 px circle (#FFB769) which we will adjust by selecting its top anchor point using the Direct Selection Tool (A) and then pushing it to the top by a distance of 4 px using the Move tool (right click > Transform > Move > Vertical > -4 px).
Step 15
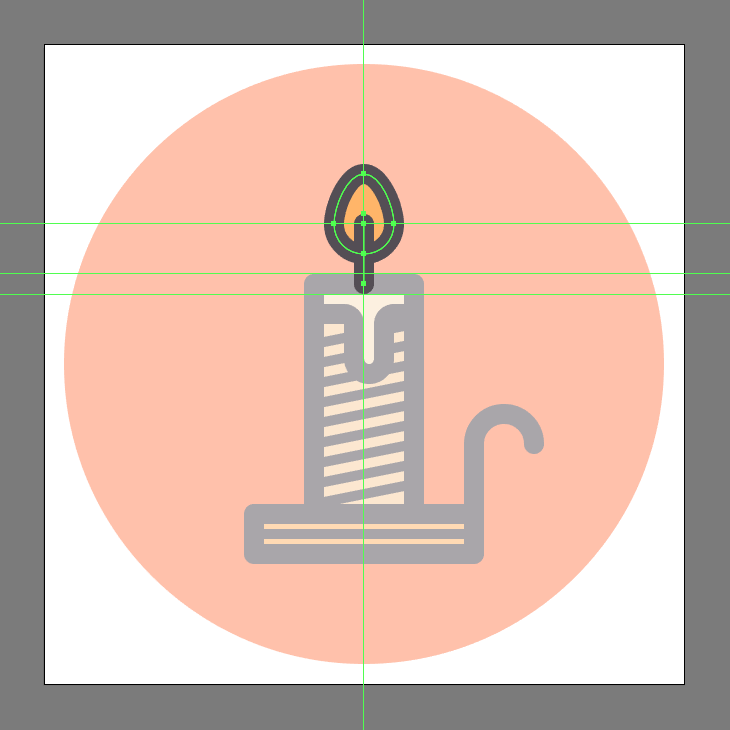
Give the resulting shape a 4 px thick outline (#534D54), followed by a 12 px tall 4 px thick Stroke line (#534D54), selecting and grouping all three of them together using the Control-G keyboard shortcut. Once you’re done, select and group (Control-G) all of the candle’s sections together before moving on to the next step.
Step 16
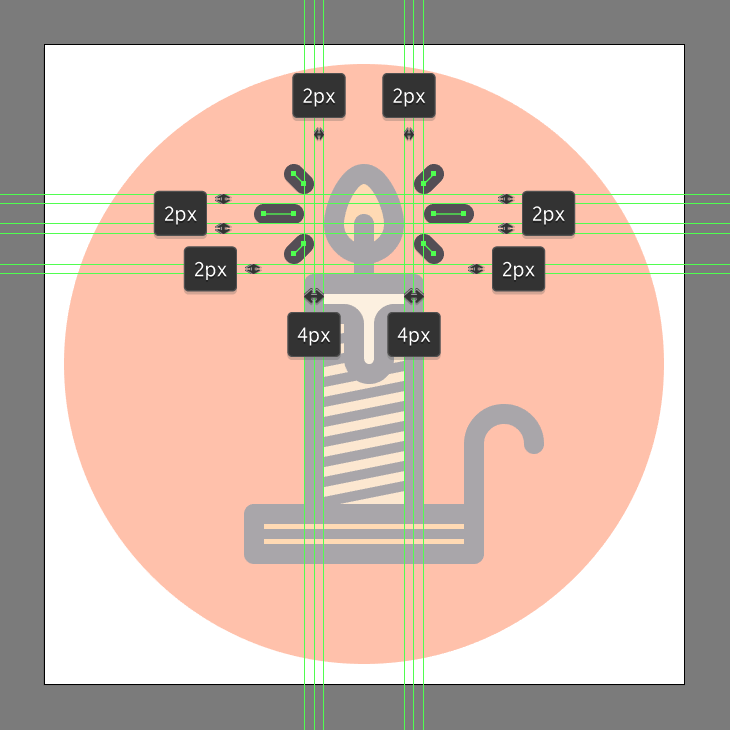
Add the little light rays using two groups of three 4 px thick Stroke lines (#534D54) with a Round Cap, which we will position onto the sides of the flame as seen in the reference image.
Step 17
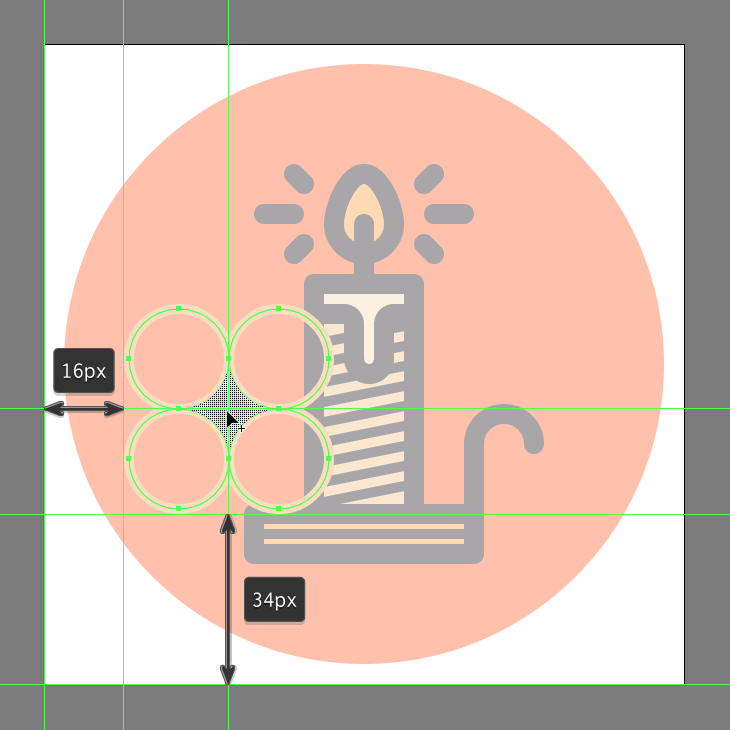
Create the left decorative star using four 20 x 20 px circles with a 2 px thick Stroke (#F9E0C0) and a Round Join, which we will overlap and position as seen in the reference image. Then simply select the center section created by their intersection using the Shape Builder Tool (Shift-M), making sure to remove the circles afterwards.
Step 18
Add the right decorative star using a smaller 12 x 12 px circle with a 2 px thick Stroke (#F9E0C0) as your base shape. Once you’re done, position the resulting shape as seen in the reference image, making sure to select and group (Control-G) all of the icon’s composing sections before hitting that save button.
![]()
It’s a Wrap!
There you have it folks, a nice an easy tutorial on how to create candle icon using some of the most basic shapes and tools that Illustrator has to offer.
As always, I hope you’ve managed to follow each and every step, and most importantly learned something new and useful along the way!
